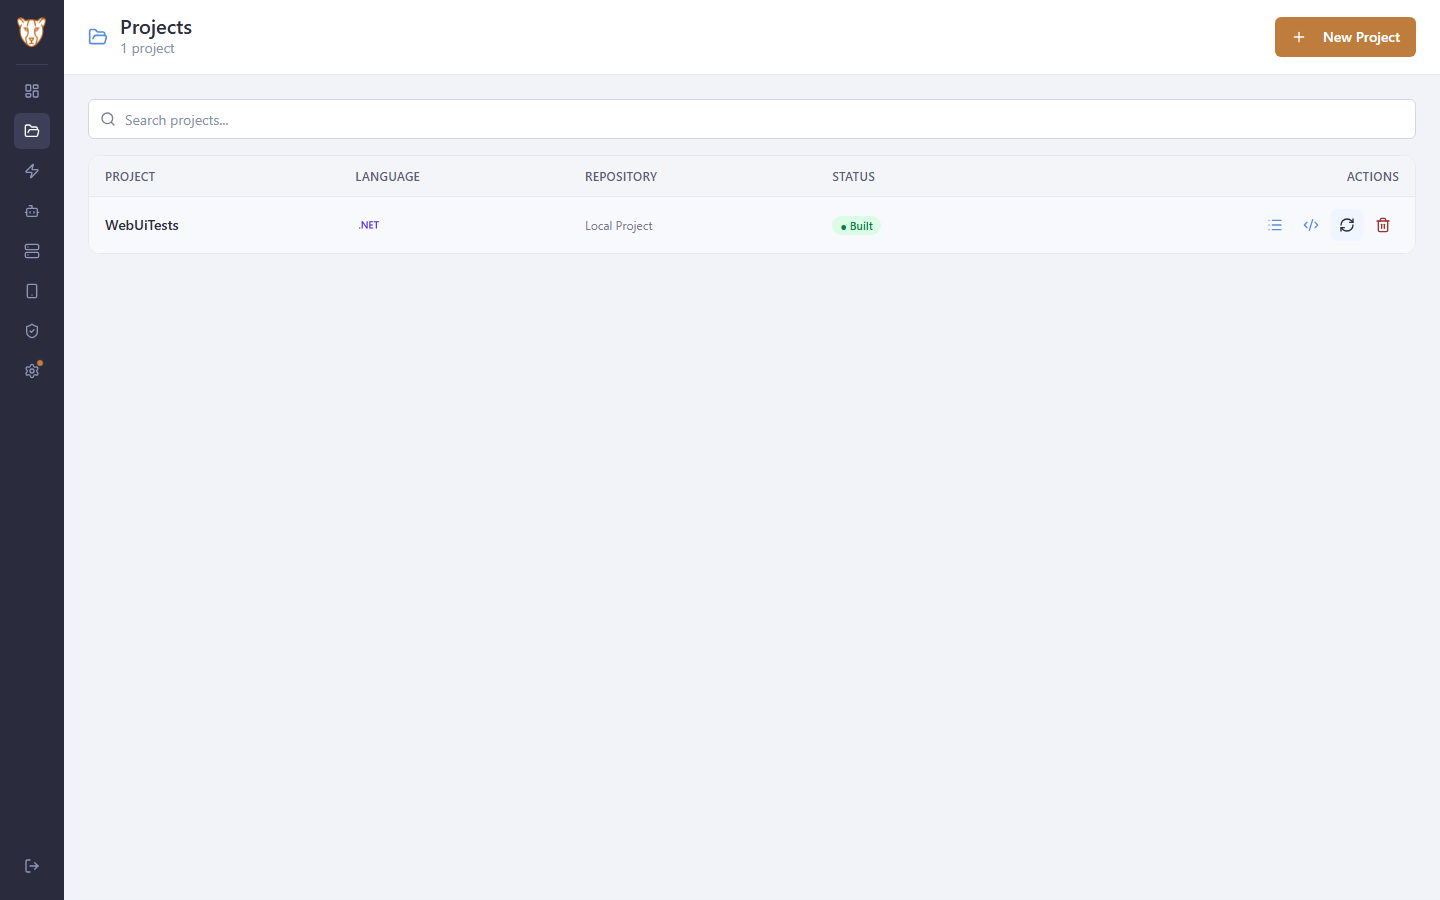
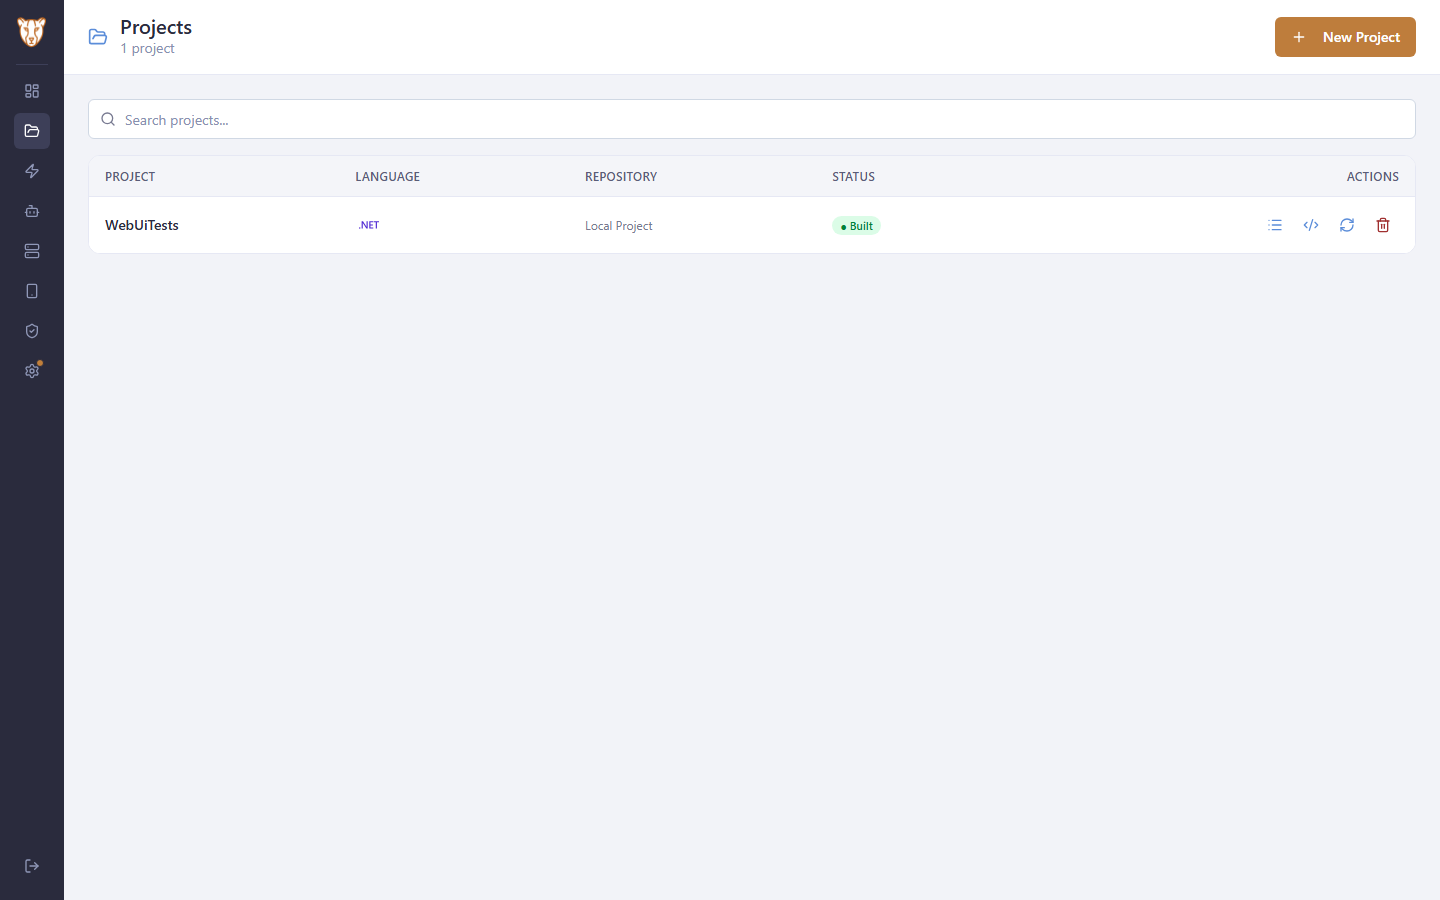
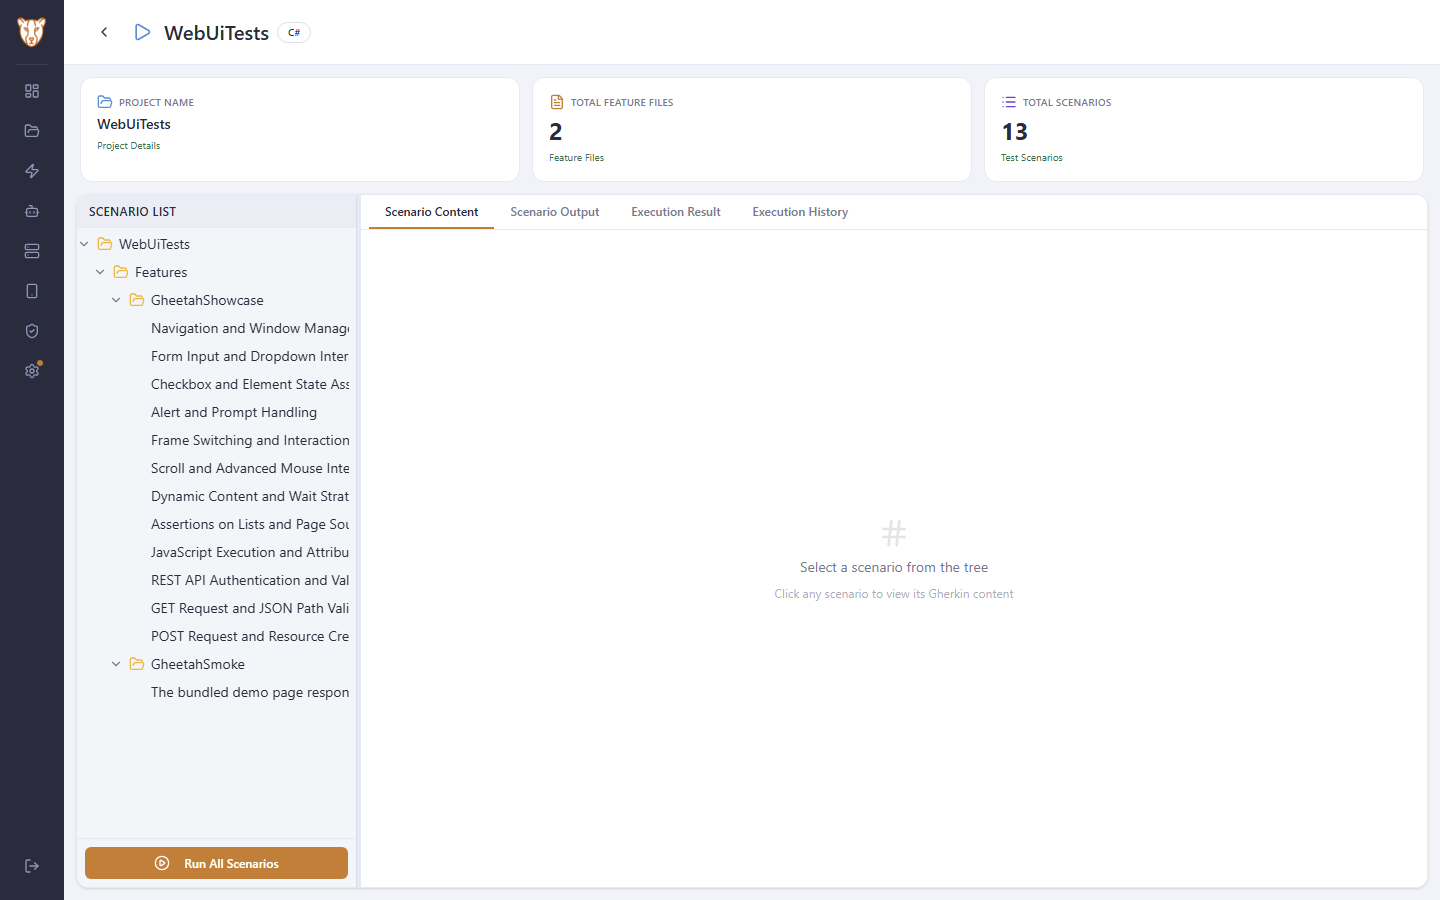
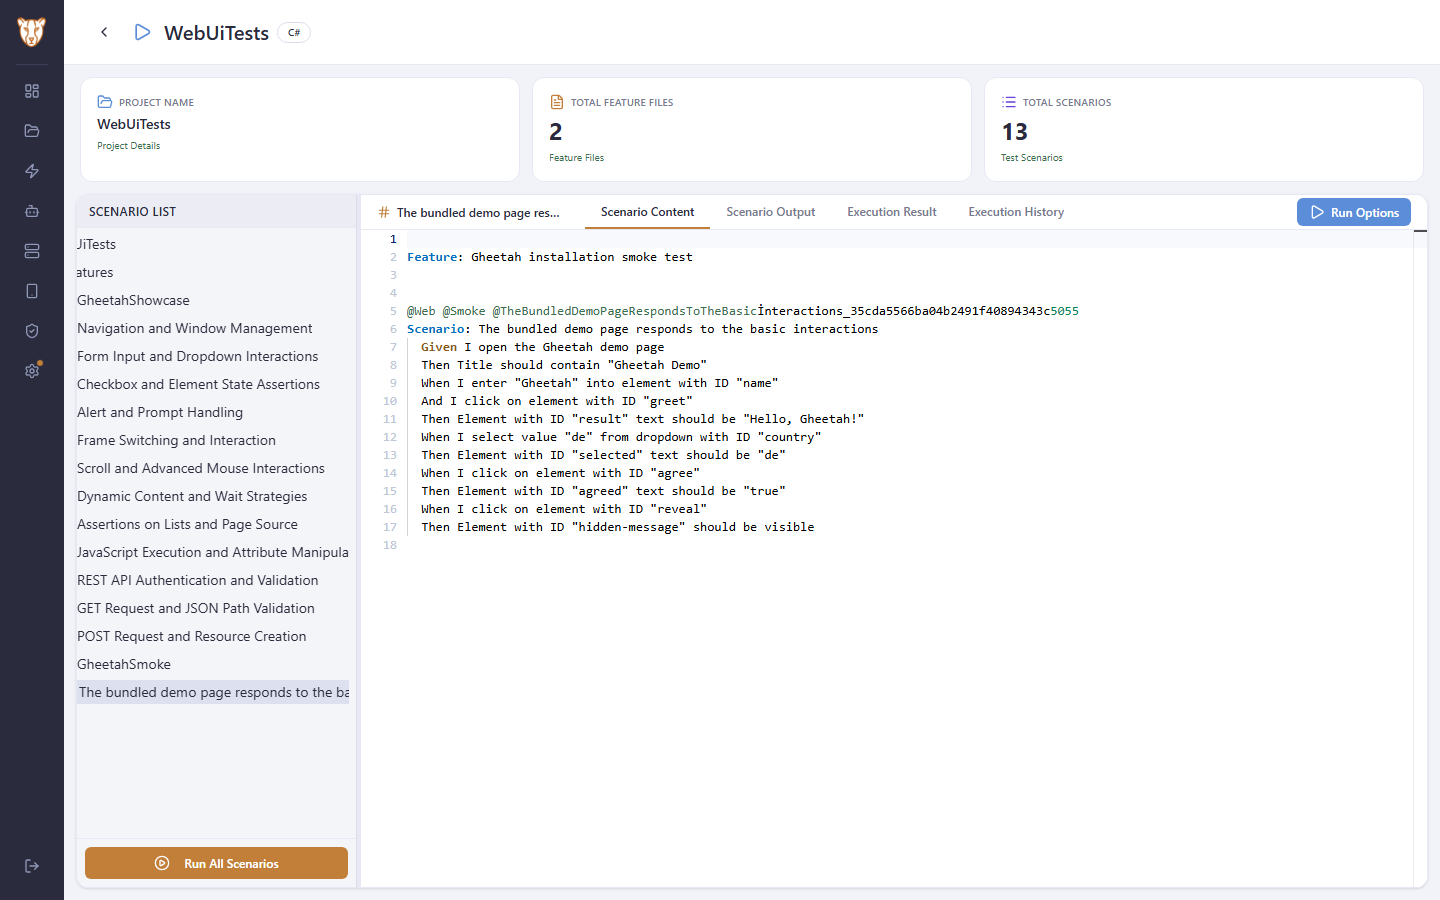
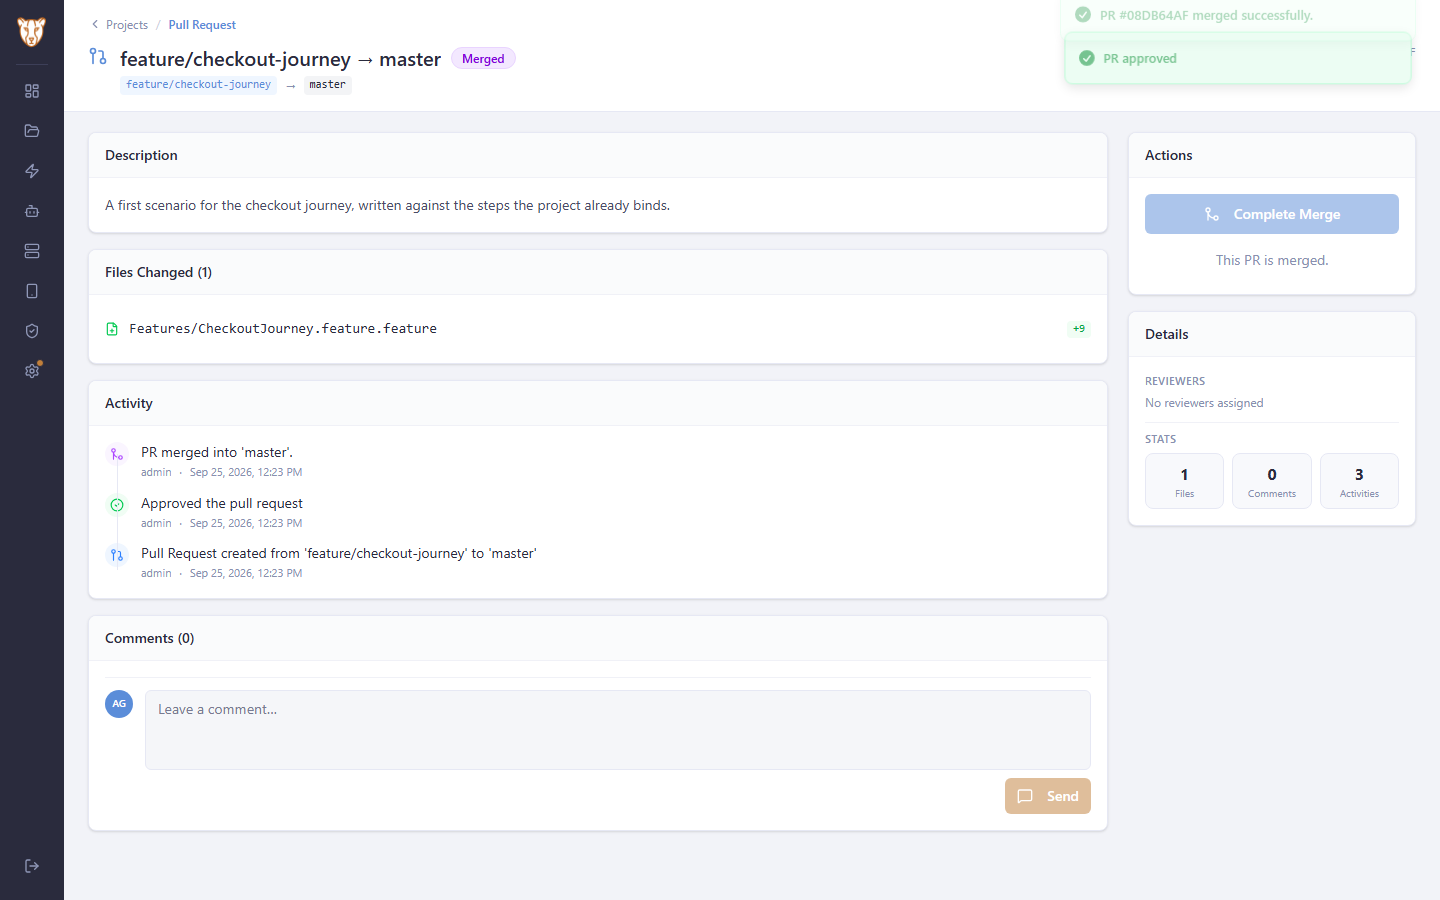
Every screenshot here was taken by Gheetah's own end-to-end suite, after the test had checked the screen was right and before it acted on it. Re-running the suite rebuilds this page, so what you see is what the product currently does. Built 2026-09-25 from 13 recorded flows and 67 steps.

Contents
1

First installation

Turning a freshly started Gheetah into a working installation: the setup token, how people sign in, where projects live, where data is stored, the permission groups, and the first administrator account.

Watch this flow

1.1 Open Gheetah for the first time

A server that has not been configured yet answers every address with the setup wizard, and the wizard asks for a one-time token before it will do anything. Gheetah prints that token to the server console when it starts, and also writes it to Data/setup-token.txt — so whoever can read the server can configure it, and nobody else can.
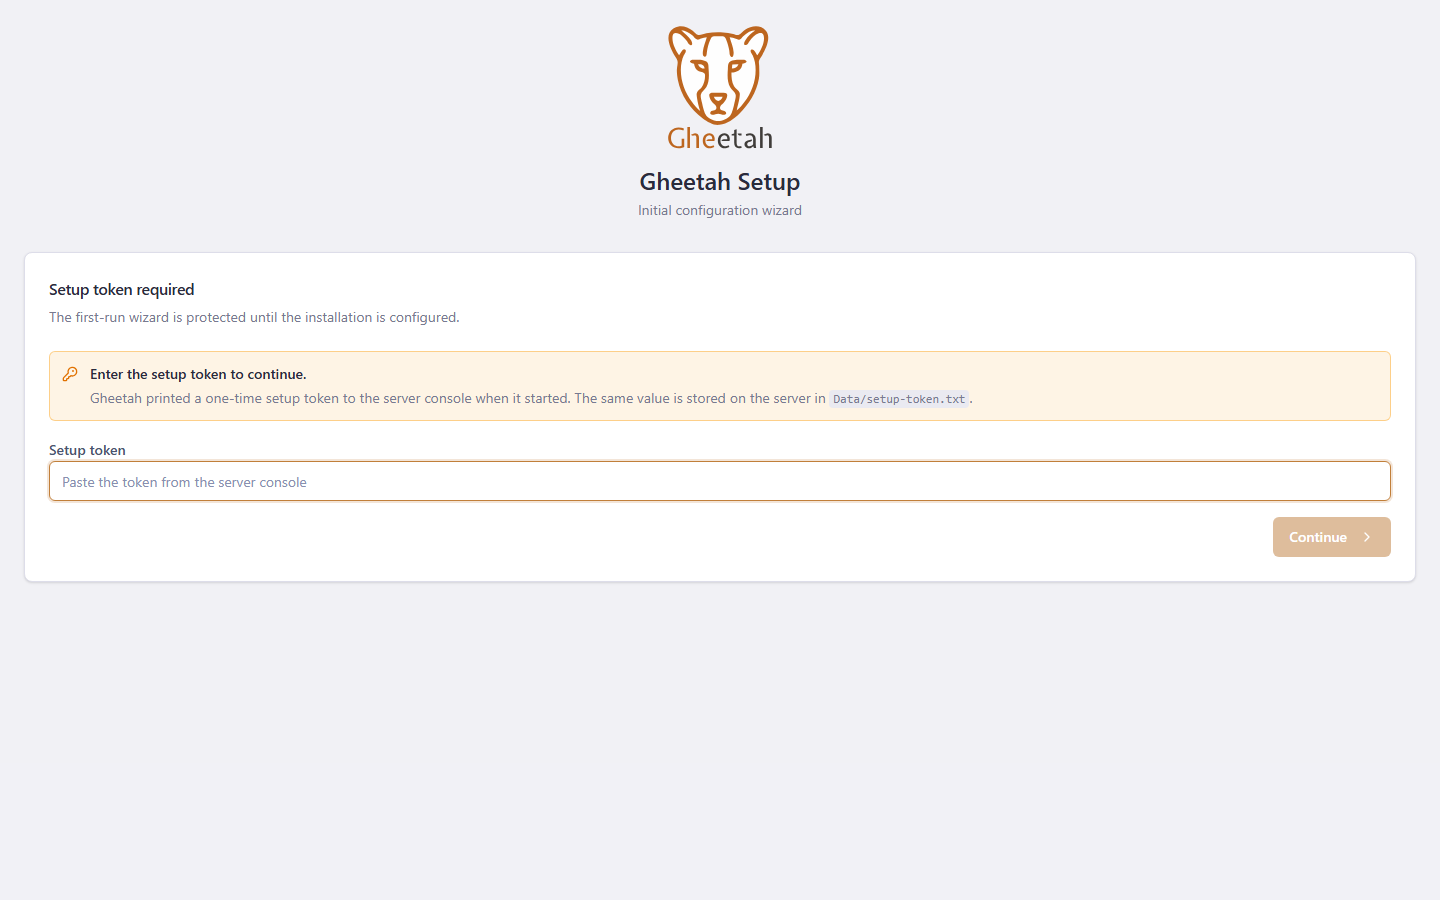
Open Gheetah for the first time

1.2 Choose how people sign in

Local accounts means Gheetah holds the usernames and passwords itself, which needs no other system and is the fastest way to get started. Microsoft Azure AD (Entra ID), Google and generic SSO are the alternatives, and any of them can be chosen later in Settings — this is not a decision you are stuck with.
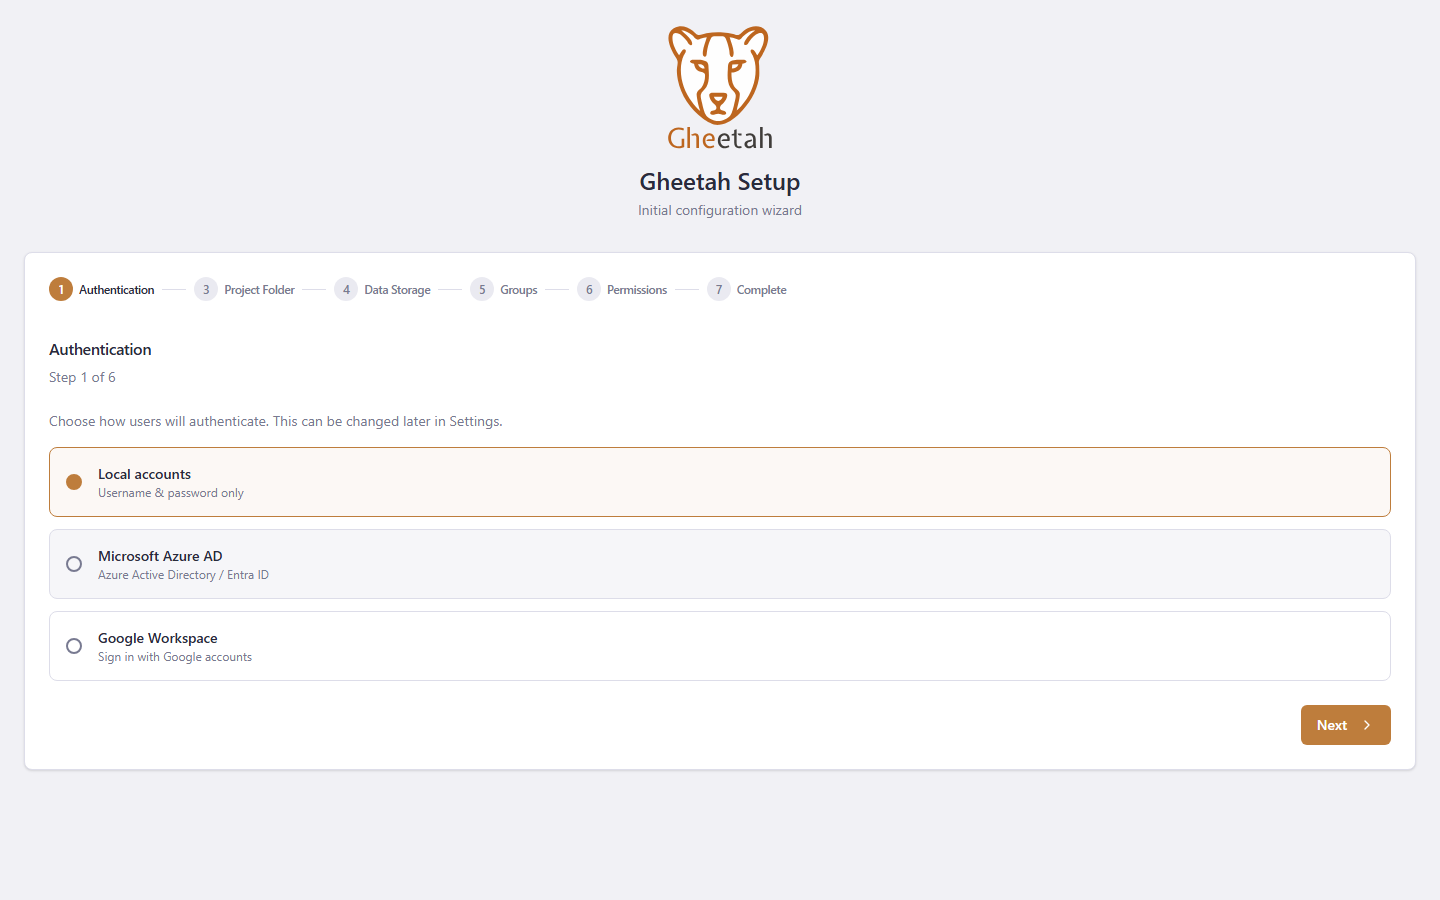
Choose how people sign in

1.3 Say where projects live

The project folder is the one directory Gheetah clones into, generates into and builds in. Everything a team adds — cloned repositories, uploaded archives, generated projects — lands under it. It can be left empty and set later in Settings.
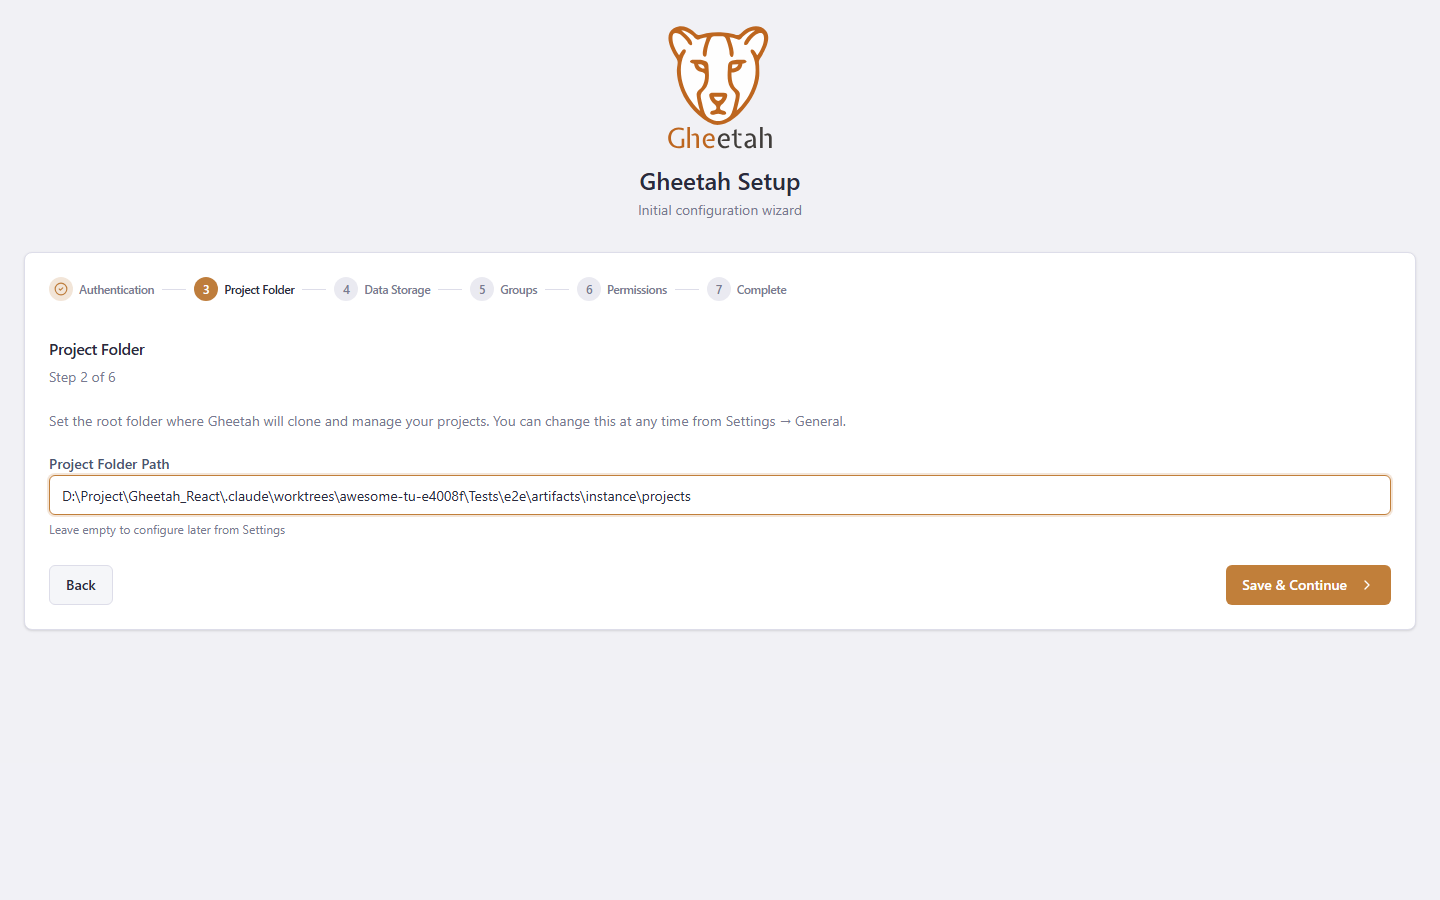
Say where projects live

1.4 Choose where Gheetah keeps its data

Local JSON needs no database and is the default: Gheetah writes its own files under Data/. SQLite, PostgreSQL, MongoDB and Cosmos DB are the alternatives for a shared or larger installation. Every feature works the same on all of them — the choice is about operations, not capability.
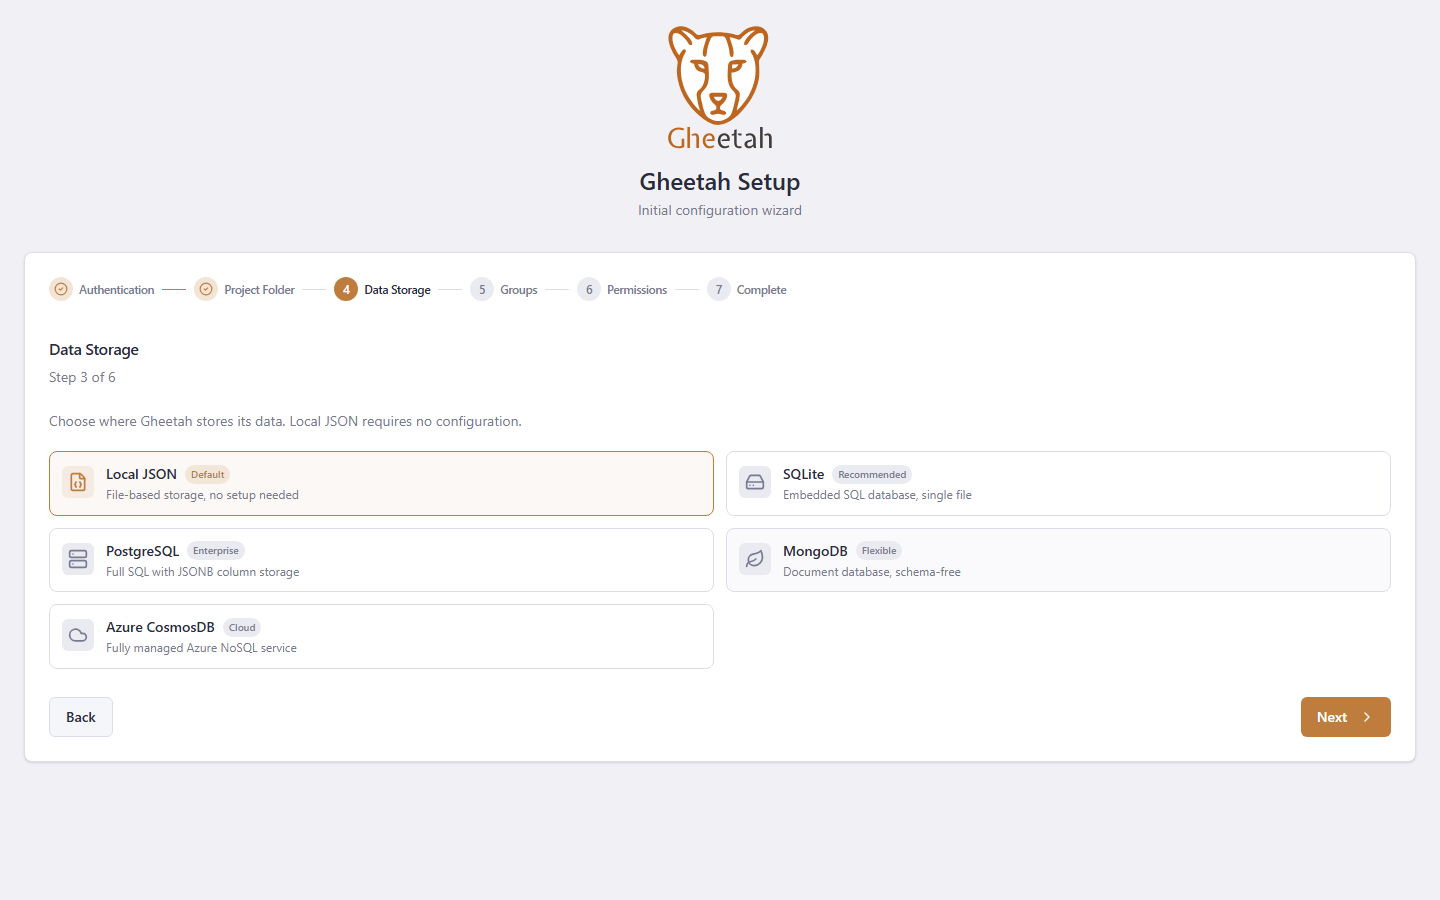
Choose where Gheetah keeps its data

1.5 Review the permission groups

Gheetah proposes three groups: Admin for full access, Lead for running and managing projects, and Runner for executing tests and reading the dashboard. Rename them to match how your team is organised, then save — the wizard will not move on until the groups are saved.
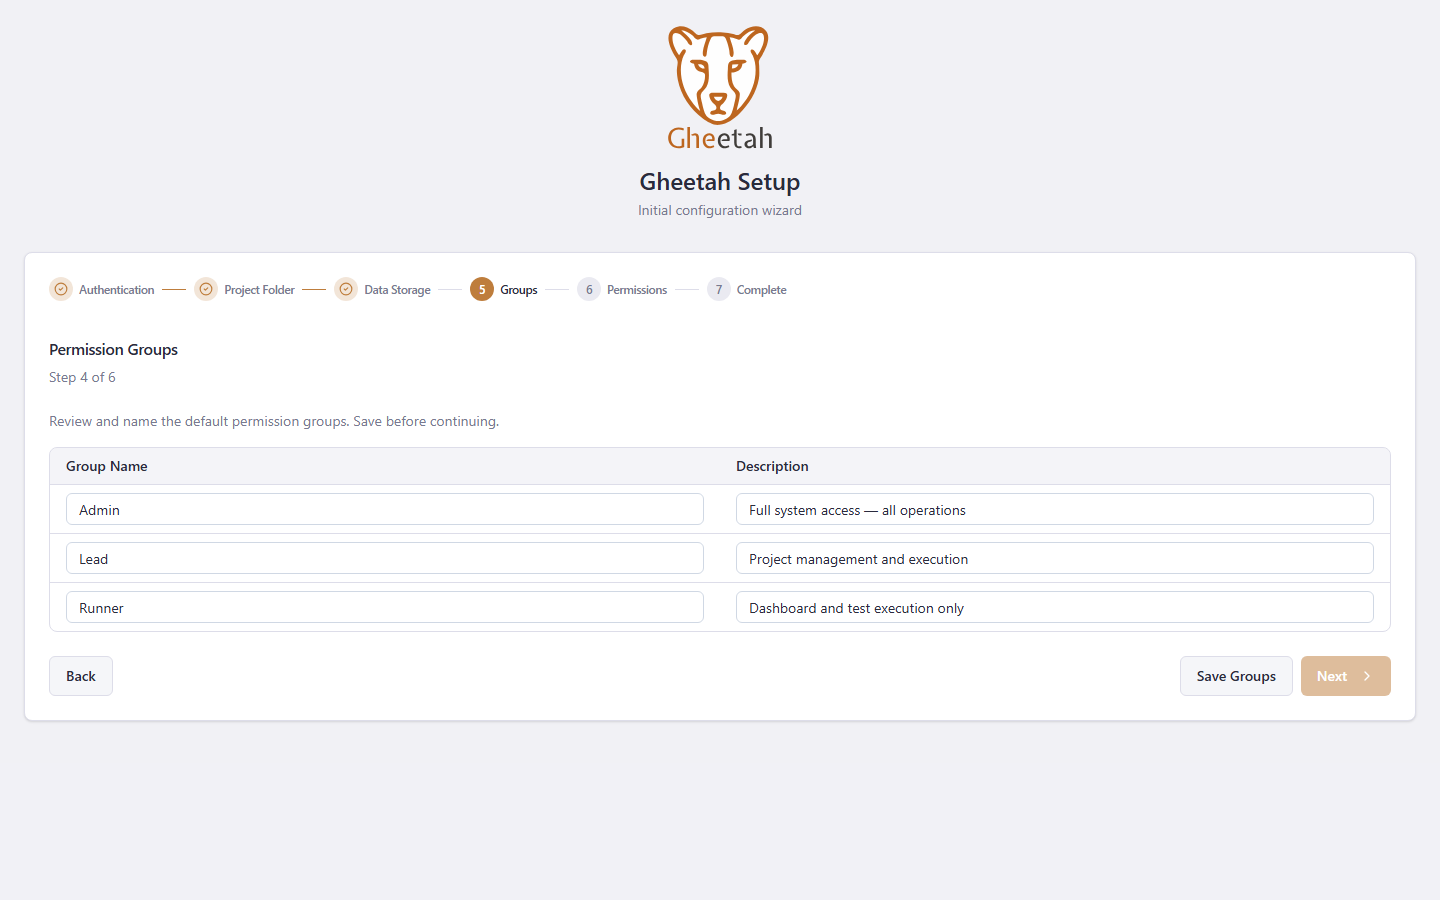
Review the permission groups

1.6 Assign permissions to each group

Each group starts with a sensible set of permissions ticked. This is where authorisation is actually decided: Gheetah enforces these on the server for every request, so a permission not granted here is not reachable, whatever the interface shows.
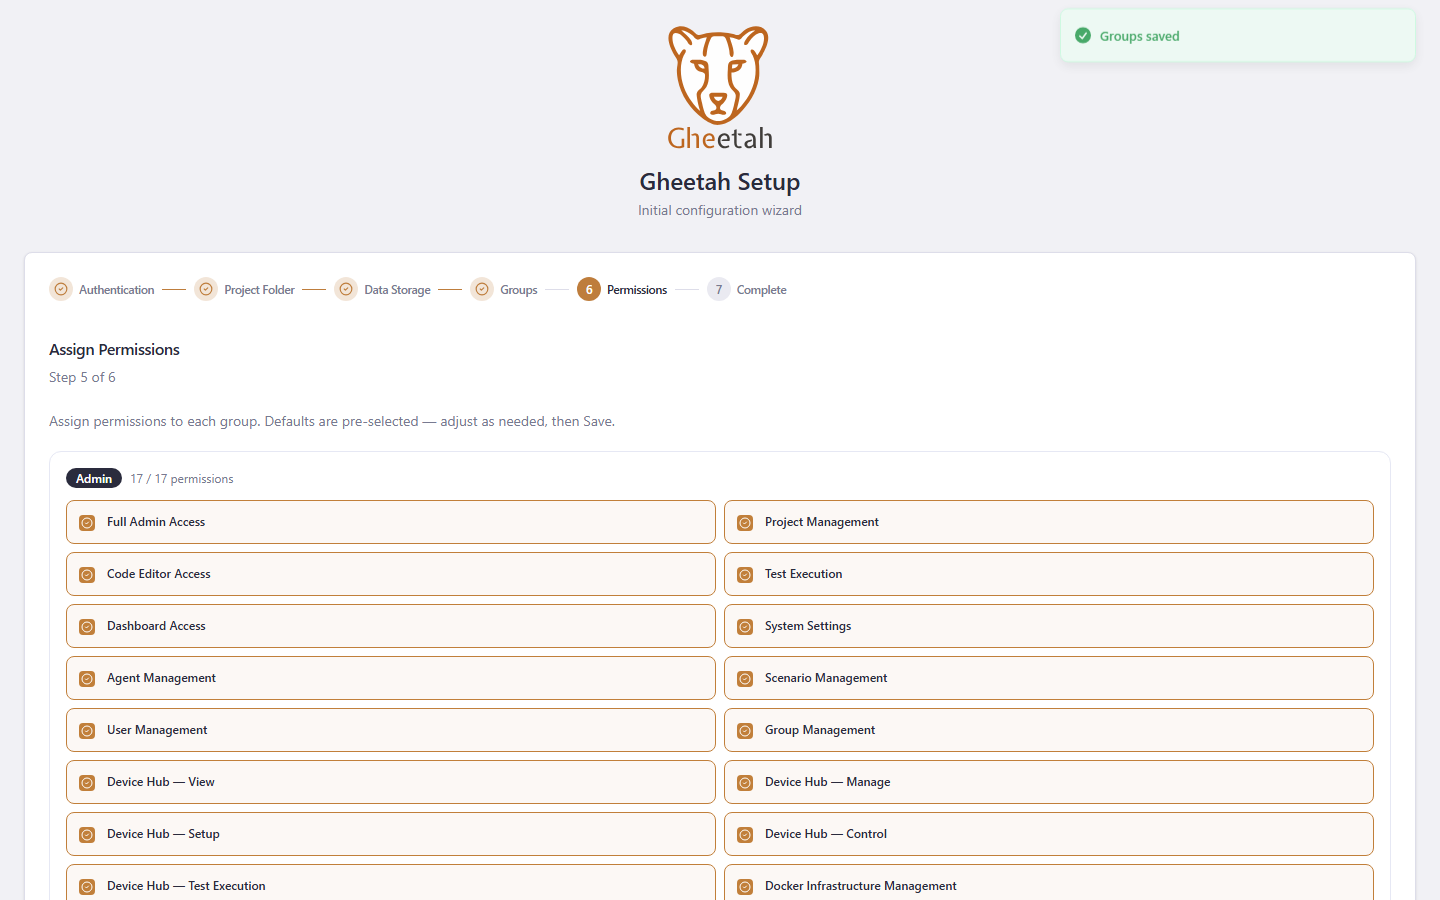
Assign permissions to each group

1.7 The installation is complete

Completing the setup writes the configuration and closes the wizard for good. Gheetah does not need to be restarted: the installation is live from this moment, which is why the next step is simply creating an account.
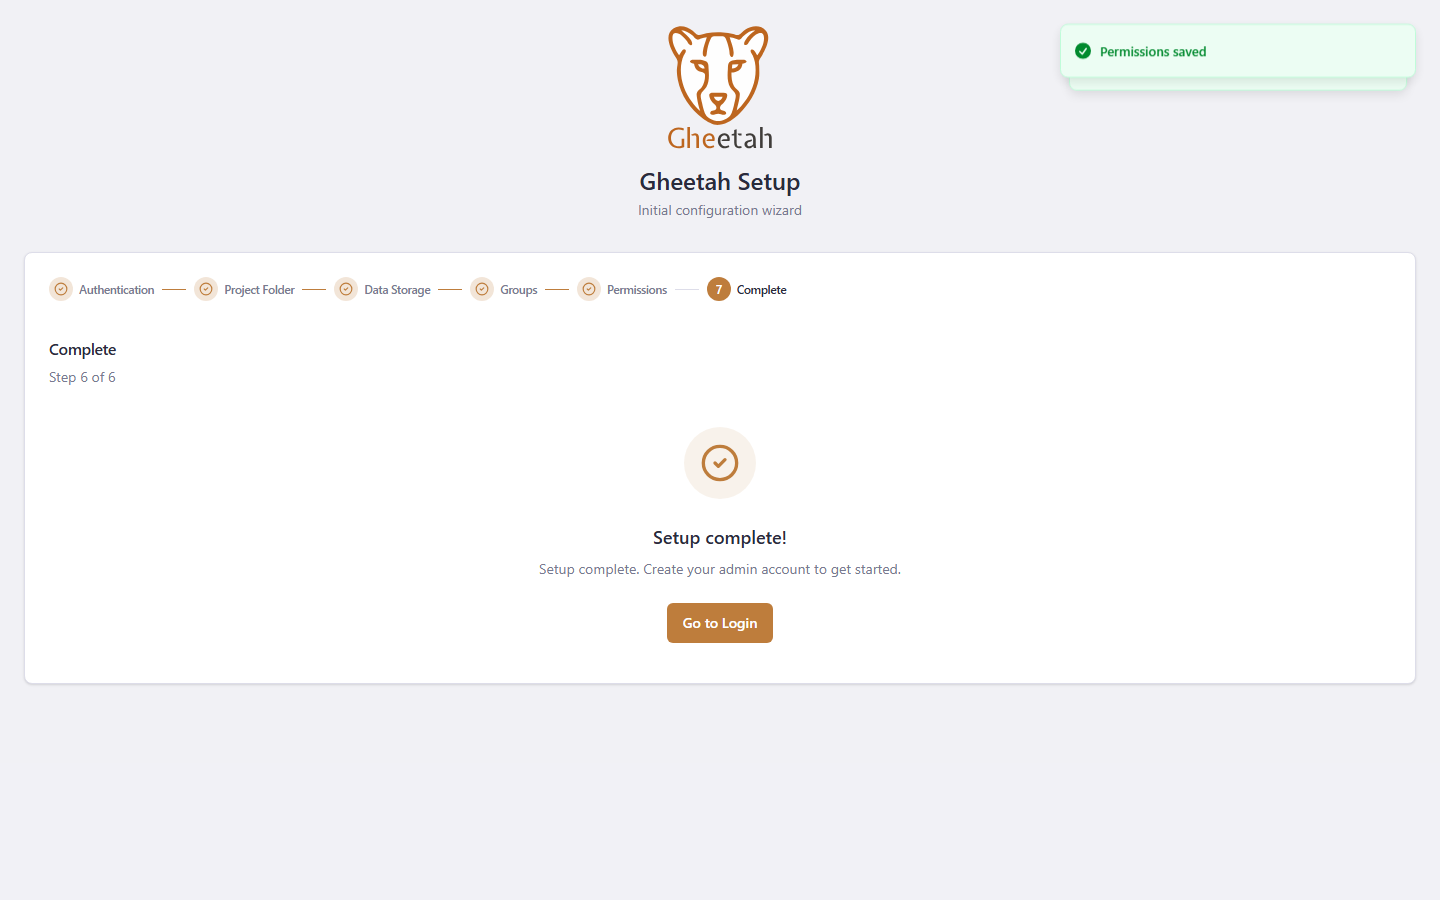
The installation is complete

1.8 Create the first administrator

The first account created after the installation is the administrator. Gheetah asks for it on the sign-in page while no users exist; once one does, that page becomes an ordinary sign-in form and further users are added from Admin → Users.
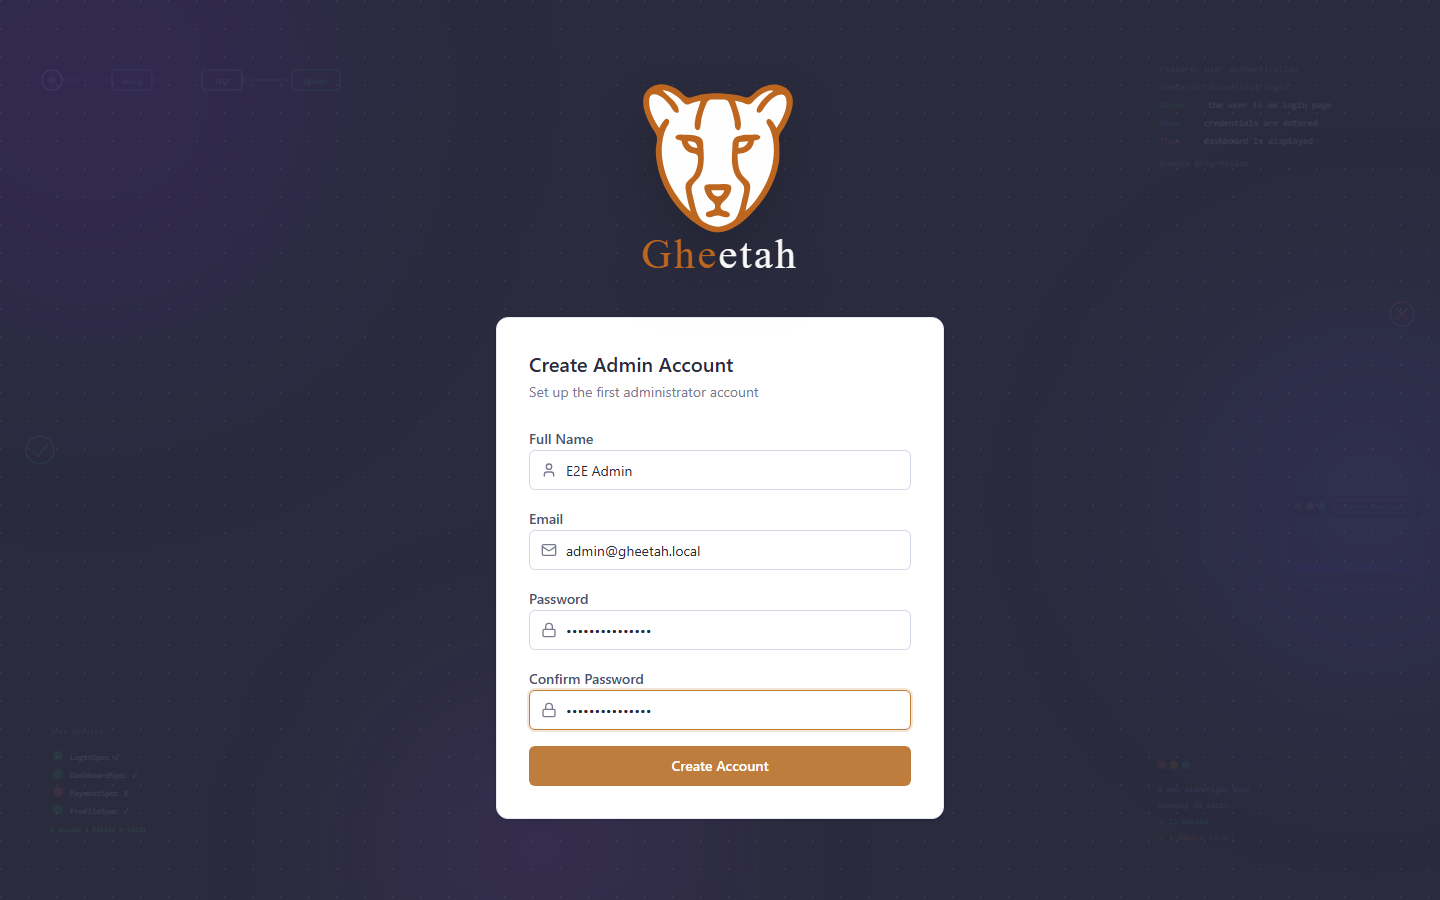
Create the first administrator

1.9 Arrive at the dashboard

Creating the account signs you in with it — Gheetah does not ask you to log in again, and never asks for a restart. The dashboard starts empty and is built from widgets, each person arranging their own. The rail on the left is the whole product; which entries appear depends on the permissions of your group.
Arrive at the dashboard

The choices the walkthrough did not make

The walkthrough above takes the shortest working path. These are the branches it passed by. None of them is tested, because each one needs an external system that a test cannot honestly stand in for — but each one is a decision a real installation makes, so here is what it involves.

Authentication

Local accounts — Gheetah stores the accounts itself. Nothing else is needed, and users are created from Admin → Users. This is the right choice for an evaluation, a single team, or an installation with no directory to integrate with.

Microsoft Azure AD / Entra ID — register Gheetah as an application in your tenant, then give the wizard the tenant id, client id and client secret. People sign in with their work accounts and Gheetah never sees a password. Group membership can be mapped onto Gheetah's permission groups, so joining a directory group is what grants access.

Google — the same arrangement with a Google Cloud OAuth client: client id and client secret, and a redirect URI that points back at your Gheetah address.

Generic SSO — for any other OpenID Connect provider: the authority URL, client id, client secret and the scopes to request.

Whichever is chosen, it can be changed afterwards in Settings → Authentication. Changing it does not delete the accounts that already exist.

Data storage

Every option supports every feature. What differs is operation.

Local JSON — Gheetah writes its own files under Data/. No database to run, no connection string, and the whole installation can be backed up by copying a folder. Best for evaluation and single-machine installations.

SQLite — one embedded database file. Still nothing to run, but with real transactions and indexes; a good step up when the JSON files grow large.

PostgreSQL — a shared server, documents stored in JSONB columns with indexes on the fields Gheetah filters and orders by. This is the usual choice for a team installation: the database is backed up, replicated and monitored the way the rest of your estate is.

MongoDB — a document database, if that is what your organisation already runs.

Cosmos DB — Azure's managed document database, for installations that must stay inside Azure.

The wizard asks for a connection string and tests the connection before it lets you continue, so a wrong string is caught here rather than after the installation.

Project folder

The project folder can be left empty during the installation and set later in Settings. Gheetah needs it before the first project is added: it is where repositories are cloned, archives are unpacked and generated projects are written. Point it at a disk with room for as many working copies as your team will hold.
2

Signing in

Coming back to an installation that already exists, and finding your way around the platform.

Watch this flow

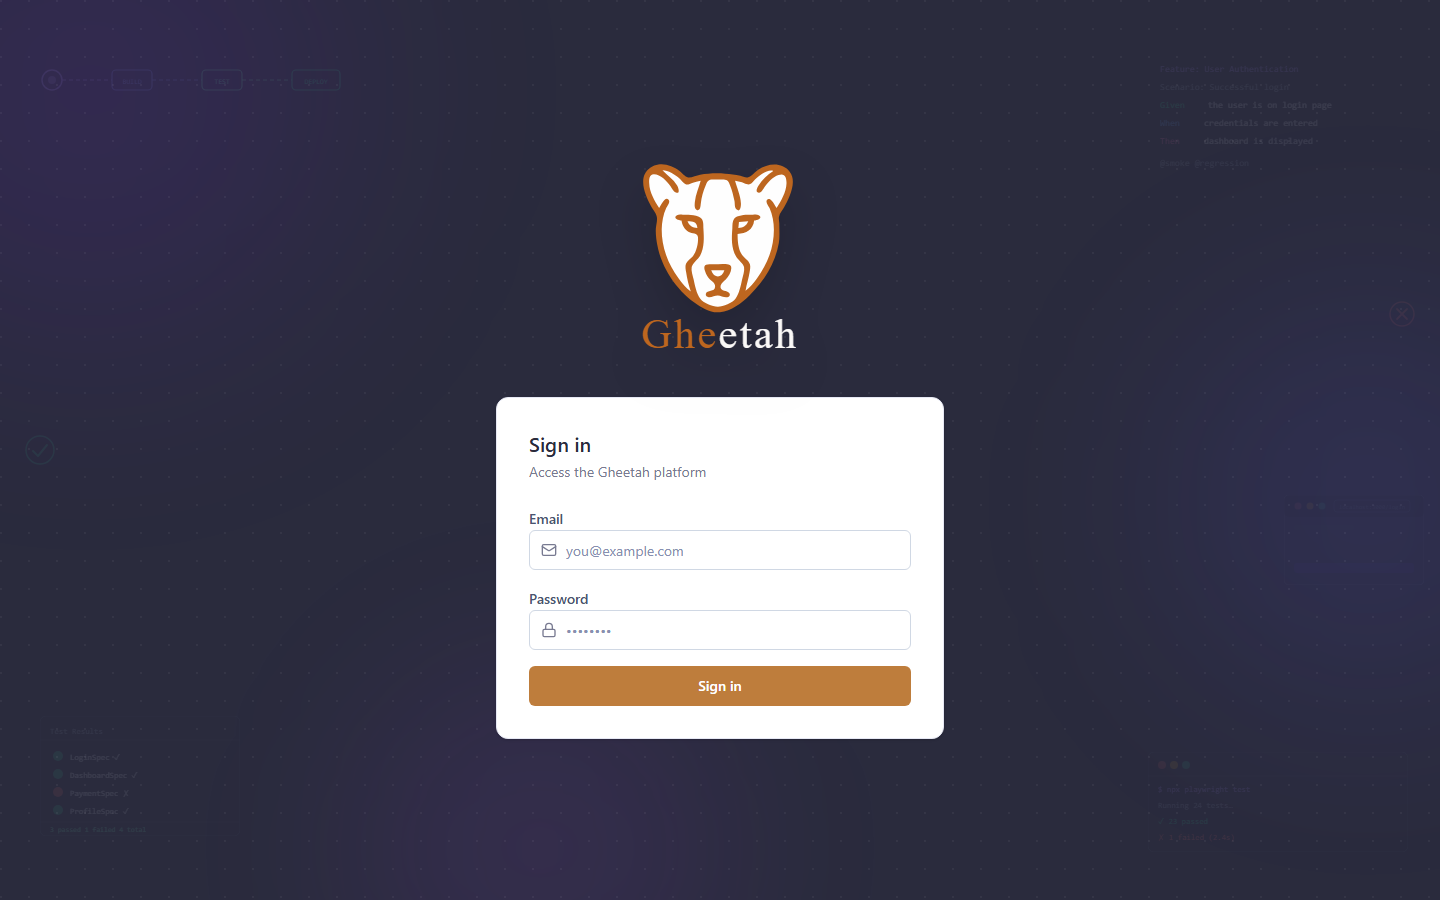
2.1 Open the sign-in page

Gheetah asks for an email address and a password. With Azure AD, Google or SSO configured instead, this page offers that provider’s button rather than the form.

Open the sign-in page

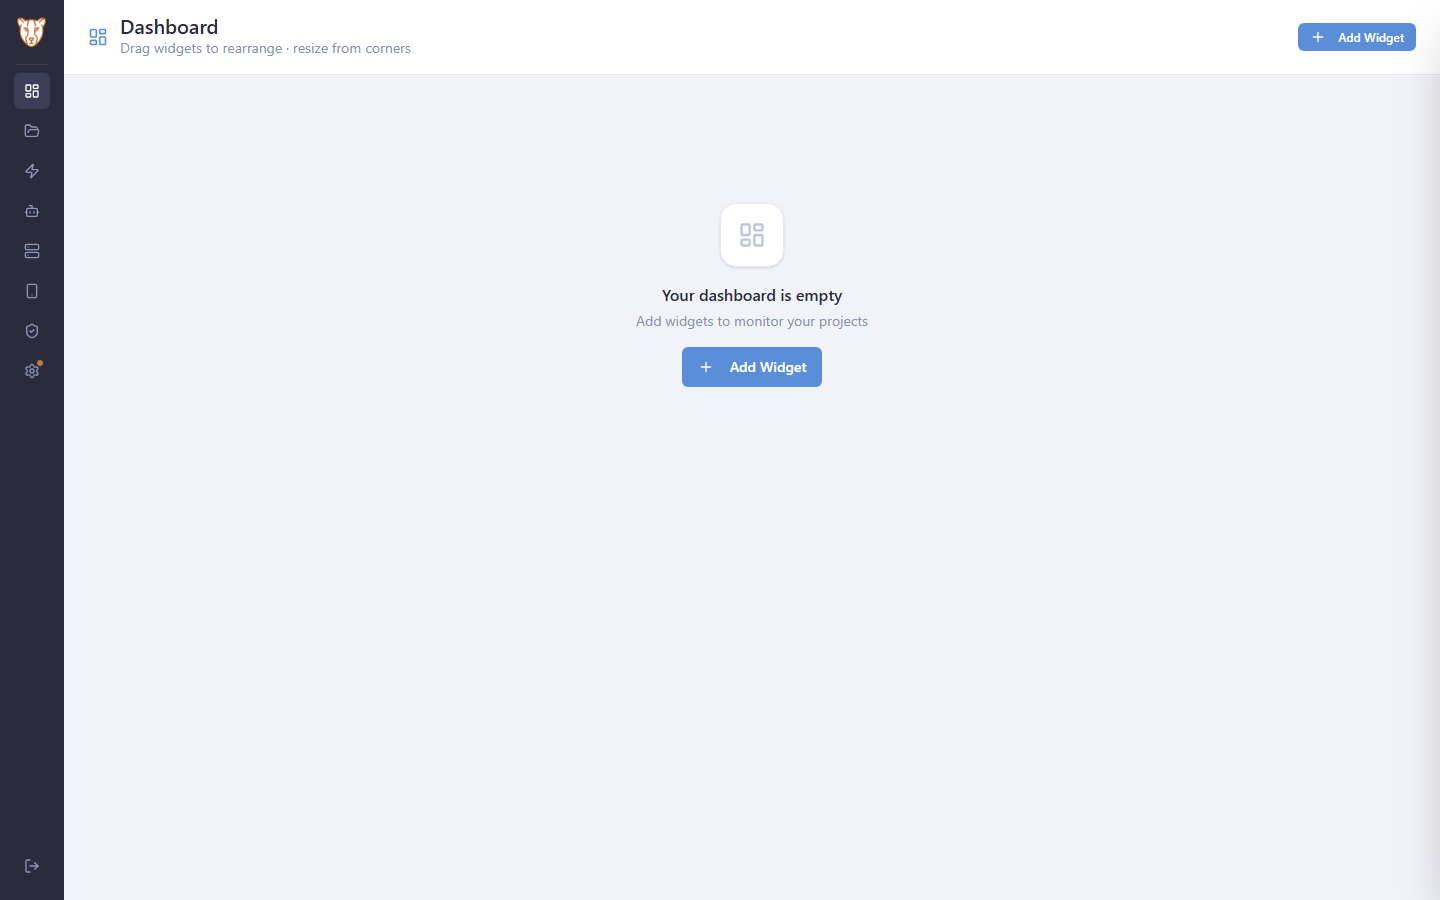
2.2 The dashboard, and the way around

The dashboard is the home of the platform: widgets for execution results, project health and agent status, arranged per person. The rail on the left holds the rest — Projects, AI Projects, Agents, Docker Servers, Device Hub, Admin and Settings. Which entries appear depends on the permissions of the group you are in.

The dashboard, and the way around
3

Creating a project from a template

Generating a working C# web project with xUnit, plus the API and database step libraries, without writing a line of setup.

Watch this flow

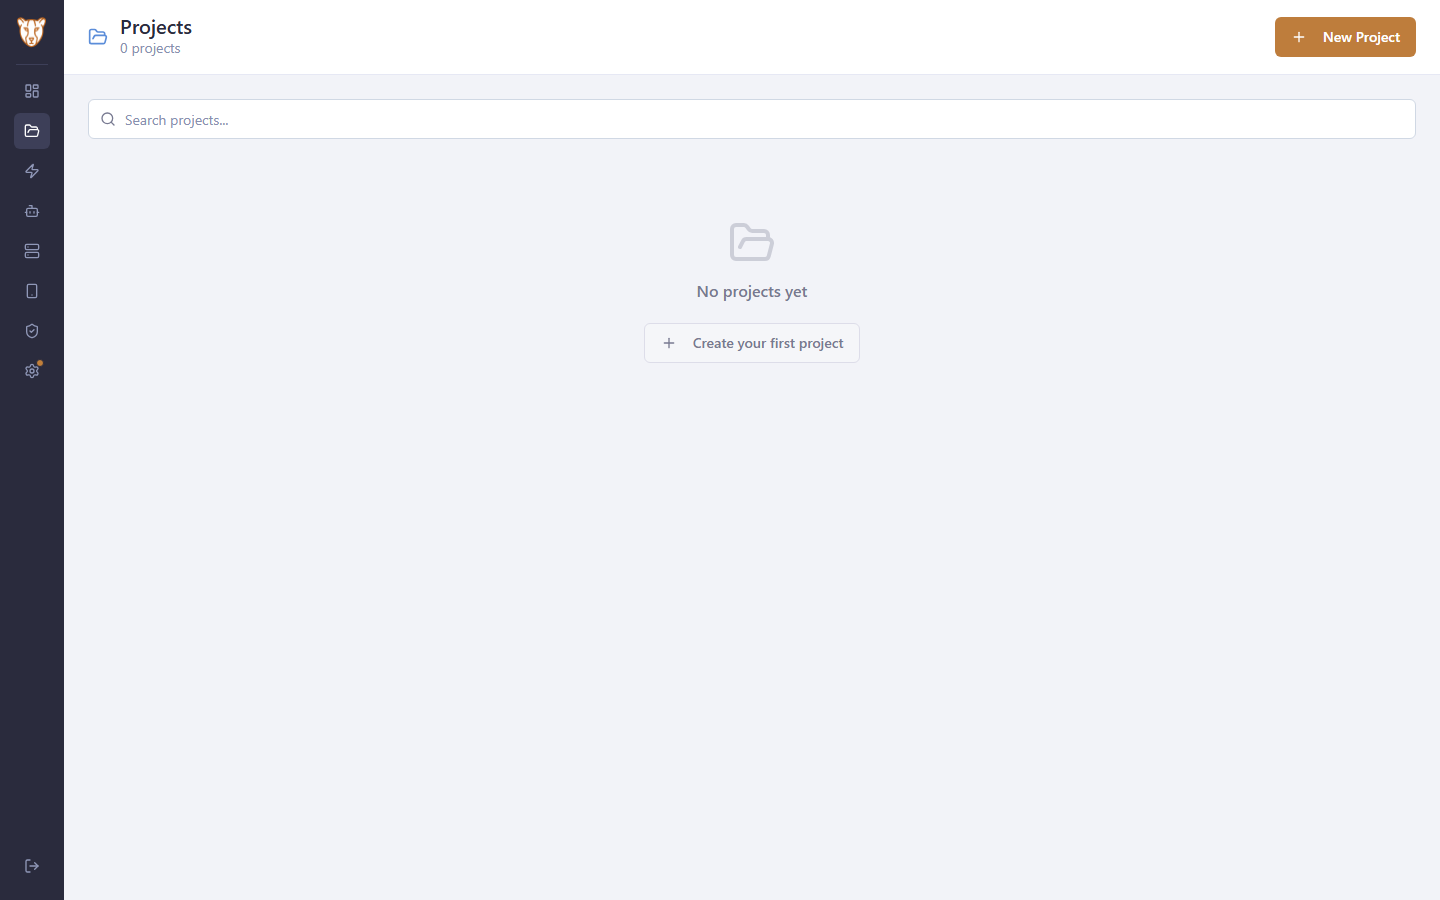
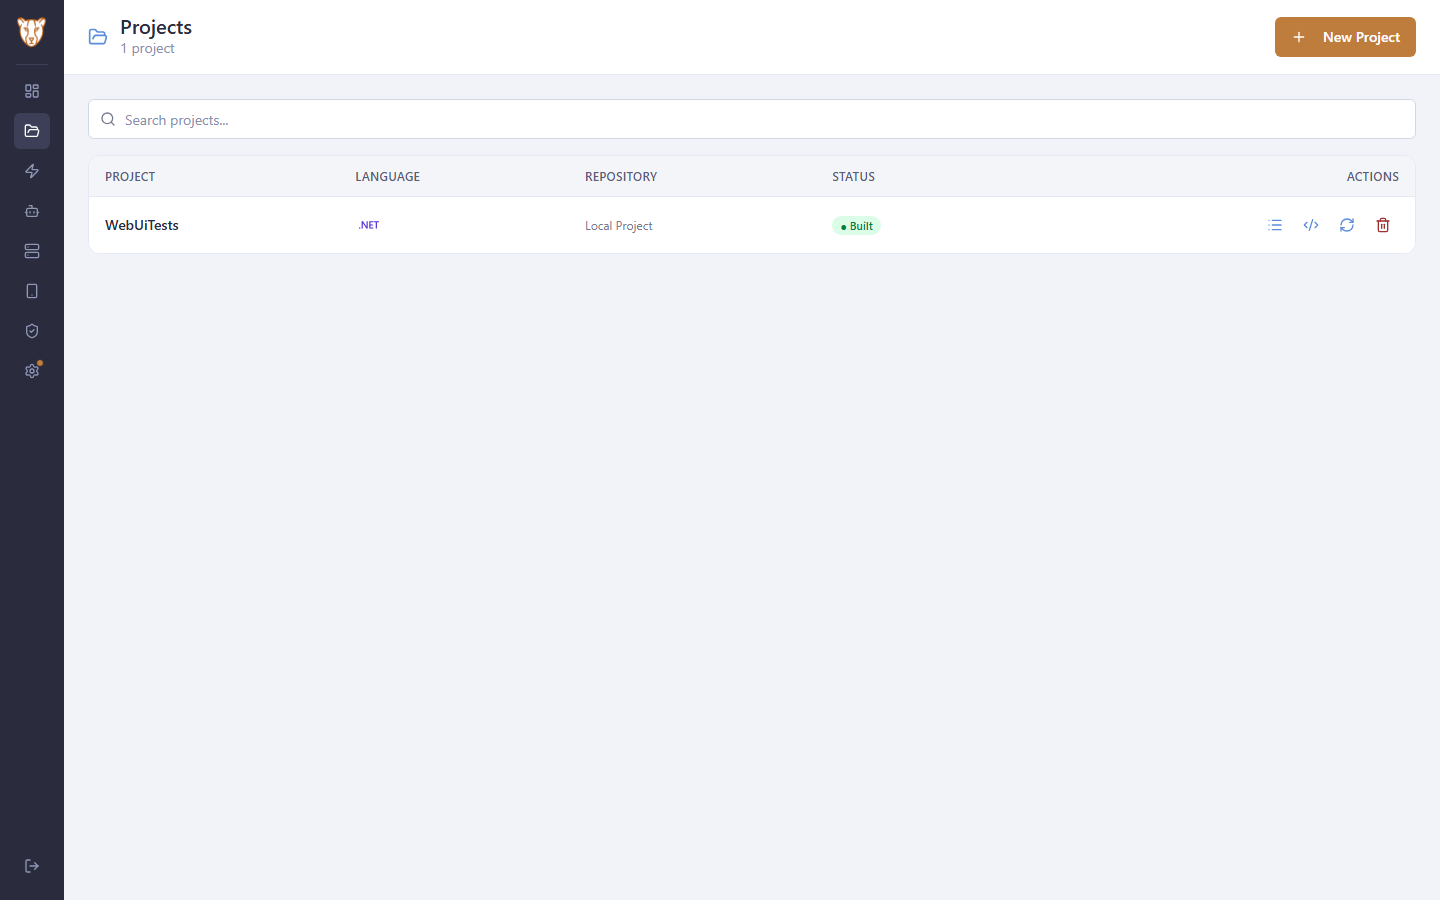
3.1 Open the projects page

Projects lists everything Gheetah knows about, whatever way it arrived. A new installation has none.

Open the projects page

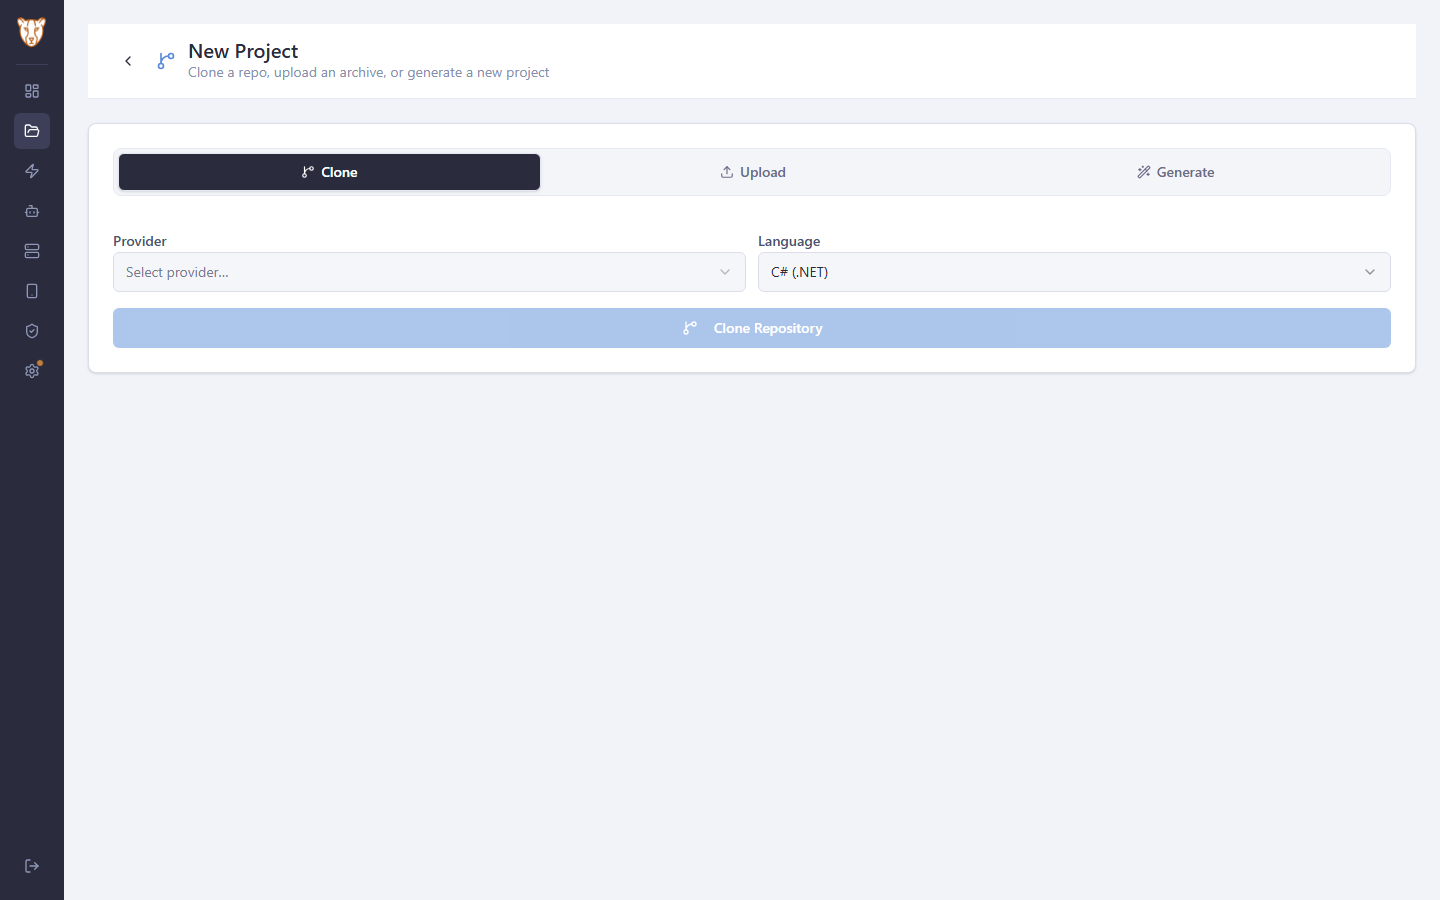
3.2 Choose how the project arrives

There are three ways in. **Clone** brings a repository Gheetah already has a connection to. **Upload** takes a zip of a project from your own machine. **Generate** writes a new one from Gheetah’s templates. All three end in the same place: a project whose scenarios can be run.

Choose how the project arrives

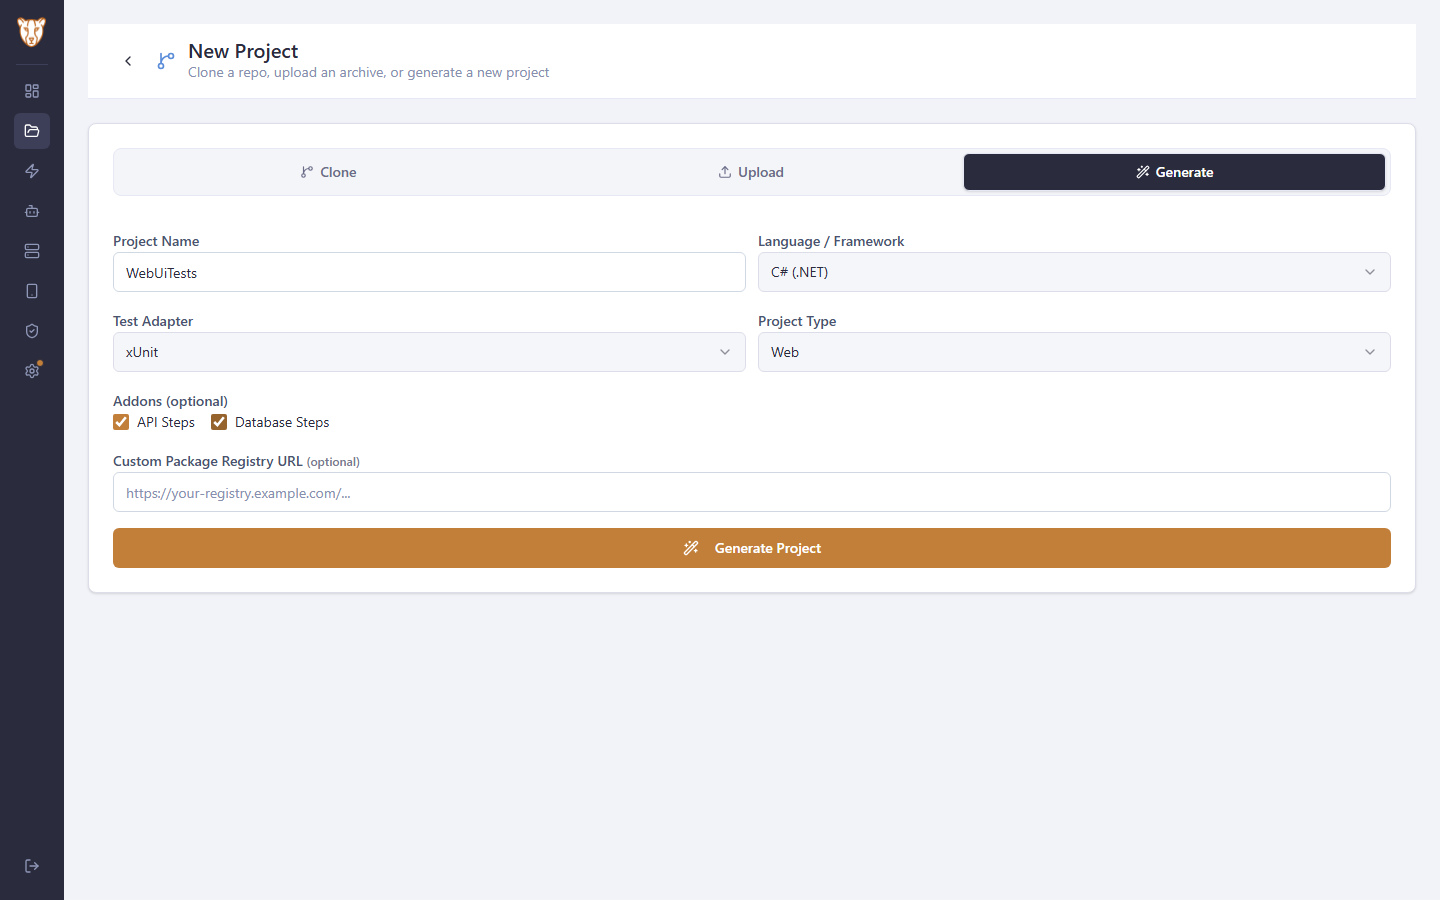
3.3 Describe the project you want

The name, the language, the test framework and what is being tested. C# and Java each offer Web, Desktop and Mobile; Playwright offers Web. The add-ons are step libraries: API adds HTTP steps, Database adds SQL ones, and both can be left off and added later by hand. A custom package registry is for teams whose builds do not reach the public feeds.

Describe the project you want

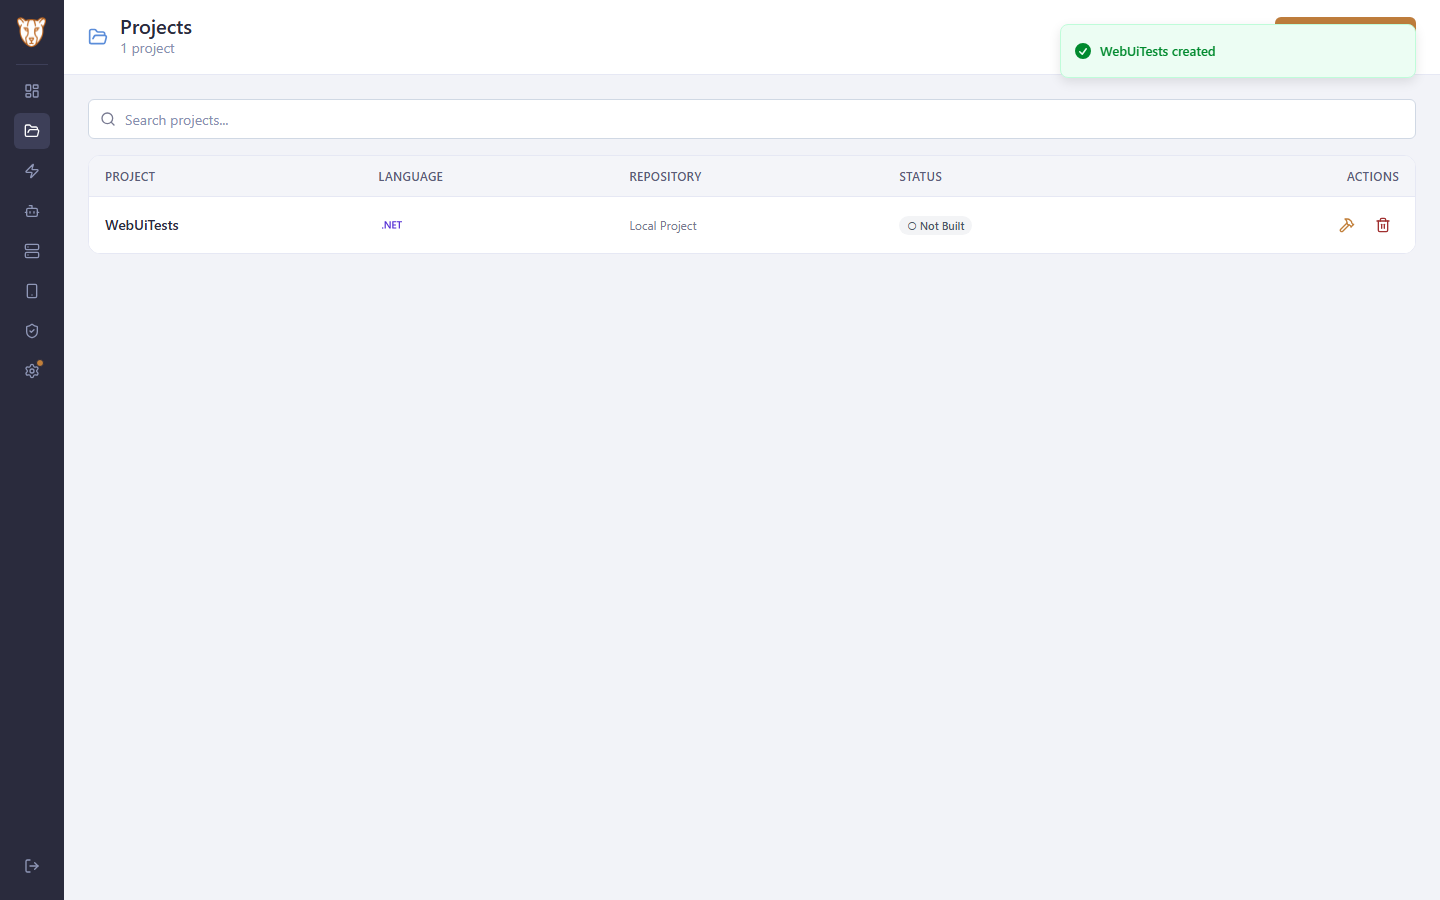
3.4 The project is written, and waiting to be built

Gheetah writes the whole project into the project folder and lists it as Not Built. Nothing has been compiled yet, which is why the only action offered is the hammer.

The project is written, and waiting to be built

3.5 The project compiles

The build runs on the server and its output is streamed back as it happens, so a failure is read where it occurred rather than guessed at. Once it succeeds the project is Built, and the row offers what a built project can do: open its scenarios, open it in the editor, or build it again. Teams whose packages come from a private registry are asked first which feeds the build may use; with none configured, the build simply starts.

The project compiles

The other two ways a project arrives

Generating is one of three. The other two bring a project that already exists, and both end in the same place: a project in the list, waiting to be built.

Clone from a repository

Settings → Git Repos is where a connection to GitHub, GitLab, Bitbucket or Azure DevOps is configured once, with a token that Gheetah stores encrypted. The Clone tab then offers the repositories that connection can see, so nobody pastes a URL or a token into the project form.

Pick the repository and the language it is written in. Gheetah clones it into the project folder, and from then on the project is Gheetah's working copy: the editor commits to it, the pull-request view reads it, and a build runs against it.

Upload an archive

For a project that is not in a repository Gheetah can reach — a proof of concept on someone's laptop, or a repository behind a network Gheetah is not on. Zip the project folder and upload it. Gheetah unpacks it into the project folder and treats it exactly like a cloned one, except that there is nowhere to push back to.

What all three have in common

Whichever way it arrived, the project has to be built before its scenarios can run, and the build happens on the server rather than on the machine of whoever added it. A project that does not compile is listed as failed with the compiler's own output, which is the fastest way to find a missing package or a wrong target framework.

Languages and targets

C# and Java each offer Web, Desktop and Mobile; Playwright offers Web. A generated project is complete for its combination: the runner for the chosen test framework, the driver setup, a step library, a showcase feature and a smoke scenario that passes offline — so the first run is green before a single line is written.

The two add-ons are step libraries rather than project types. API Steps adds HTTP steps (RestSharp for C#, REST Assured for Java) and Database Steps adds SQL ones (Dapper, or Hibernate with the JDBC driver). Both can be added by hand later; ticking them here only saves writing the packages and the step definitions yourself.

4

Finding your way around a project

Reading the scenarios a project contains, and the tabs that show what happens when one is run.

Watch this flow

4.1 Open the project’s scenarios

The scenarios page is reached from the project row. It lists every feature file Gheetah found in the project and every scenario inside them — a generated project arrives with a smoke scenario that runs offline and a showcase feature that exercises the step library.

Open the project’s scenarios

4.2 The scenario tree

Feature files on the left, scenarios under them. The counters at the top say how much there is to run. Selecting a scenario is what the Run Options panel acts on; Run All Scenarios runs the project instead.

The scenario tree

4.3 Read the scenario itself

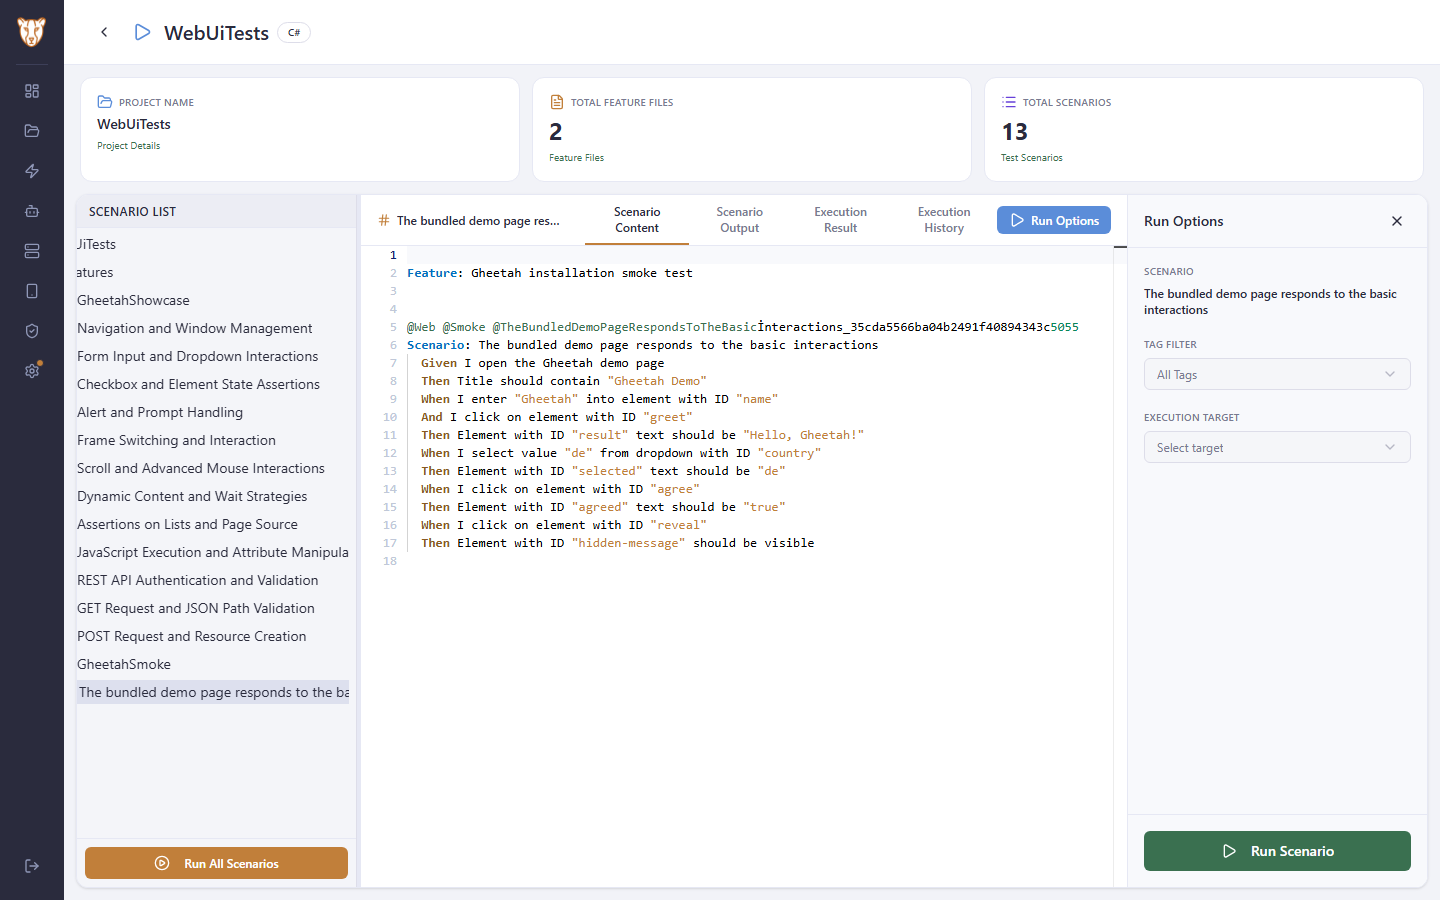
Scenario Content shows the Gherkin exactly as it is in the feature file: the Given/When/Then a tester wrote, with the tags that decide which runs include it. It is read-only here — the editor is where a project is changed.

Read the scenario itself

4.4 The four tabs of a run

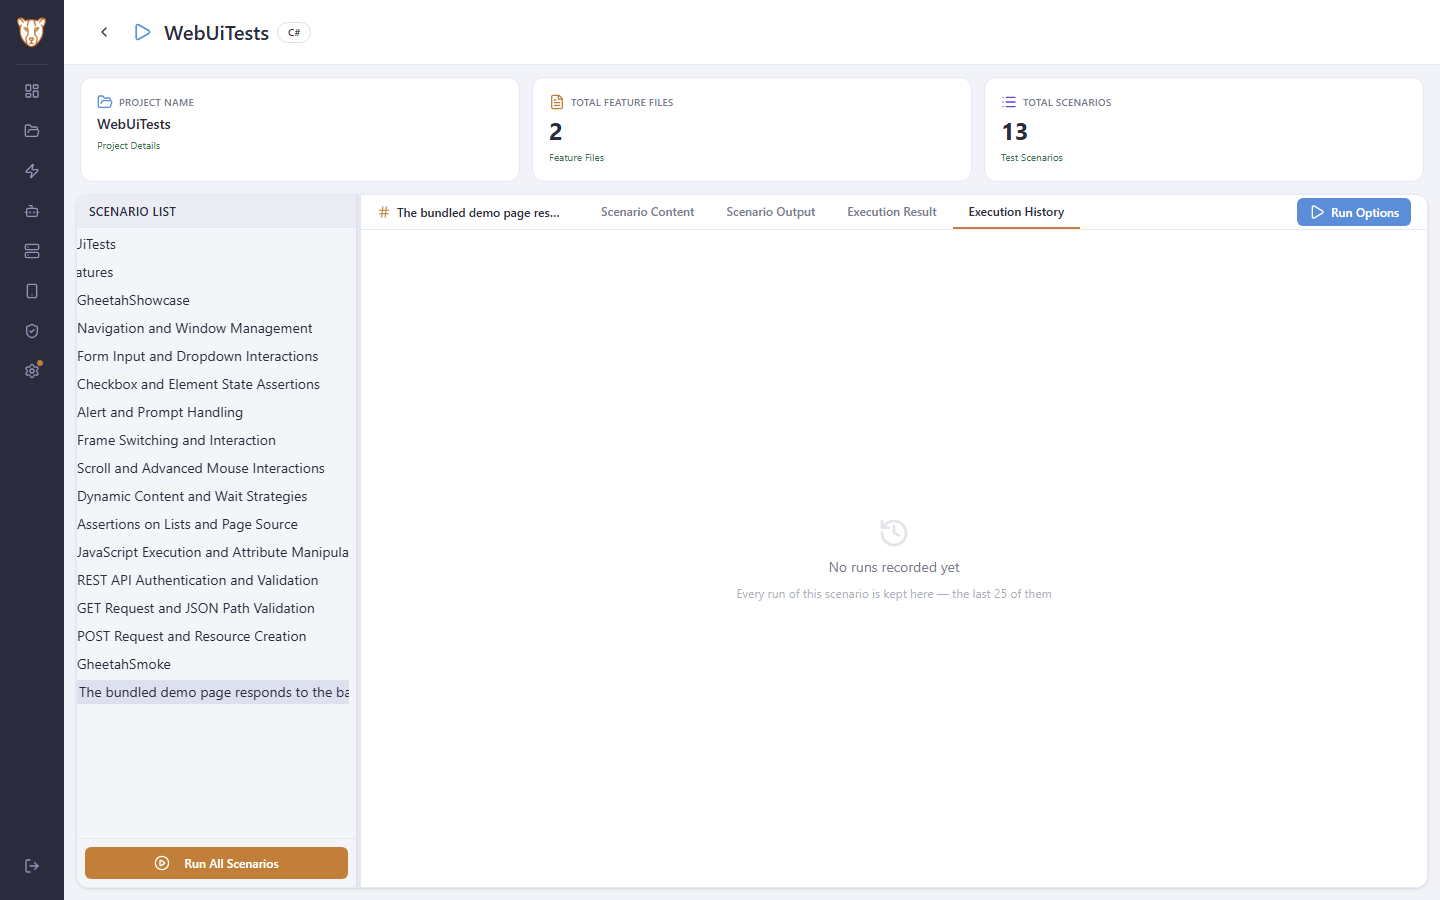
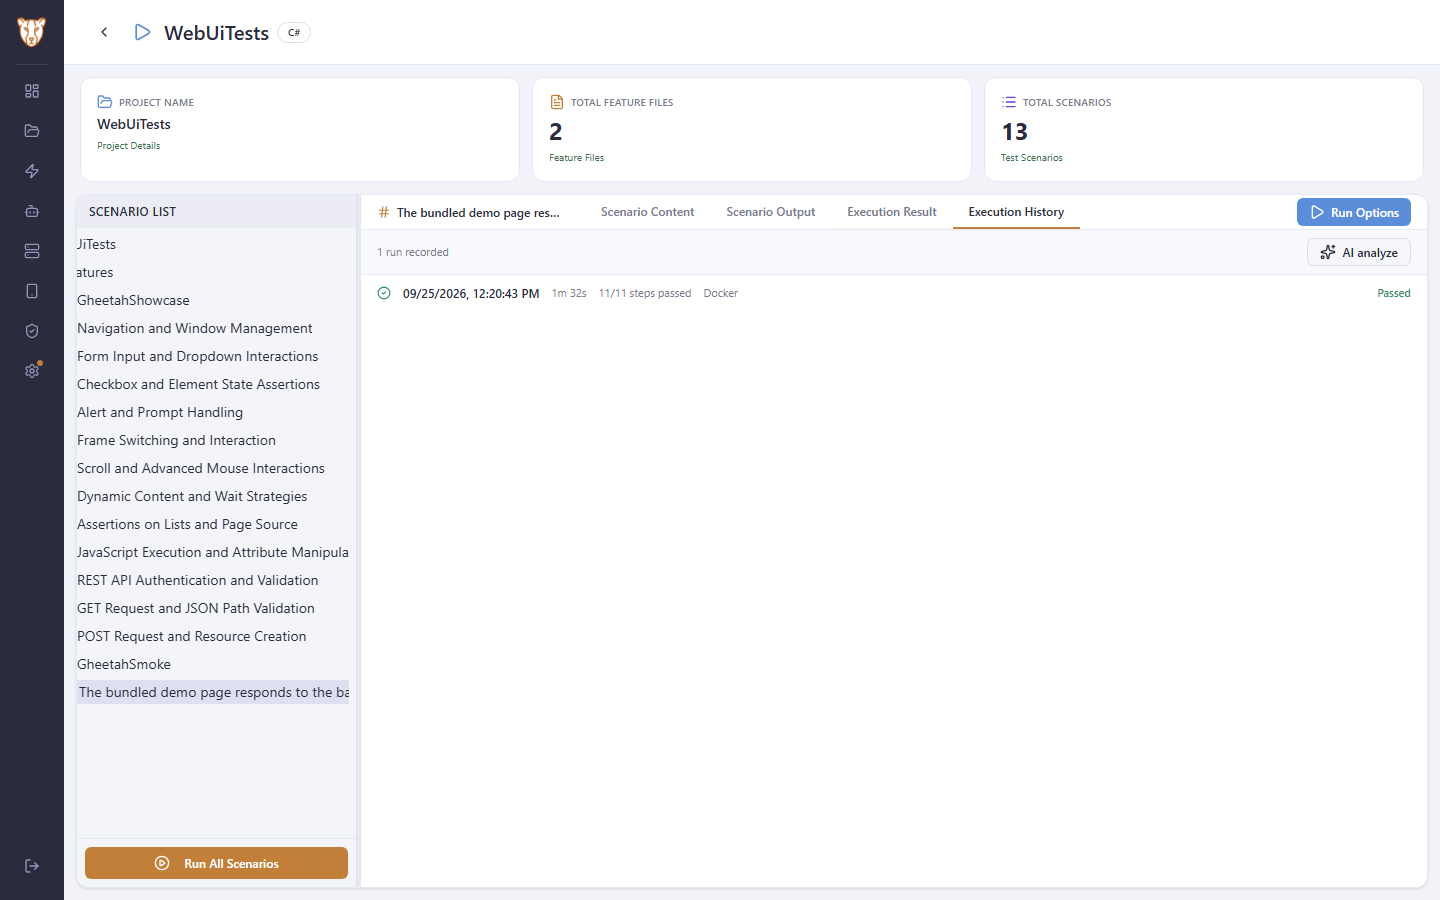
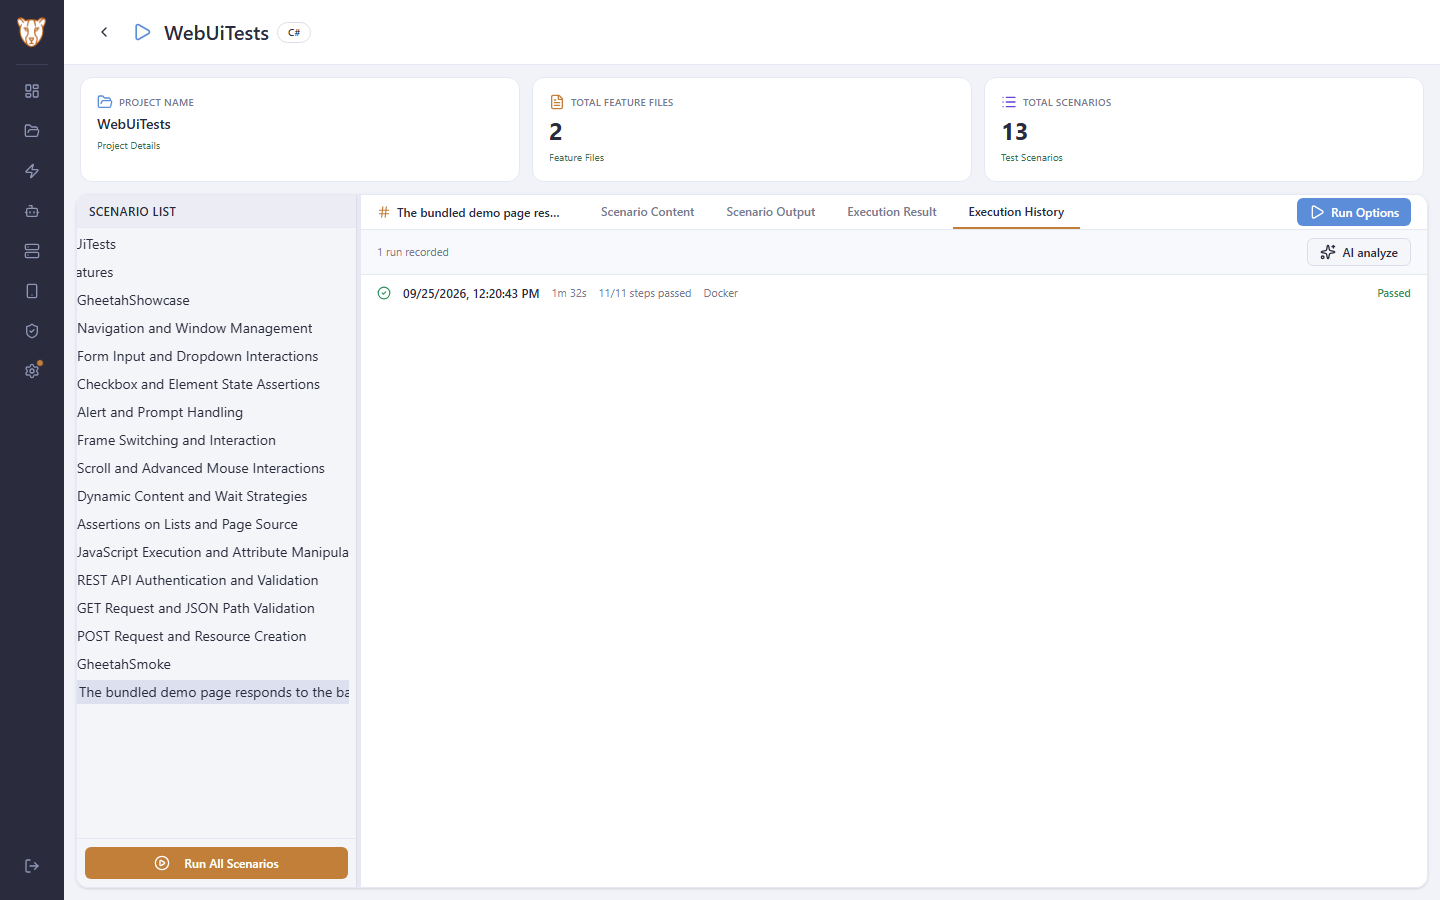
Scenario Output is the live console of a run. Execution Result is the BDD report of the last one. Execution History — this tab — keeps the last 25 runs of the selected scenario by date, so a failure can be compared against the runs before it. Nothing has been run yet, so it is empty.

The four tabs of a run
5

Registering an AI model

Telling Gheetah which model to use, and what that unlocks.

Watch this flow

5.1 Open the agents page

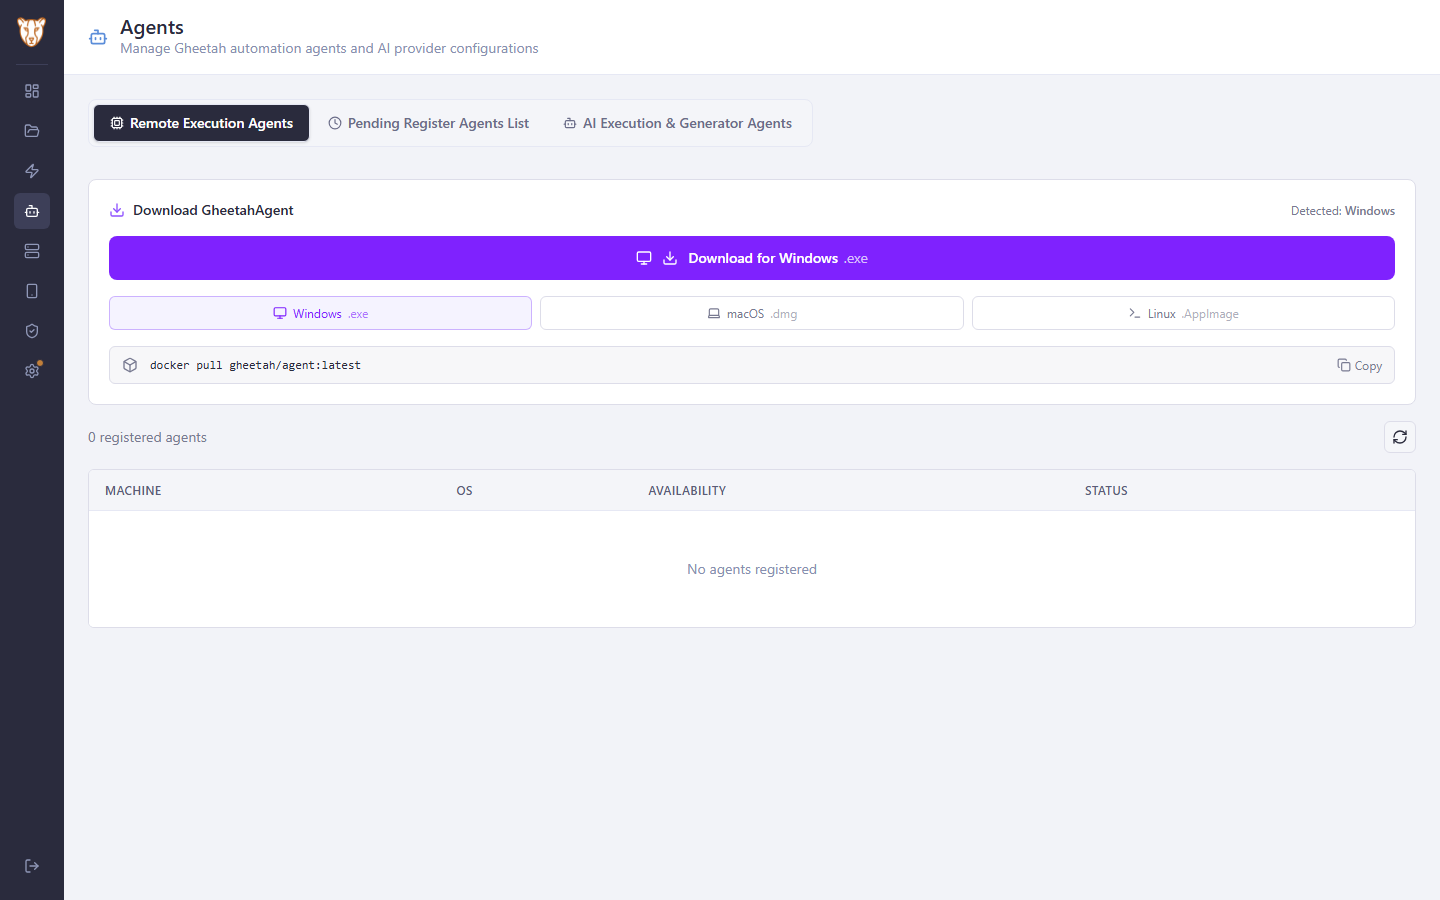
Agents covers both kinds. Remote Execution Agents are the machines that run tests — the GheetahAgent desktop application. AI Execution & Generator Agents are the language models Gheetah calls.

Open the agents page

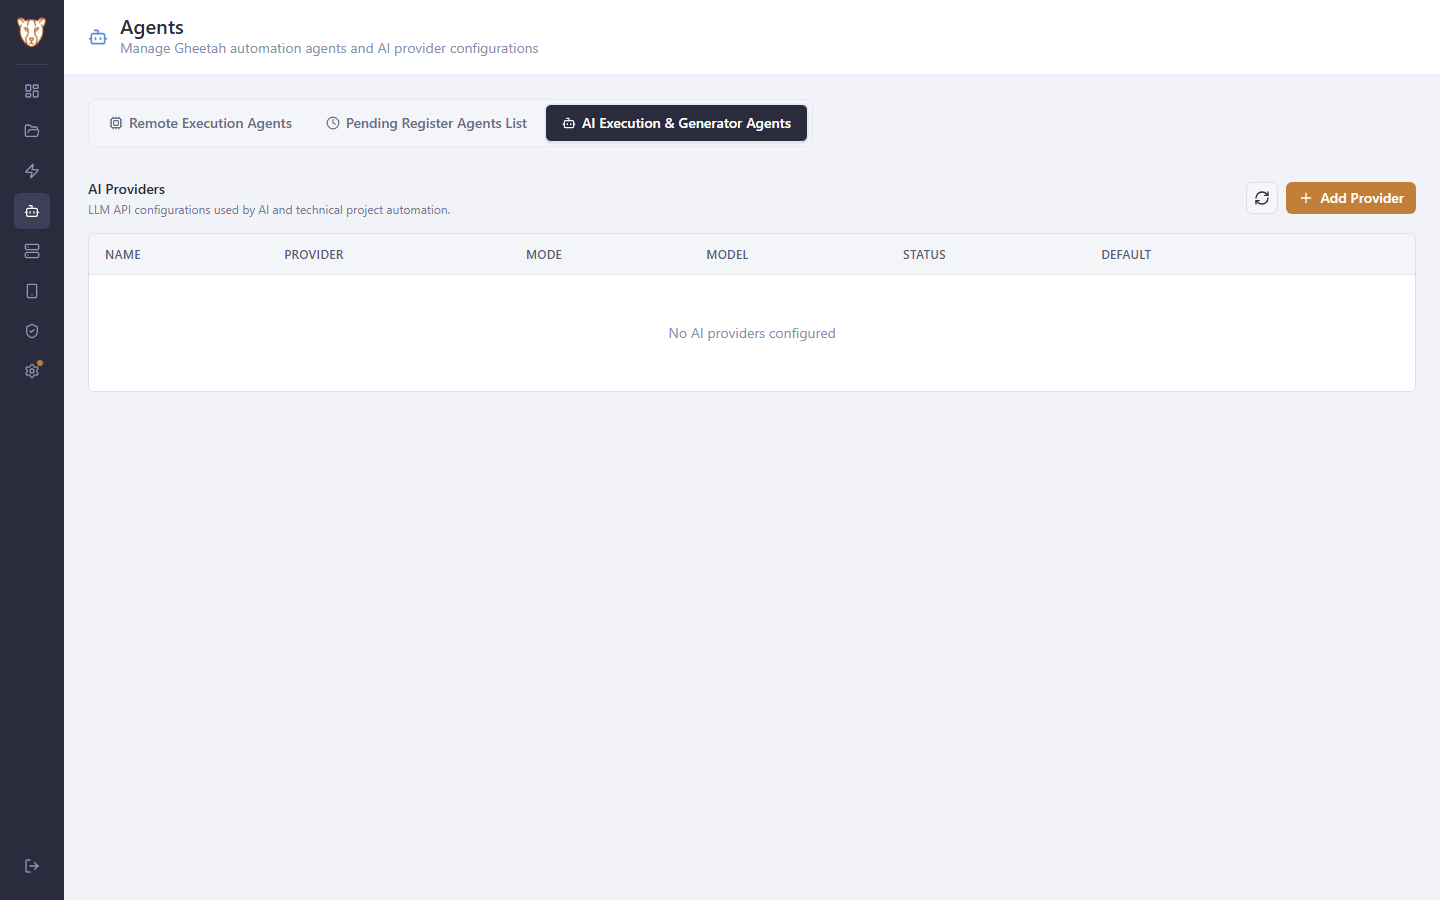
5.2 No model is configured yet

Without a model, Gheetah still runs every test you have written — what it cannot do is write or analyse them for you. The AI Projects section and the Execution History analysis appear once a model is here.

No model is configured yet

5.3 Describe the model

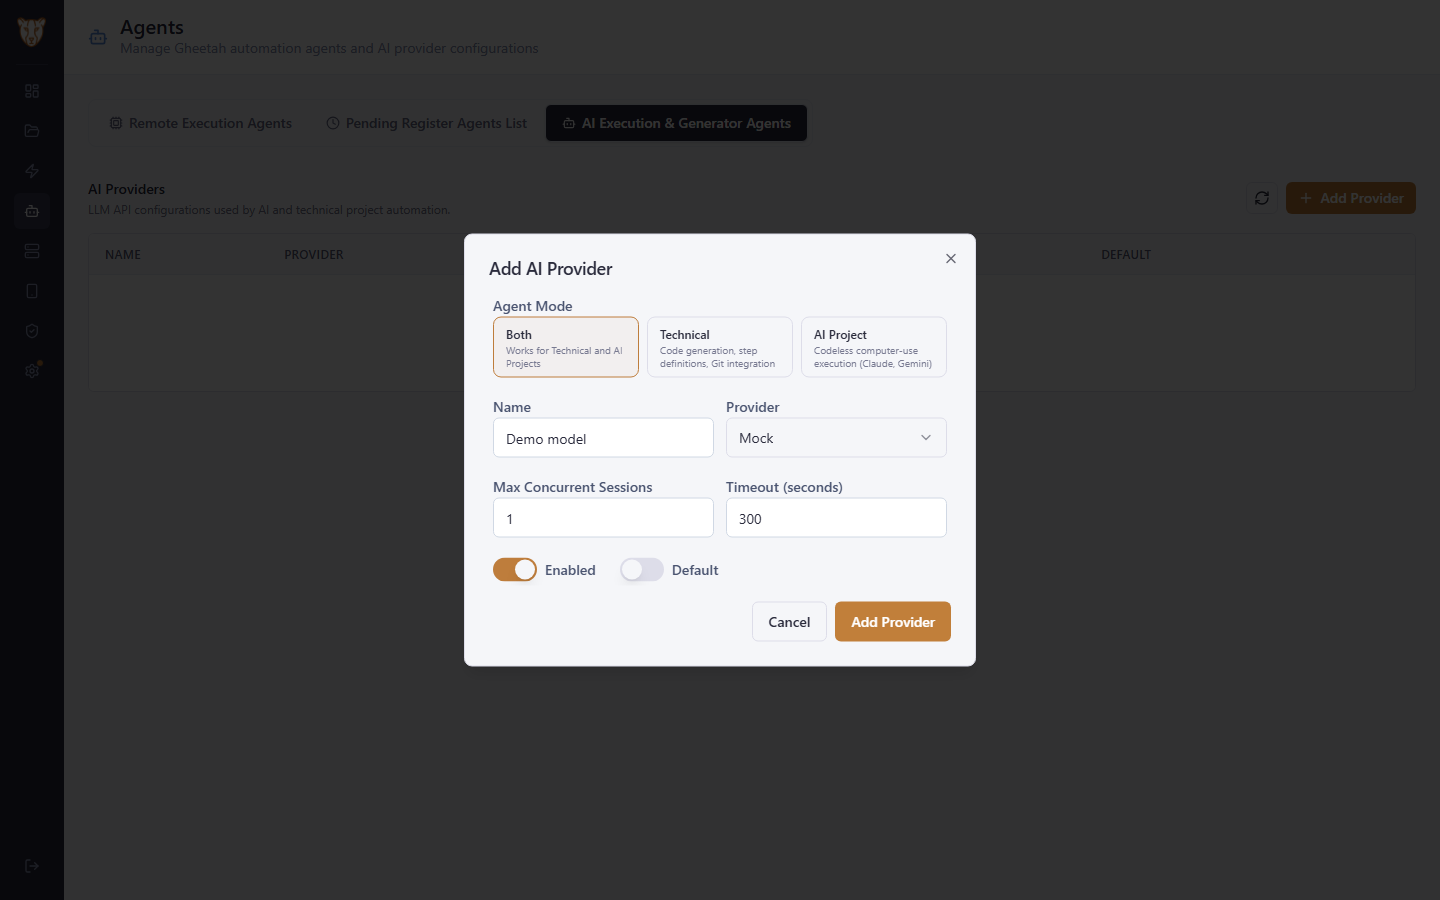
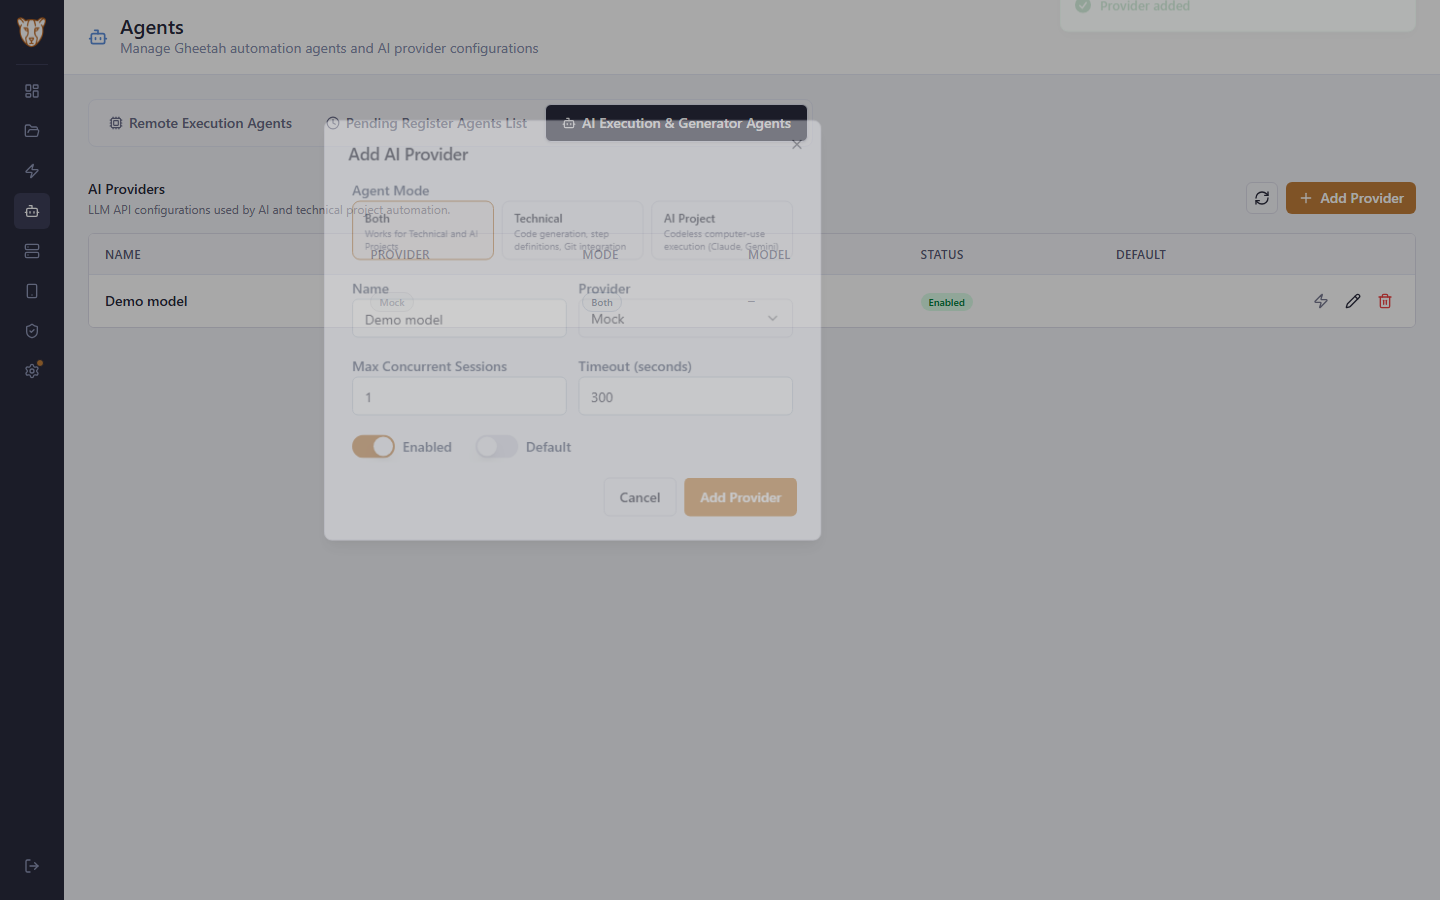
The mode decides what the model is used for: Technical for step definitions and code, AI Project for codeless scenarios, Both for either. Claude, OpenAI, Gemini, Grok, Nvidia, an MCP server or any OpenAI-compatible endpoint are the real choices, each asking for its API key and model name. Mock is built in and answers locally — useful for trying the flow without an account anywhere.

Describe the model

5.4 The model is registered

The provider is listed with its mode and whether it is enabled. Marking one as the default is what decides which model answers when Gheetah is not told otherwise.

The model is registered
6

Adding a Docker execution target

Registering the server Gheetah runs tests on: SSH, Docker, the dependencies it needs, and the runtime images for the languages your projects are written in.

Watch this flow

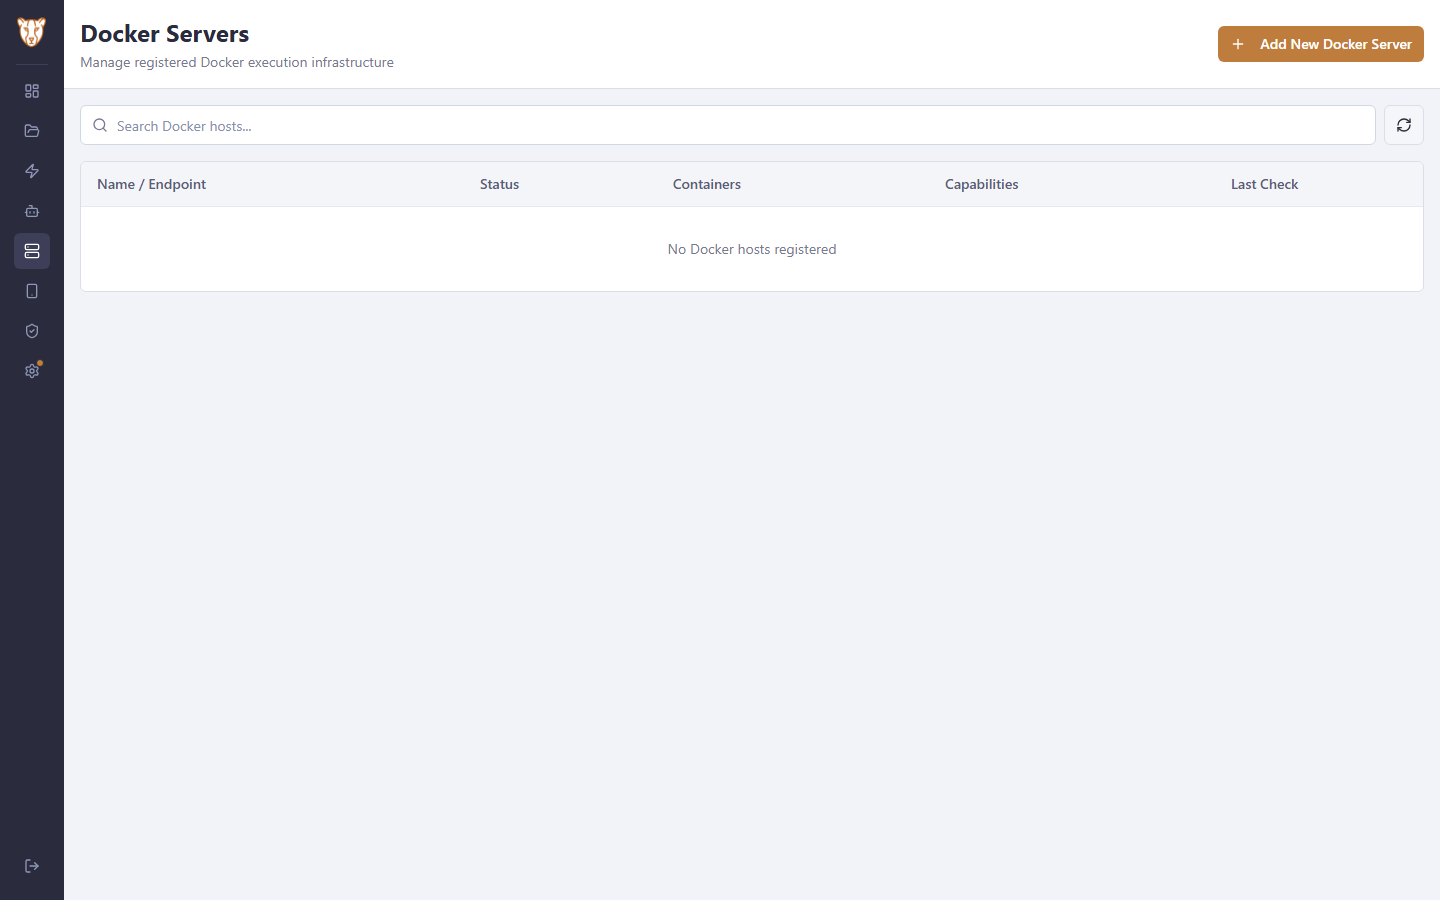
6.1 No execution target yet

Docker Servers lists the machines Gheetah runs containers on. Until one is registered, a run has nowhere to go — which is what the Run Options panel means when it offers no target.

No execution target yet

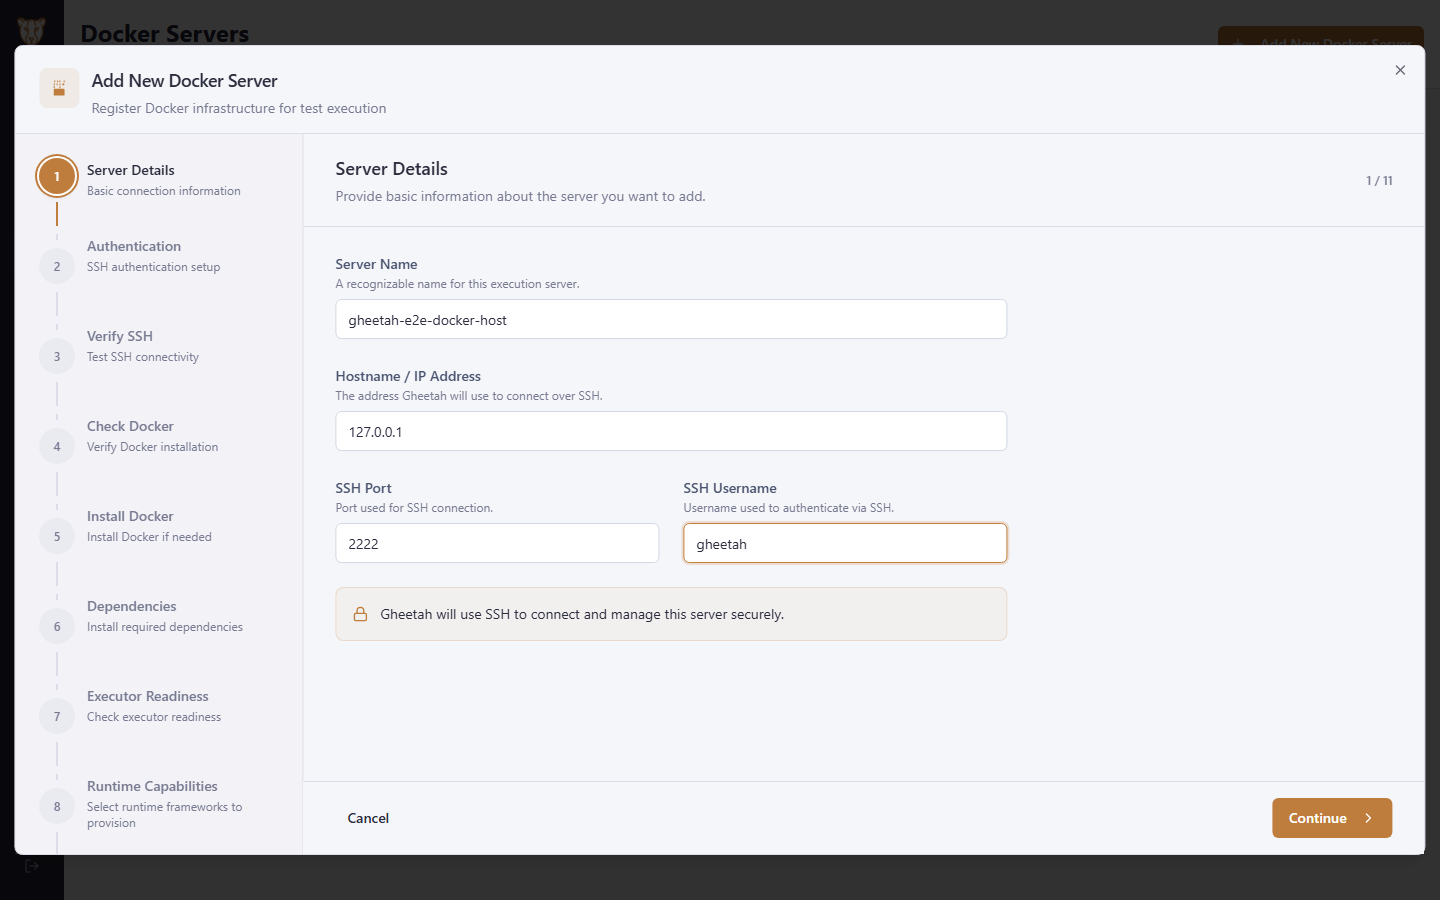
6.2 Where the server is

A name to recognise it by, and how to reach it: hostname or address, SSH port, and the user Gheetah signs in as. That user needs to be able to run Docker — on most servers that means being in the docker group.

Where the server is

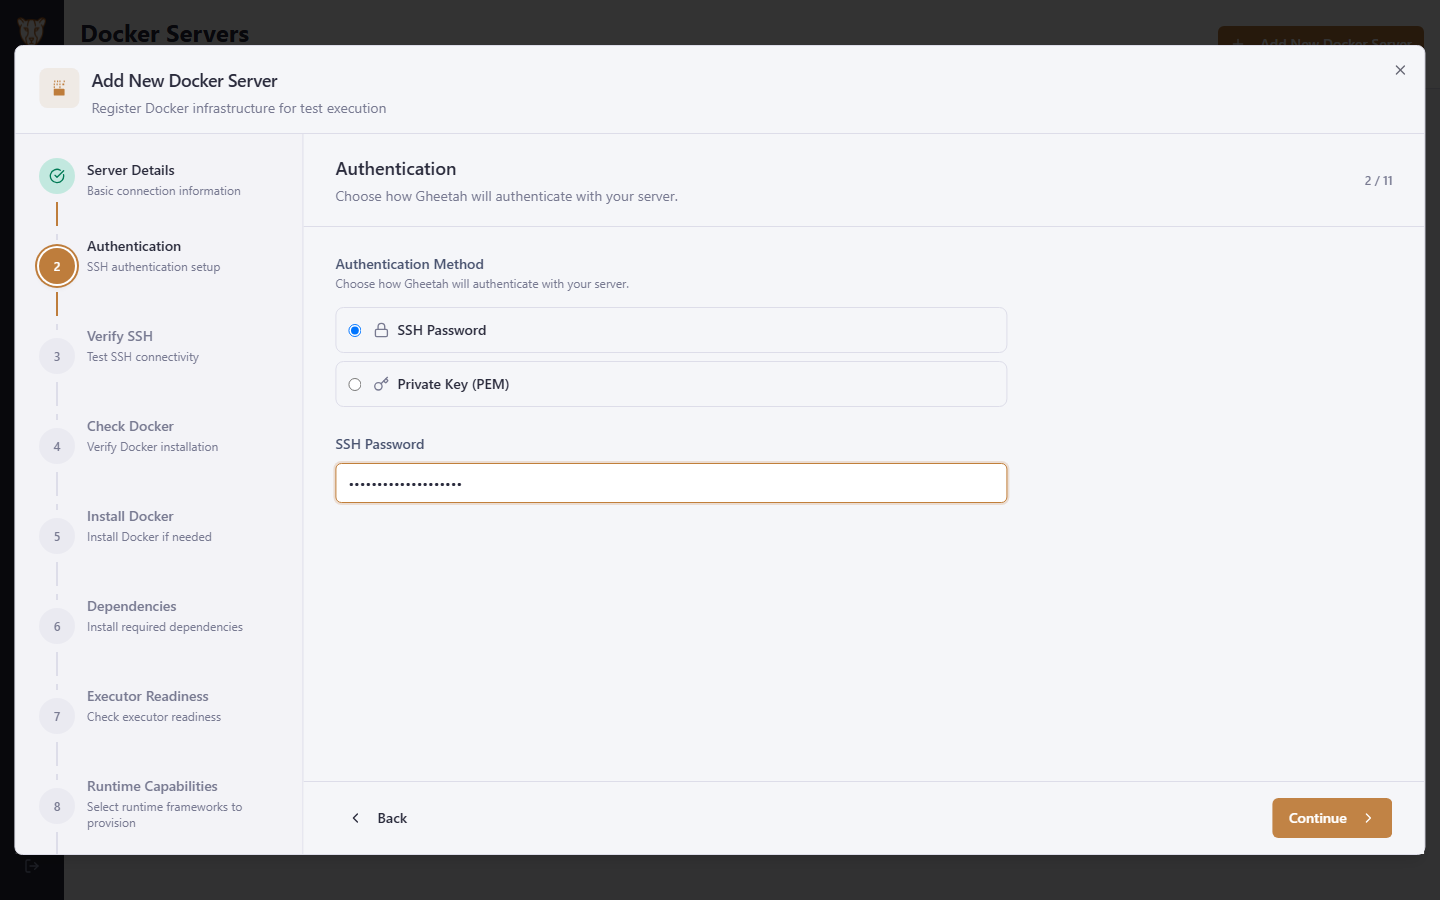
6.3 How Gheetah authenticates

A password or a private key. A key is the better choice on a shared server: it can be issued for Gheetah alone and withdrawn without changing anything else.

How Gheetah authenticates

6.4 Check that the server answers

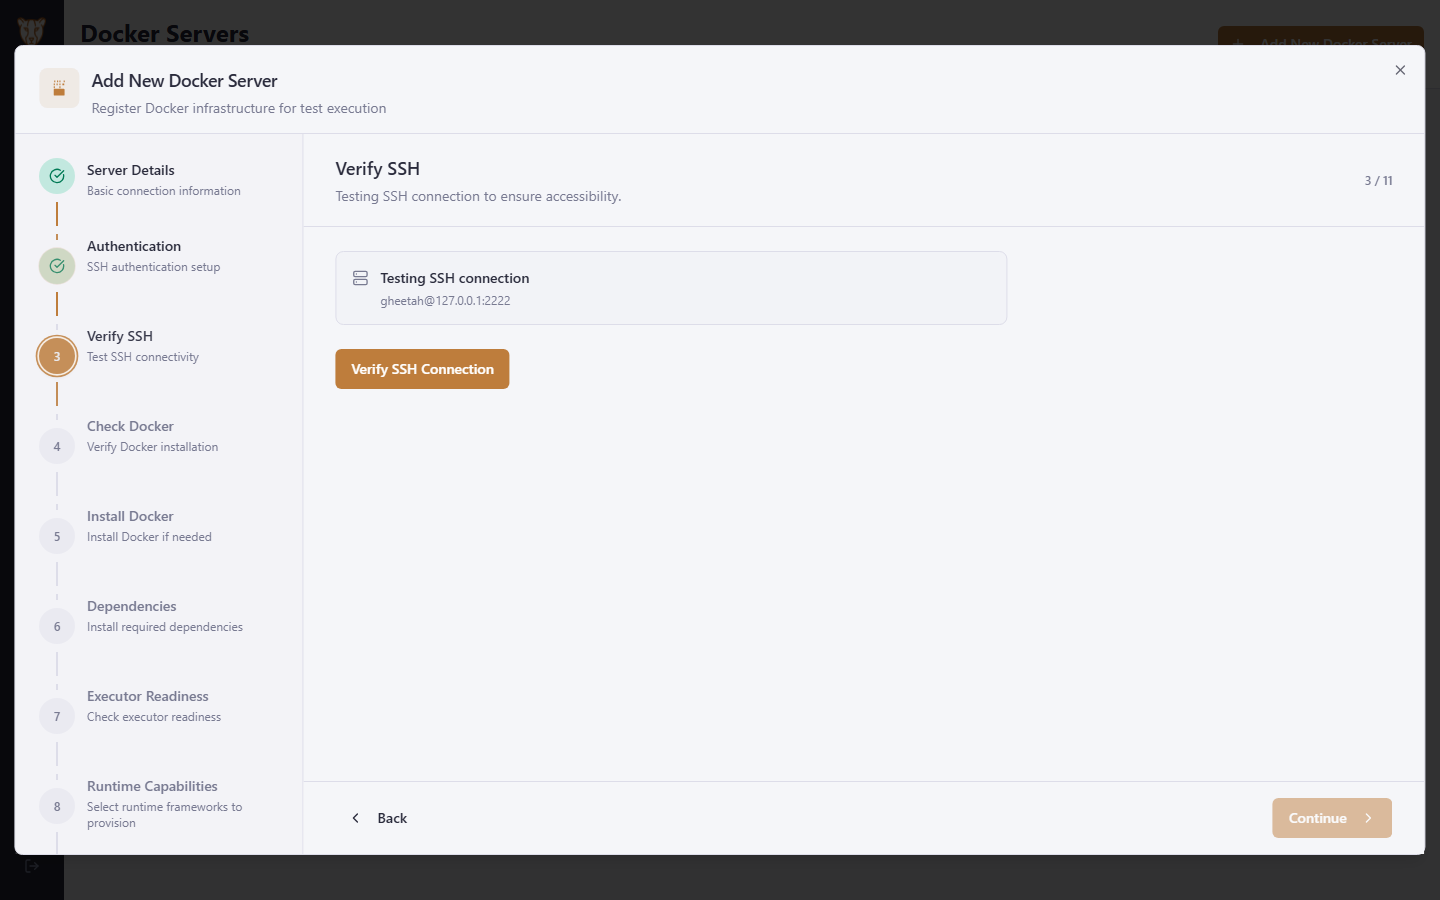
Gheetah connects before it changes anything. A failure here is a firewall, a wrong port or a wrong user — and it is better found now than half way through the setup.

Check that the server answers

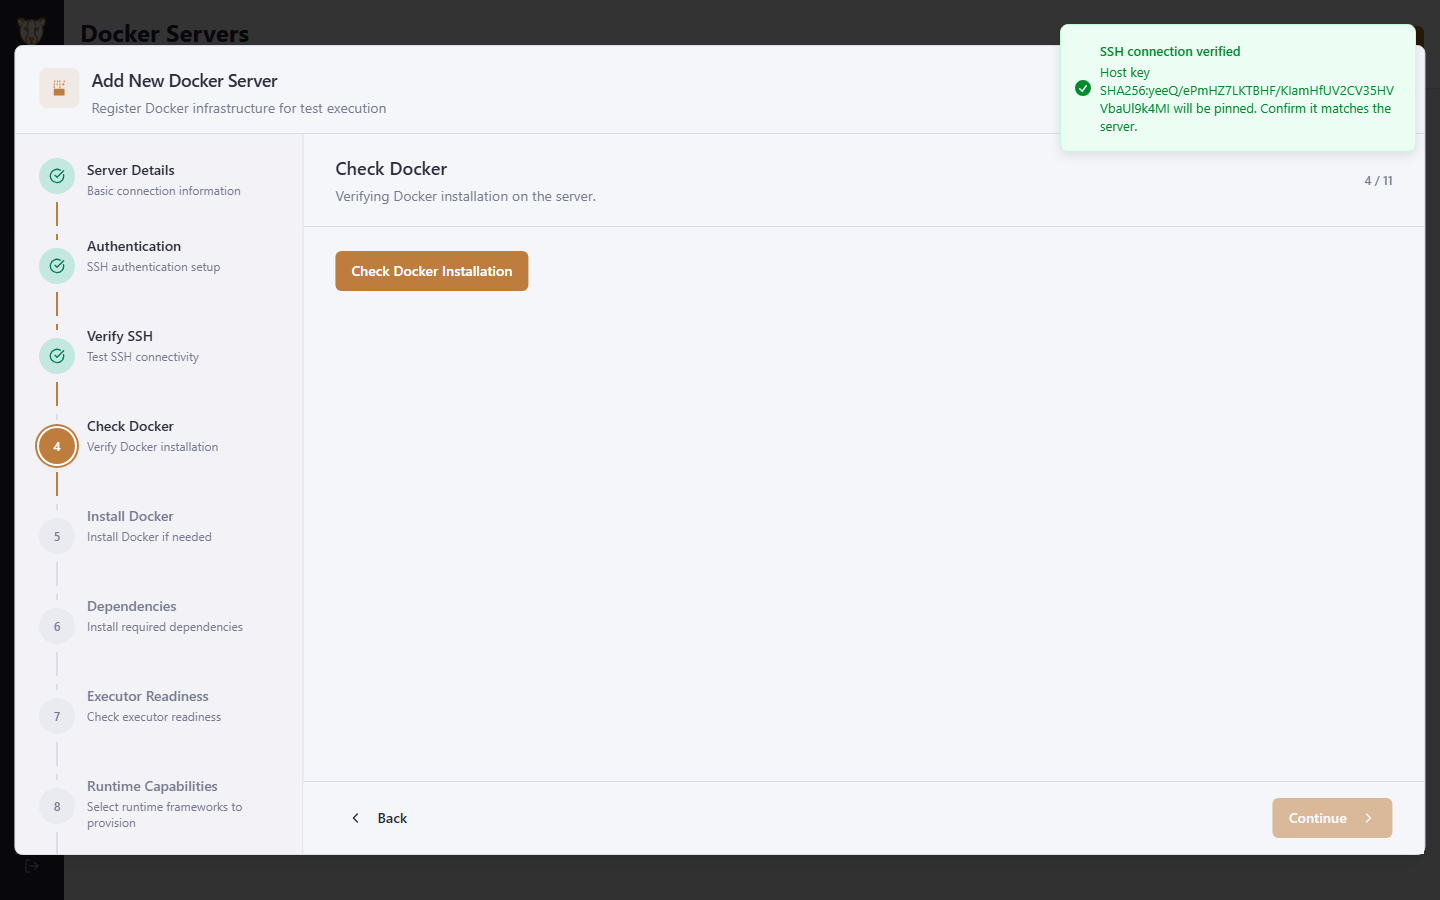
6.5 Check the server for Docker

Gheetah looks for Docker and reports the operating system it found. On Ubuntu and Debian it can install Docker itself if it is missing; on anything else it says so rather than guessing. The socket path is asked for because that is what Gheetah talks to.

Check the server for Docker

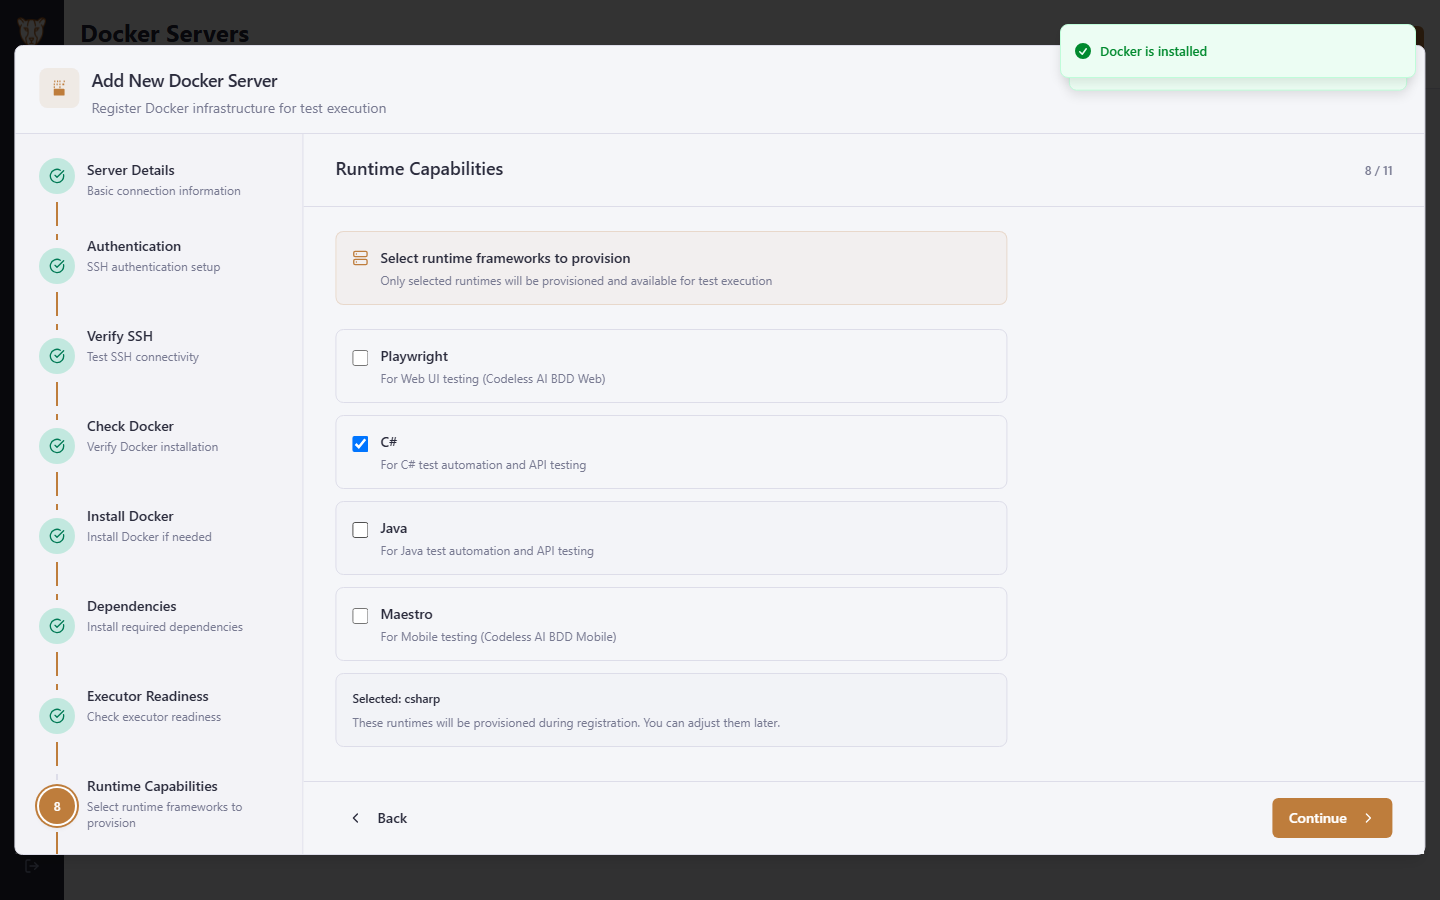
6.6 Choose the runtimes this server provides

Each runtime is a container image Gheetah builds on the server: Playwright for codeless web tests, C# and Java for the projects written in them, Maestro for mobile. Provisioning only what a server is meant to run keeps it small — a server can be C#-only and another Java-only.

Choose the runtimes this server provides

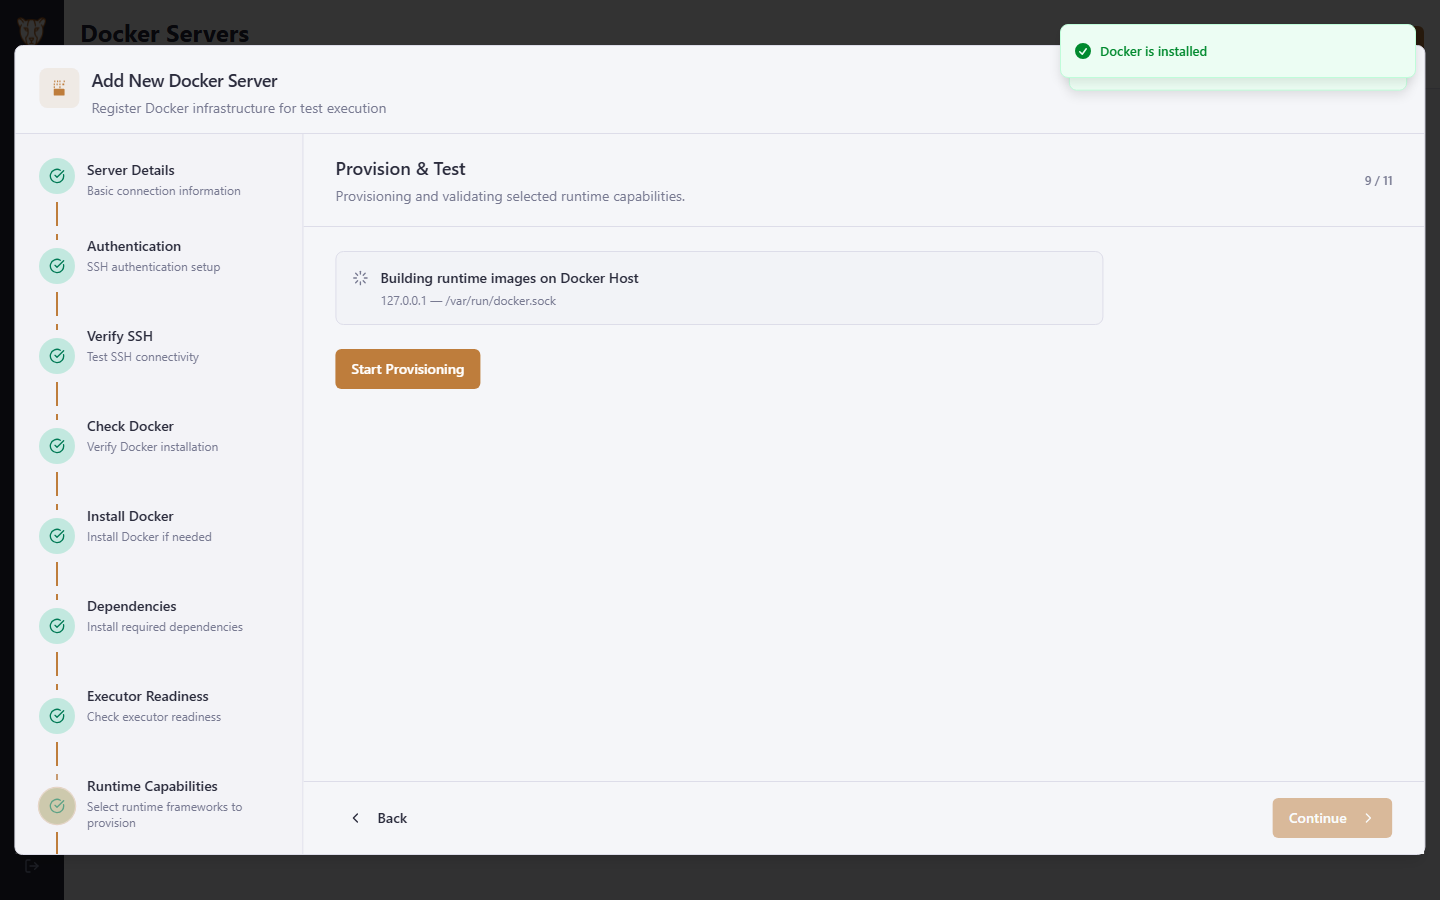
6.7 Build the runtimes on the server

The images are built on the server itself, from the Dockerfiles Gheetah ships, so the machine that runs the tests is the machine that holds them. This is the long step — the first build pulls a language SDK and installs a browser, and the server needs to reach a registry for it. If a runtime fails to build, the wizard says which one and lets you register the server anyway: readiness is remembered per runtime, and only the ready ones are offered to a run.

Build the runtimes on the server

6.8 Register the server

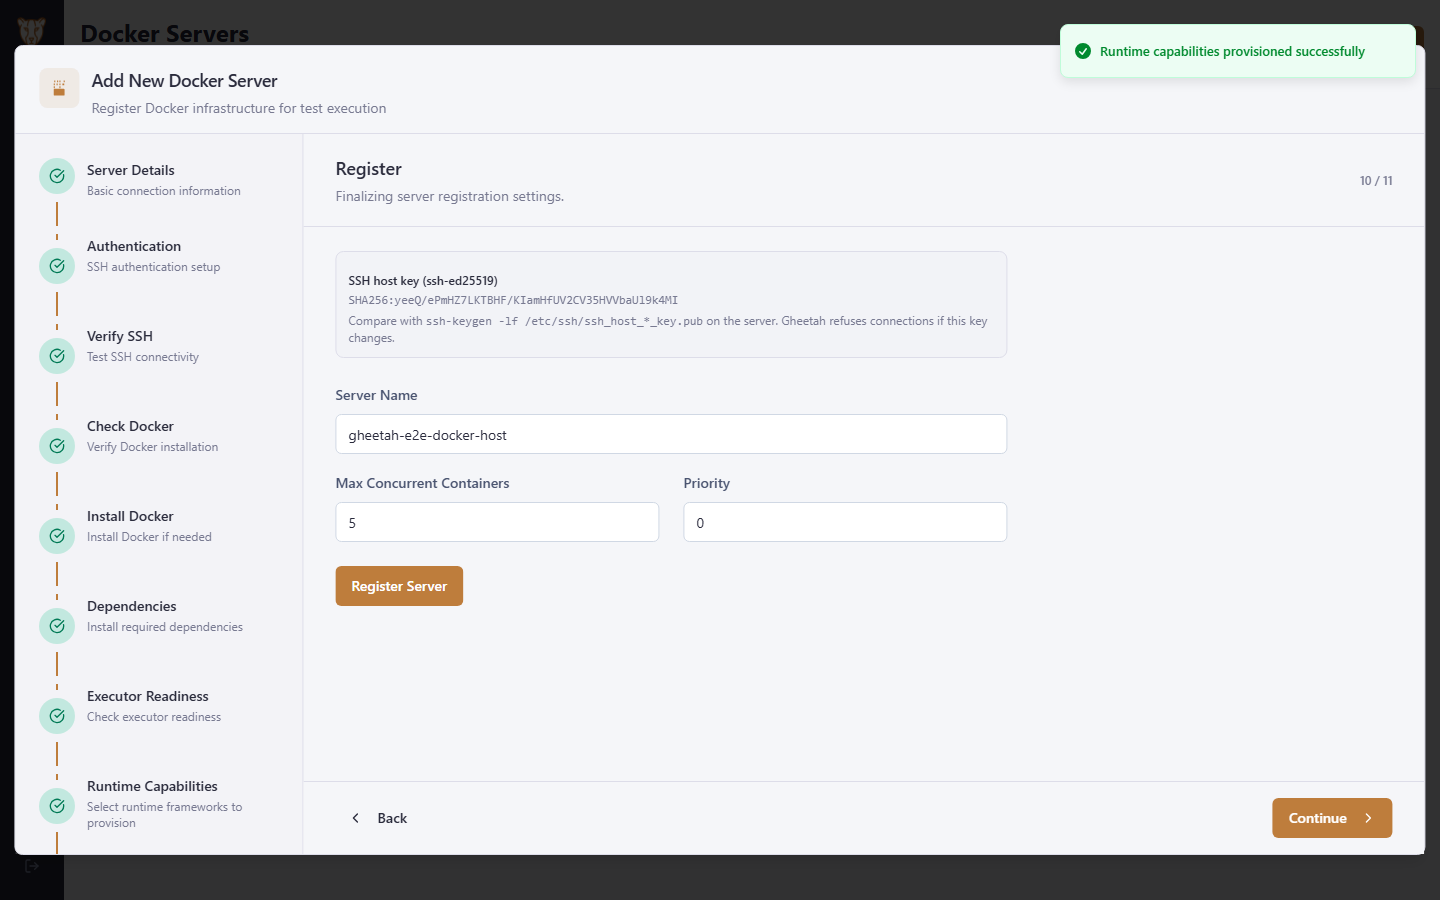
The host key fingerprint is shown so it can be compared against the server’s own — the same check an SSH client asks you to make the first time. How many containers may run at once, and the priority against other servers, decide how work is spread.

Register the server

6.9 The server is registered

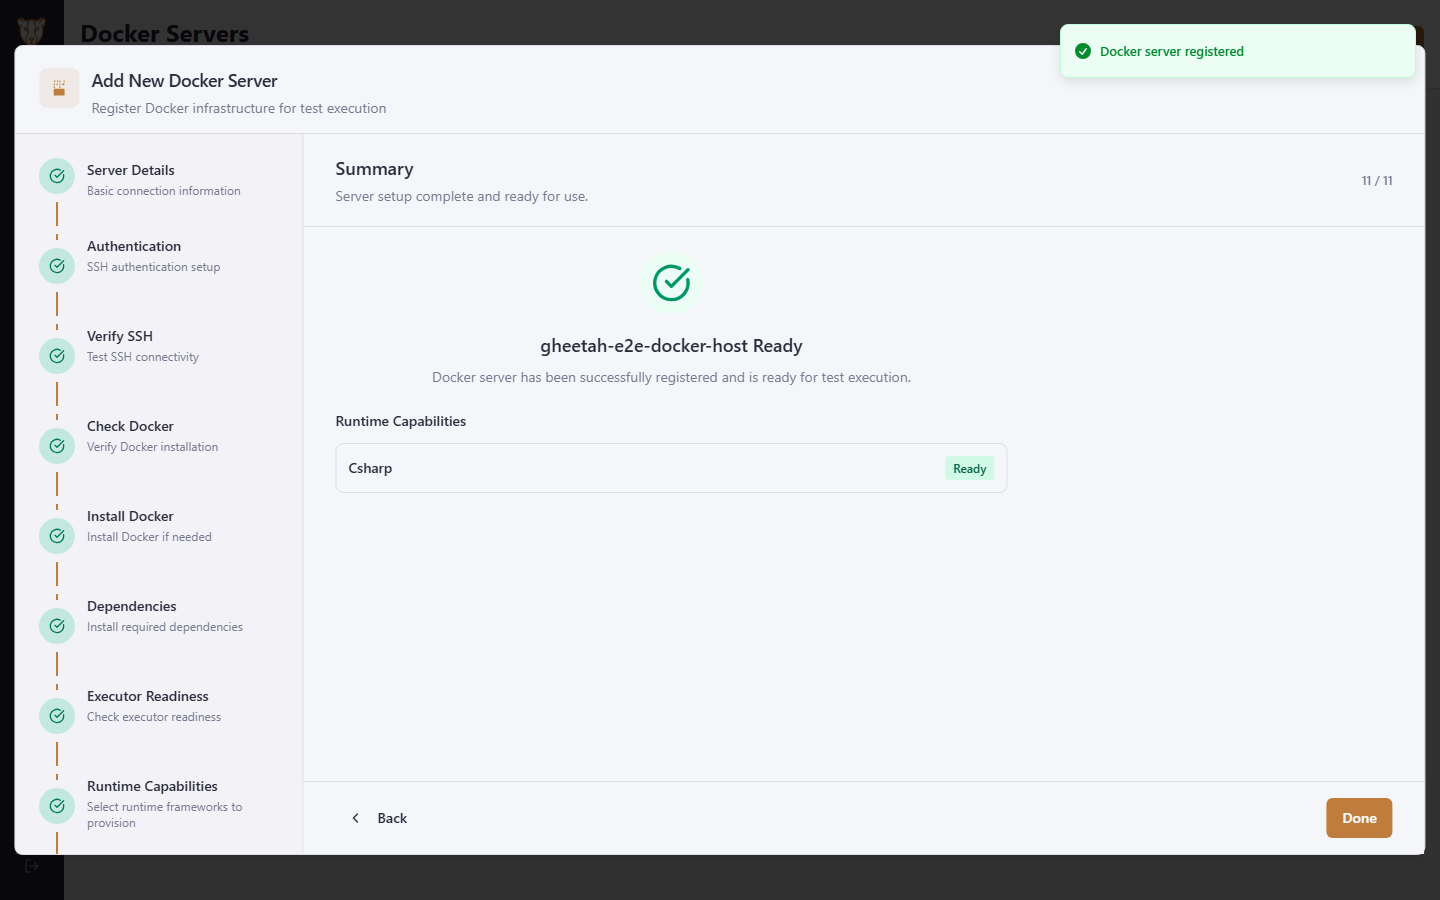
The summary says what the server can do. A runtime that built is Ready and is offered to runs from now on; one that did not is listed as failed and can be provisioned again later from the server’s own page, without going through the wizard again.

The server is registered

What the runtime images need, and the other kind of target

Runtime images are built on the server

Gheetah does not ship prebuilt runner images. Each runtime — Playwright, C#, Java, Maestro — is built on the Docker server itself from a Dockerfile Gheetah copies there. That is what lets a team pin the versions they need and audit what runs their tests, and it is why provisioning is the long step: the first build of the C# runtime pulls the .NET SDK image and installs a browser into it.

It asks two things of the server: enough disk for the images, and a Docker daemon that can reach a registry. A server behind a proxy needs Docker configured for that proxy before this step, not after. Readiness is remembered per runtime, so a server can be registered with C# ready and Java failed, and used for C# projects while Java is sorted out.

One arrangement fails for a reason worth knowing. A Docker host that is itself a container running its own daemon — Docker inside Docker, the usual shortcut for a demonstration — cannot extract the layers of the base images:

failed to convert whiteout file ".wh.PowerShell.Linux.x64.7.4.20.nupkg": operation not permitted

That is overlayfs refusing to create whiteout files on top of overlayfs, and it happens to a plain docker pull with no Gheetah involved. It is not a limit of the product or of the image: on an ordinary Ubuntu or Debian server — which is what Gheetah supports and what a team registers — the same provisioning builds and reports Ready. If you are evaluating Gheetah with a nested host and see a runtime fail here, give it a real host or a daemon of its own, and it will build.
The other kind of target: an agent

A Docker server is not the only place tests run. The GheetahAgent is a desktop application installed on a machine of your own — a tester's laptop with a particular browser and version, a Windows machine for a desktop application under test, a machine with phones attached. The agent connects back to Gheetah and waits; an administrator approves it once, and from then on it appears in the same target list the Docker servers do.
Use a Docker server when the test only needs a browser and you want runs to be identical and disposable. Use an agent when the test needs something a container cannot have: a specific operating system, a real GPU, a device plugged into a USB port, or software that is only licensed on one machine.

Execution policy

A run can be told where to go, or left to Gheetah. The policies are Docker-only, Docker-preferred, agent-only and local, and the choice is recorded with the run — so a result can always be traced back to where it ran and why that target was picked.

7

Running a scenario

Starting a single scenario, watching it run, reading its report, and looking back at the runs before it.

Watch this flow

7.1 Choose what to run it on

Run Options is where a single scenario is started. The tag filter narrows a run to scenarios carrying a tag; the execution target is the machine it runs on — a registered Docker server, or an agent on someone’s machine. Webhooks and an e-mail report can be attached to the run here too.

Choose what to run it on

7.2 Start the run

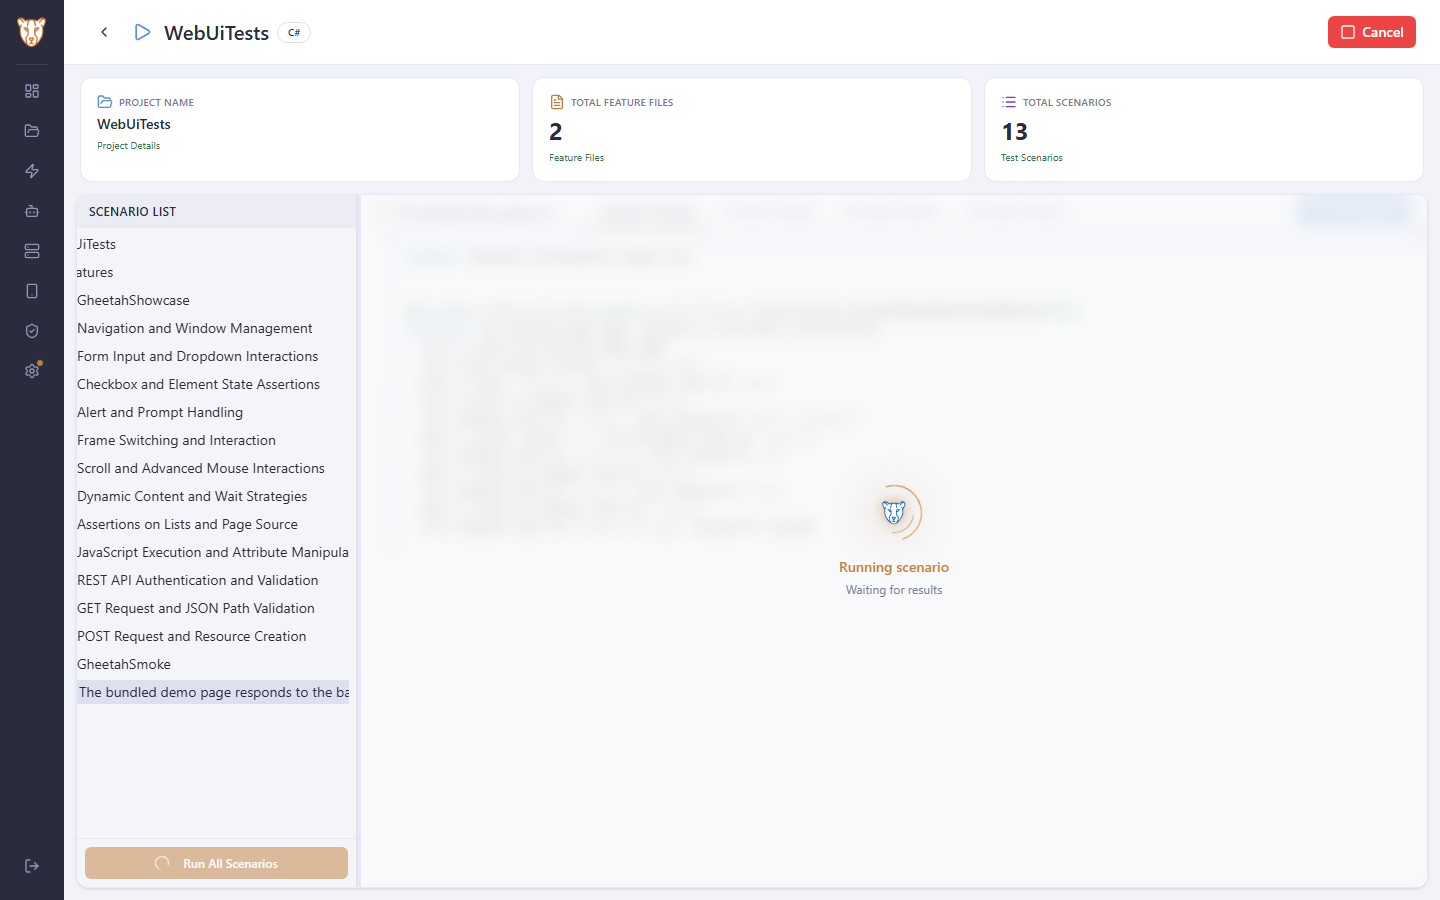
The scenario is sent to the chosen target. Gheetah copies the project into a container there, runs the one scenario, and streams the output back while it happens.

Start the run

7.3 Read the result

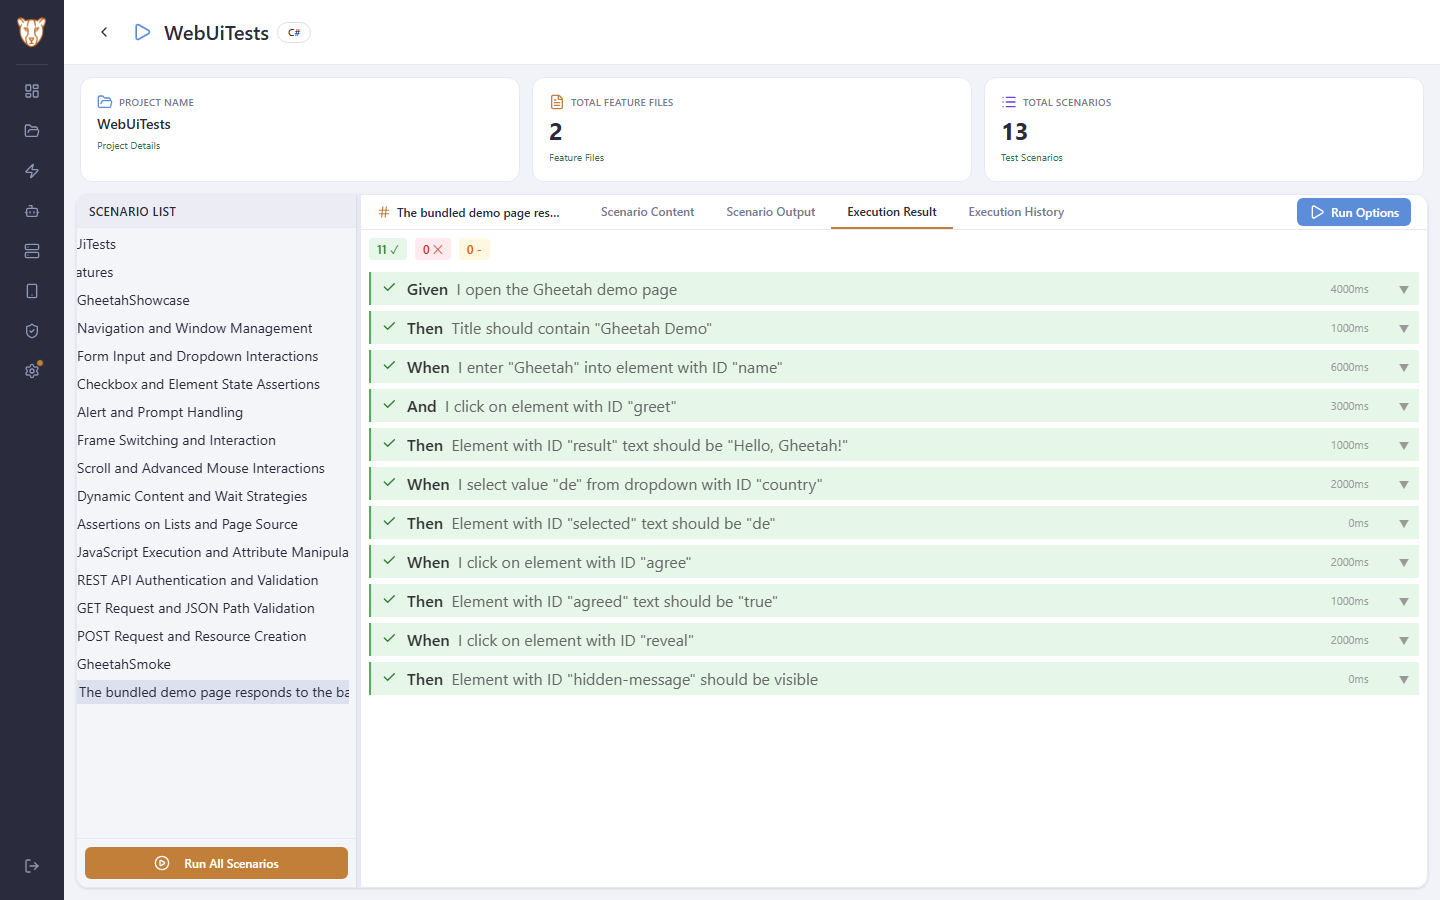
When the run finishes, Execution Result holds the BDD report: every step with its outcome, its duration, and the error message where one failed. A run that could not start says why instead of spinning.

Read the result

7.4 The run is kept

Execution History lists the scenario’s runs by date — the last 25 of them. Opening one shows that run’s own report, so the failure you are looking at can be compared with the last time it passed.

The run is kept

7.5 Ask the model what the runs say

With an AI model registered, the history can be analysed as a whole: whether the scenario is flaky, which failures recur, where the time goes and what to do next. The runs are sent as data — and through Gheetah’s redactor first, so a token a test happened to log does not reach the model provider.

Ask the model what the runs say

What else a run can be told, and where it can go wrong

One scenario means one scenario

Selecting a scenario and pressing Run Scenario runs that scenario and nothing else. It is worth saying because it was not always so: the run used to be filtered by the scenario's first tag, and since a generated project tags its whole feature @Web, asking for one scenario ran every scenario in the project that carried it. The report that came back was then somebody else's.

A run is now filtered by the scenario's title — dotnet test matches it on the display name and the fully qualified name, Cucumber on --name, Playwright on --grep. Tags still filter when a tag is what you asked for, which is what the tag filter in Run Options is.

Running more than one

Run All Scenarios runs the project. With a tag chosen in Run Options it runs the scenarios carrying that tag — which is how a team runs a smoke set, a regression set, or everything tagged for a release.

Tags come from the feature files, so the list Gheetah offers is the list your scenarios actually use.

Where a run can go wrong before it starts

  • No execution target. Nothing is registered, or nothing with the runtime this project needs. The run

fails immediately and says so rather than waiting.

  • The project does not build. A run uses the build that was made when the project was added or rebuilt; a

project listed as failed cannot be run until it builds.

  • The licence limit. A tier has a maximum number of concurrent runs; when it is reached the run is refused

with that reason rather than queued indefinitely.

Each of these is recorded with the run, so the Execution History shows why a run did not produce a report.

Notifications

A run can carry a Slack message, an e-mailed report, or both. They are chosen per run rather than configured once and forgotten, so a nightly run can notify a channel while a run someone starts by hand does not.

The Slack message carries the per-step breakdown; the e-mail carries the same BDD report the page shows.

What the analysis is given

The AI analysis reads the runs themselves — dates, outcomes, durations, which steps failed and with what message — not the reports. It sees at most the twenty-five runs the scenario keeps, and it sees them as data: the prompt says so explicitly, so a step name that reads like an instruction is reported rather than obeyed.

Everything sent goes through Gheetah's outbound redactor first. A test that logged a token, a connection string or an authorization header does not hand it to the model provider because someone asked what the runs mean.

8

Running tests on your own machines

Getting the GheetahAgent onto a machine, and how an agent becomes one Gheetah will send work to.

Watch this flow

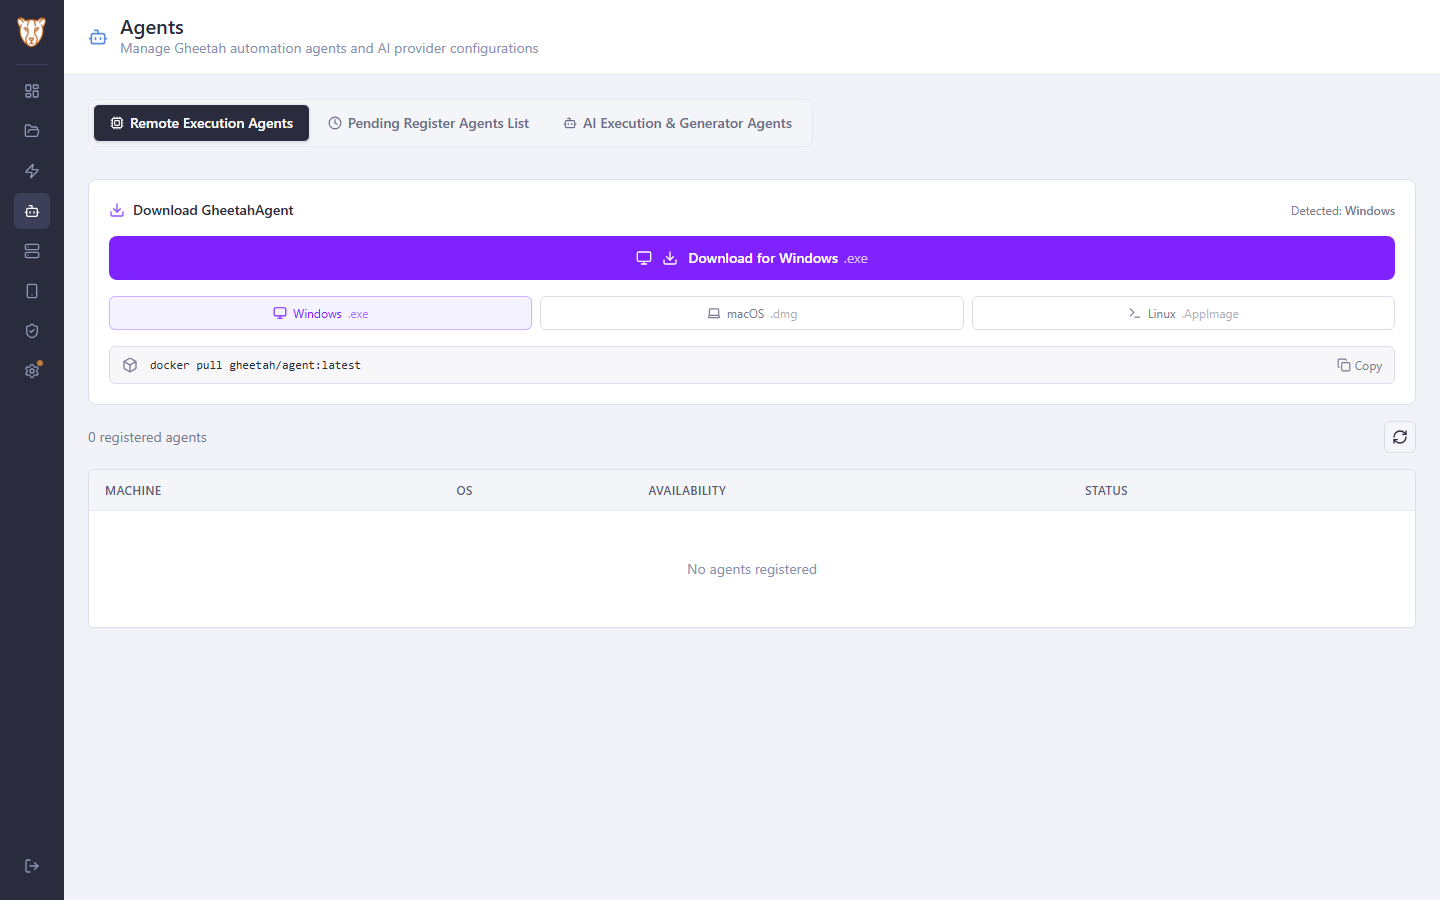
8.1 Get the agent for the machine that will run tests

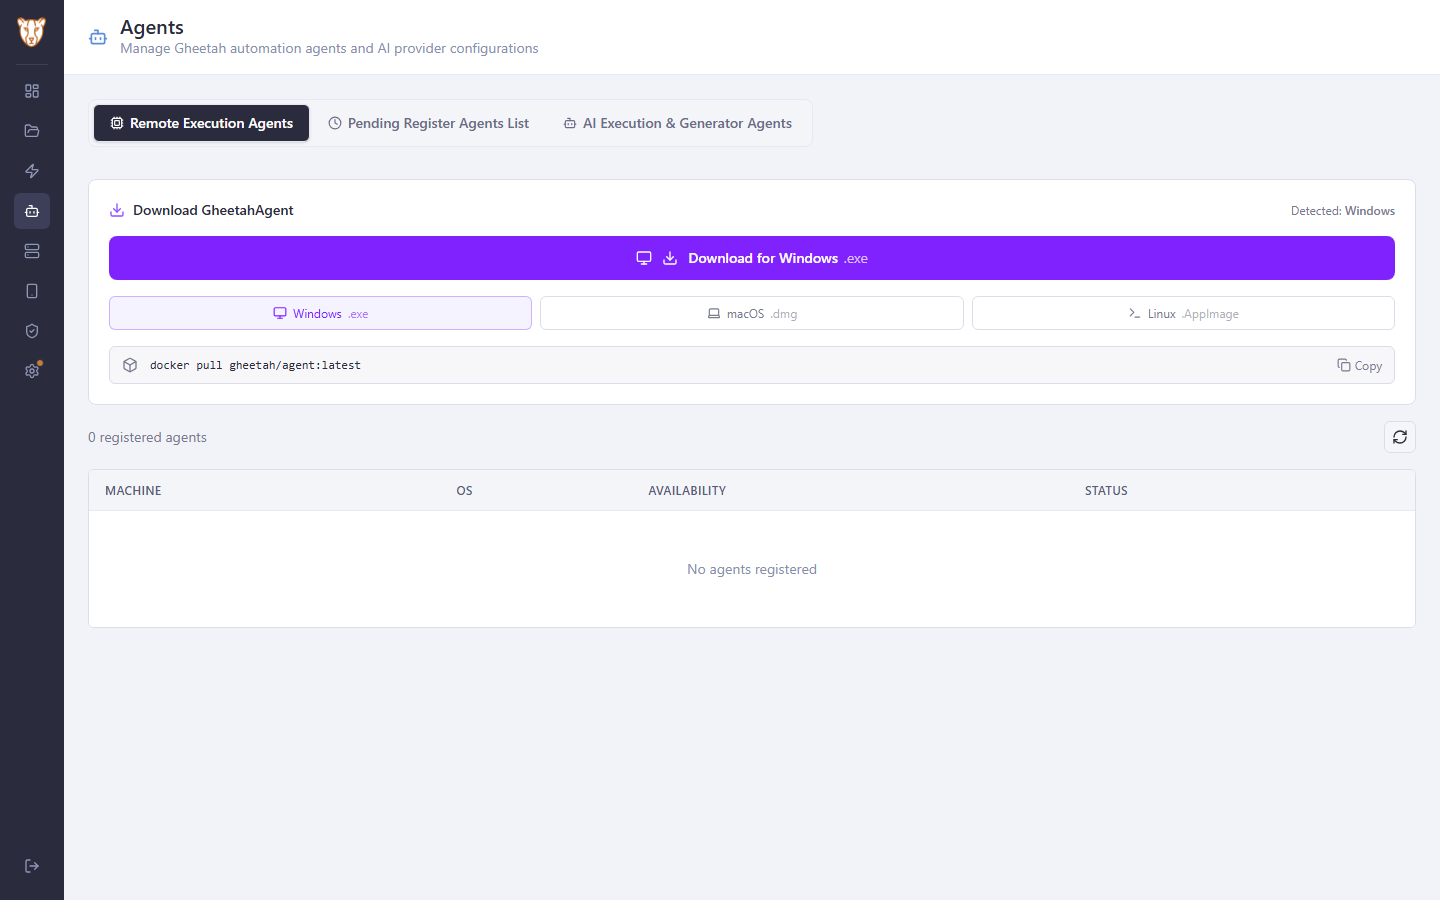
The GheetahAgent runs on the machine the tests should run on — a tester’s laptop with a particular browser, a Windows machine for a desktop application, a phone lab. Gheetah offers it for Windows, macOS and Linux, and as a container image for a machine with no desktop.

Get the agent for the machine that will run tests

8.2 No machine has registered itself yet

An installed agent asks to join, and appears here once it does. Until then Gheetah has no machines of its own to run on — which is why a new installation runs its tests in Docker.

No machine has registered itself yet

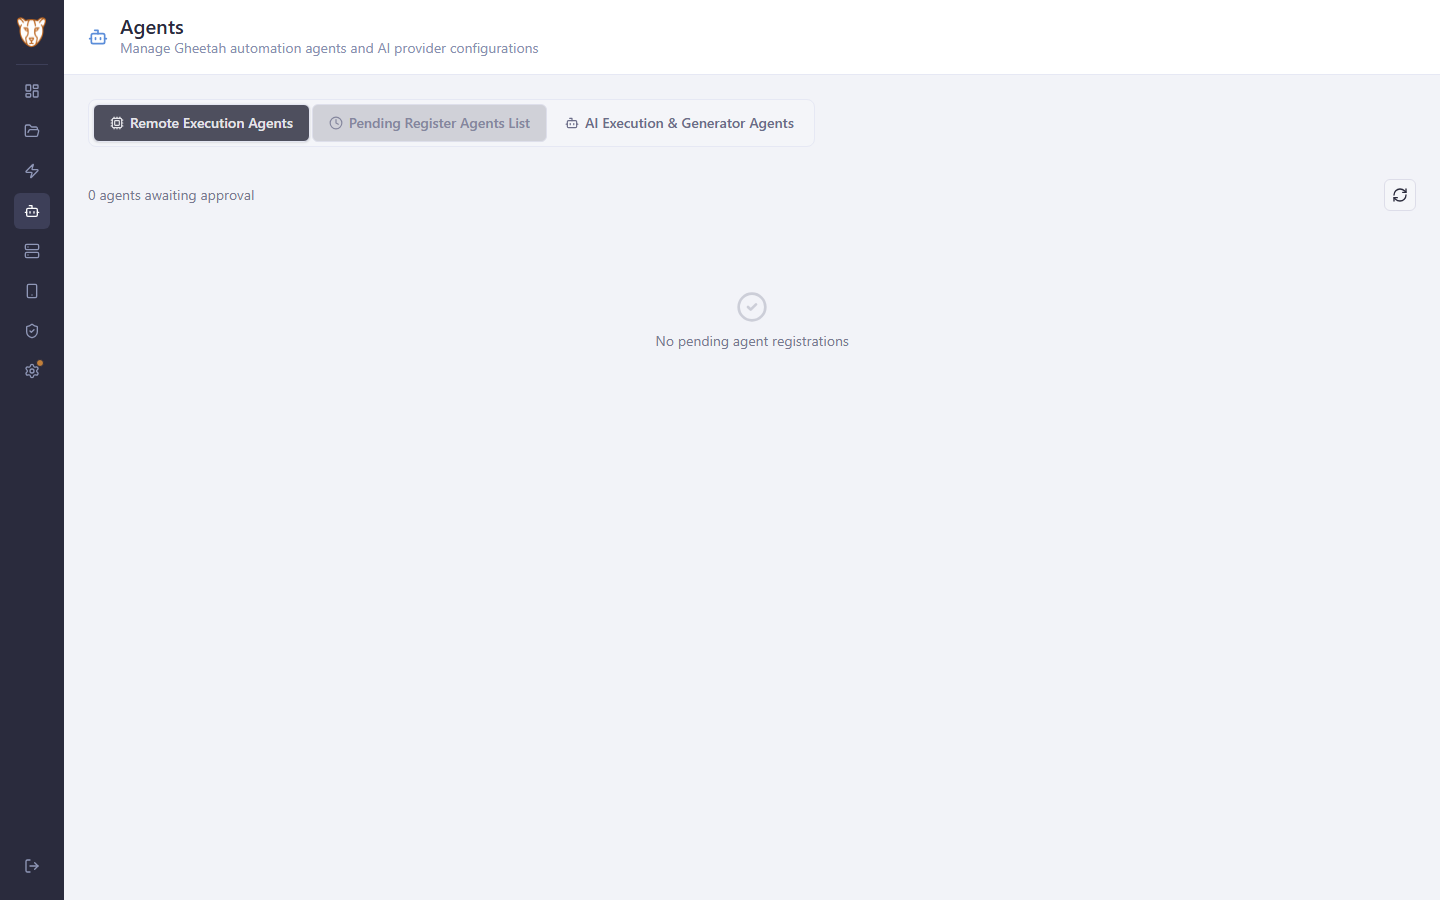
8.3 Joining is something an administrator allows

An agent that asks to join waits here until someone approves it. Nothing runs on a machine Gheetah was not told to trust, and a machine that should no longer be used is declined rather than switched off.

Joining is something an administrator allows

Getting an agent from installed to trusted

The walkthrough shows the download and the empty lists, because an agent has to be installed on a machine before there is anything to approve. These are the steps on that machine.

Install it

Download the build for the machine's operating system — Windows .exe, macOS .dmg, Linux .AppImage — or run the container image on a server with no desktop. The agent updates itself once it is connected, so this is done once per machine.

Point it at Gheetah

On first start the agent asks for the address of the Gheetah installation. It generates its own key, keeps the private half on the machine, and sends the public half with its request to join. The secret never travels.

Approve it

The request appears under Pending Register Agents List with the machine's name and operating system. Approving it is what makes the machine usable; until then it can connect and do nothing. A machine that should not be there is declined, and declined machines are listed separately rather than forgotten.

Use it

An approved agent appears in the Run Options target list beside the Docker servers, with how many runs it will take at once. It reports its own availability, so a laptop that is closed simply stops being offered.

Withdrawing a machine

Removing an agent stops new work reaching it immediately; runs already on it finish. Nothing has to be uninstalled on the machine itself for it to stop being trusted.

9

Administering the installation

Adding people, deciding what each group may do, and reading the activity log.

Watch this flow

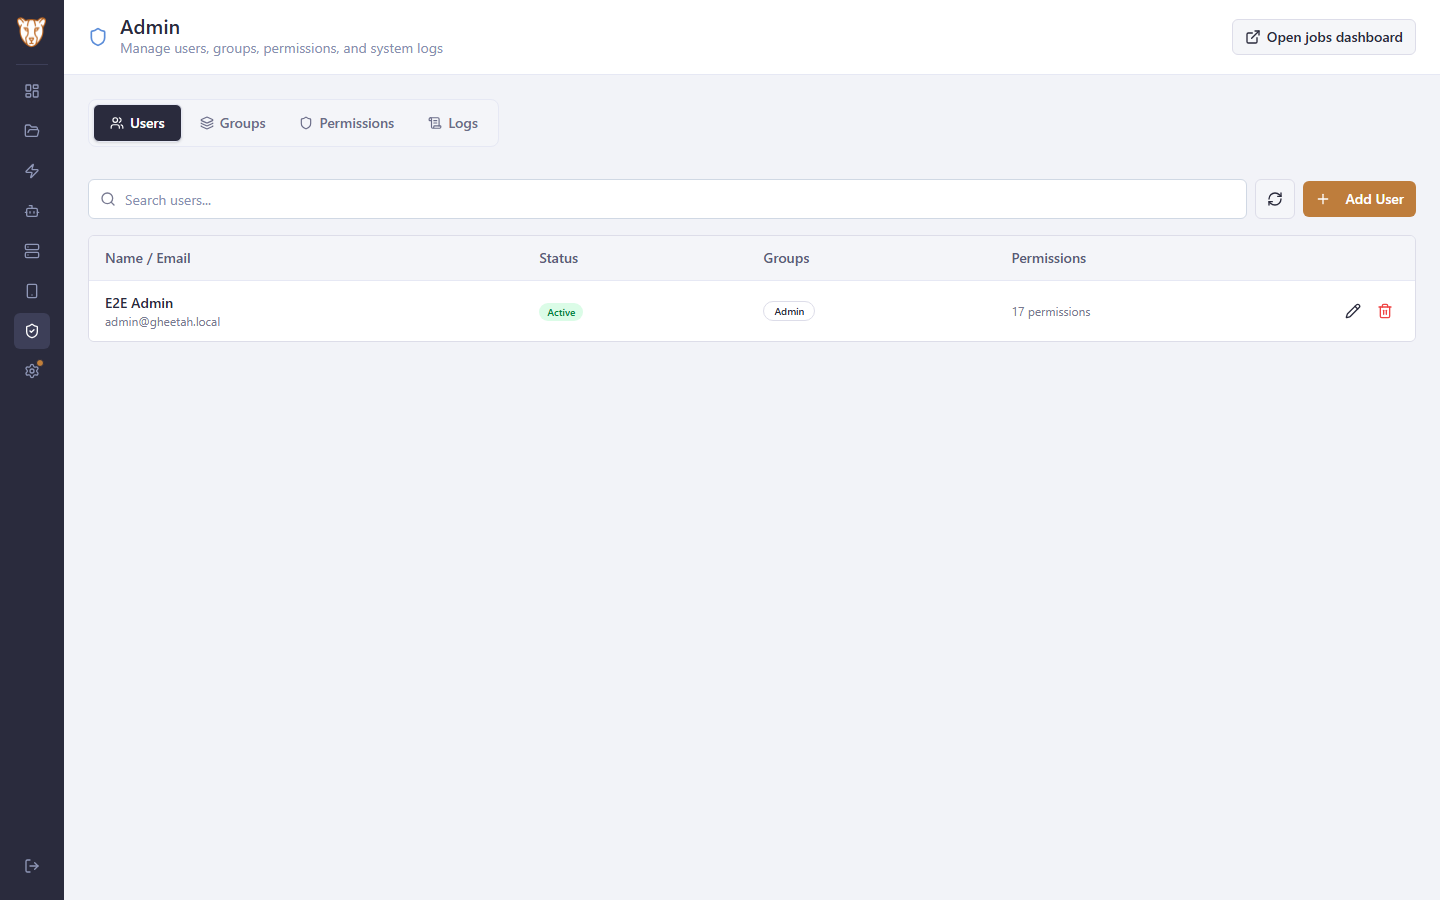
9.1 The people who use the installation

Users lists every account with the groups it belongs to and how many permissions that adds up to. Add User creates a local account; with Azure AD, Google or SSO configured, people arrive the first time they sign in and are put into groups here.

The people who use the installation

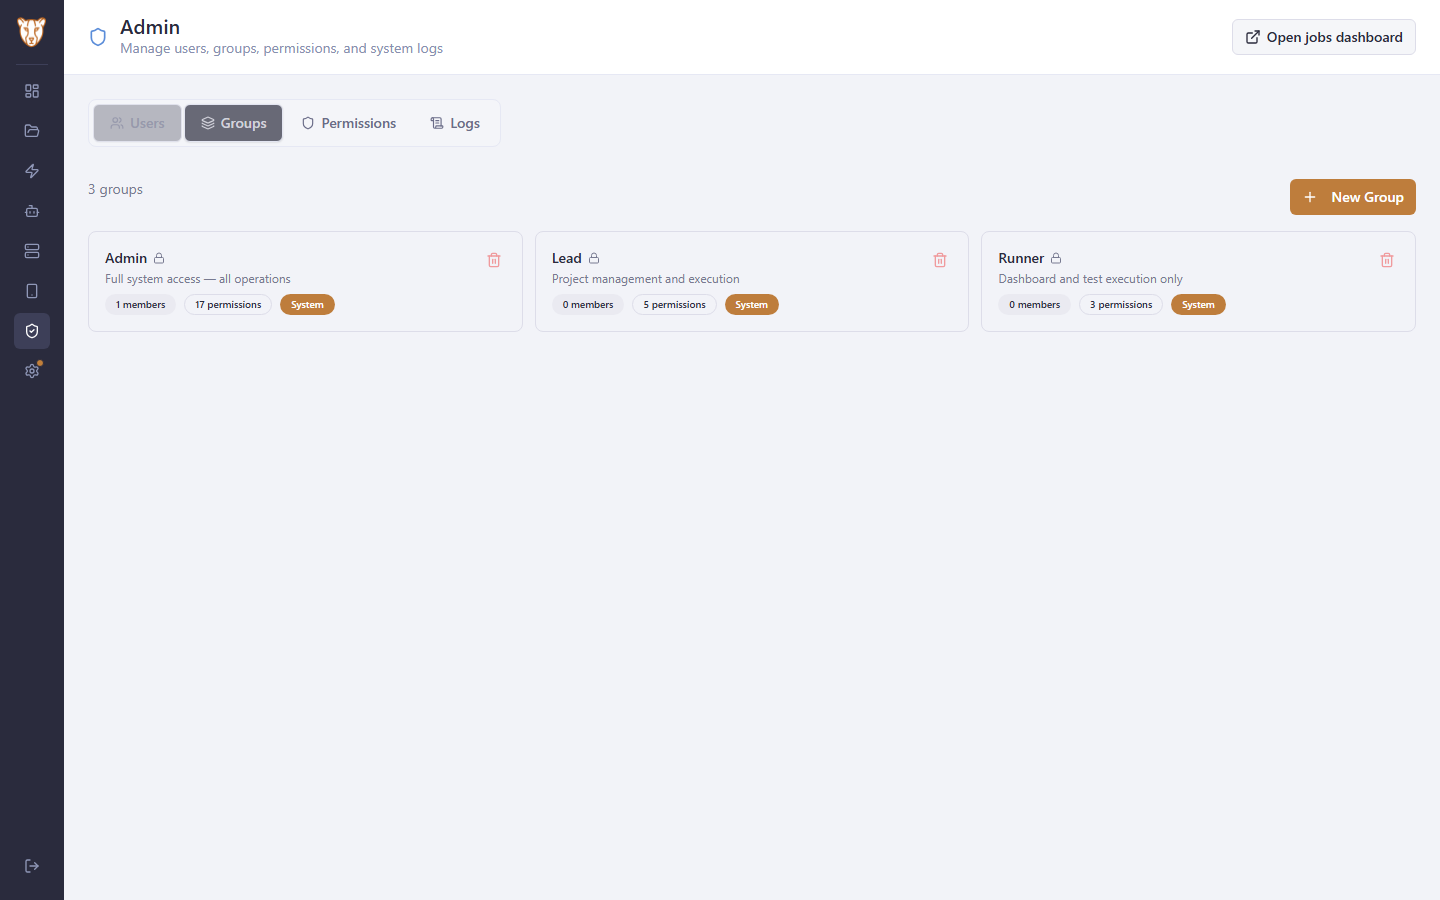
9.2 The groups that decide what they may do

A group is a named set of permissions — the three the installation started with can be renamed, and more added. Nobody is given permissions directly; they come from the groups a person is in, which is what keeps an installation with many people reviewable.

The groups that decide what they may do

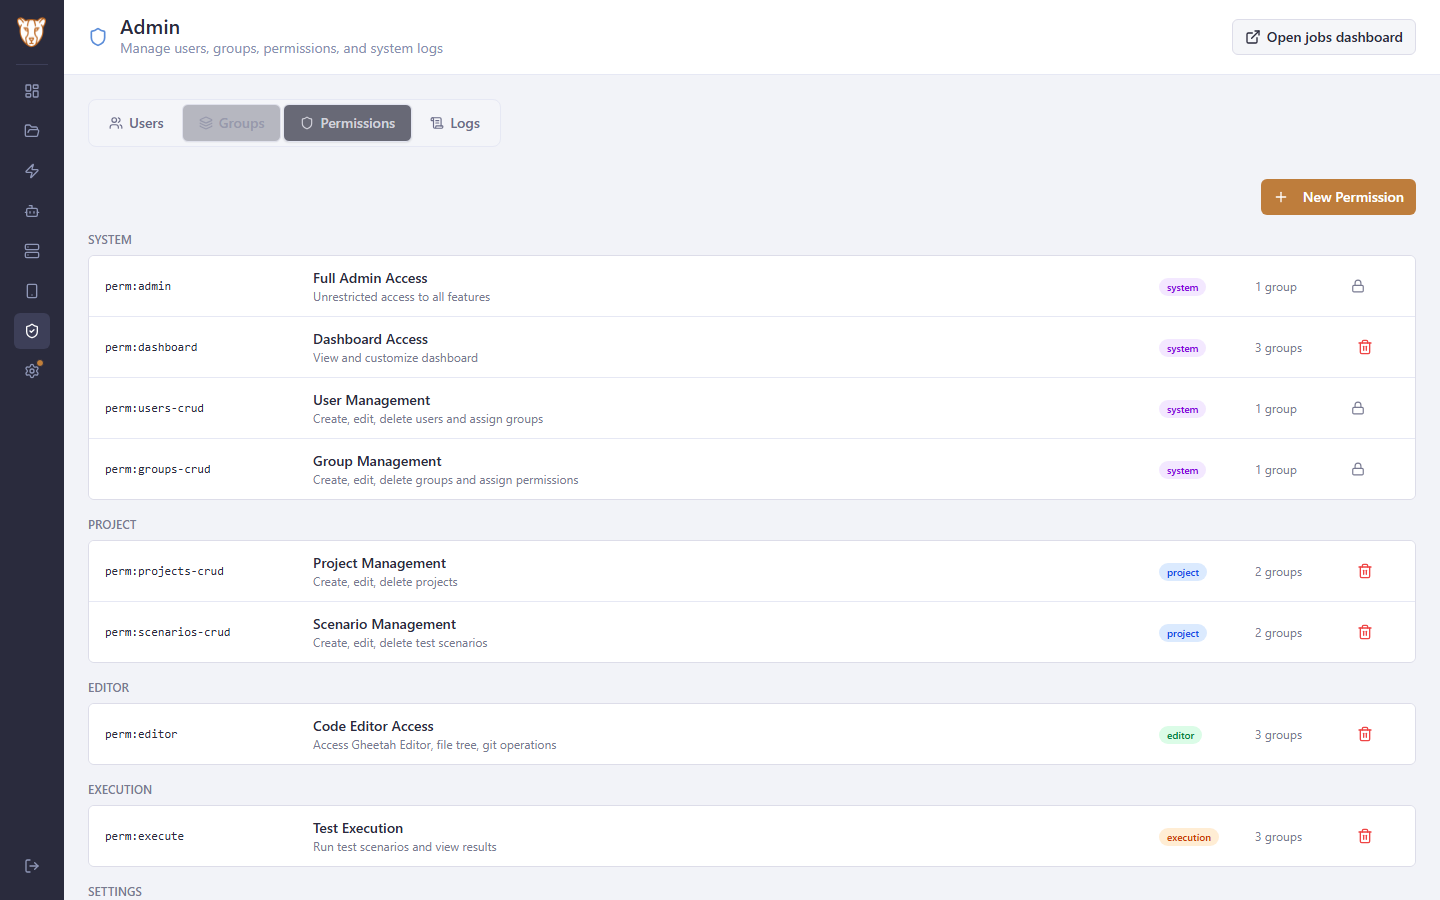
9.3 What each permission allows

The permissions themselves: execution, project management, the code editor, agents, the device hub, Docker infrastructure, settings and administration. Gheetah checks these on the server for every request — what the interface offers follows from them, not the other way round.

What each permission allows

9.4 What has been done

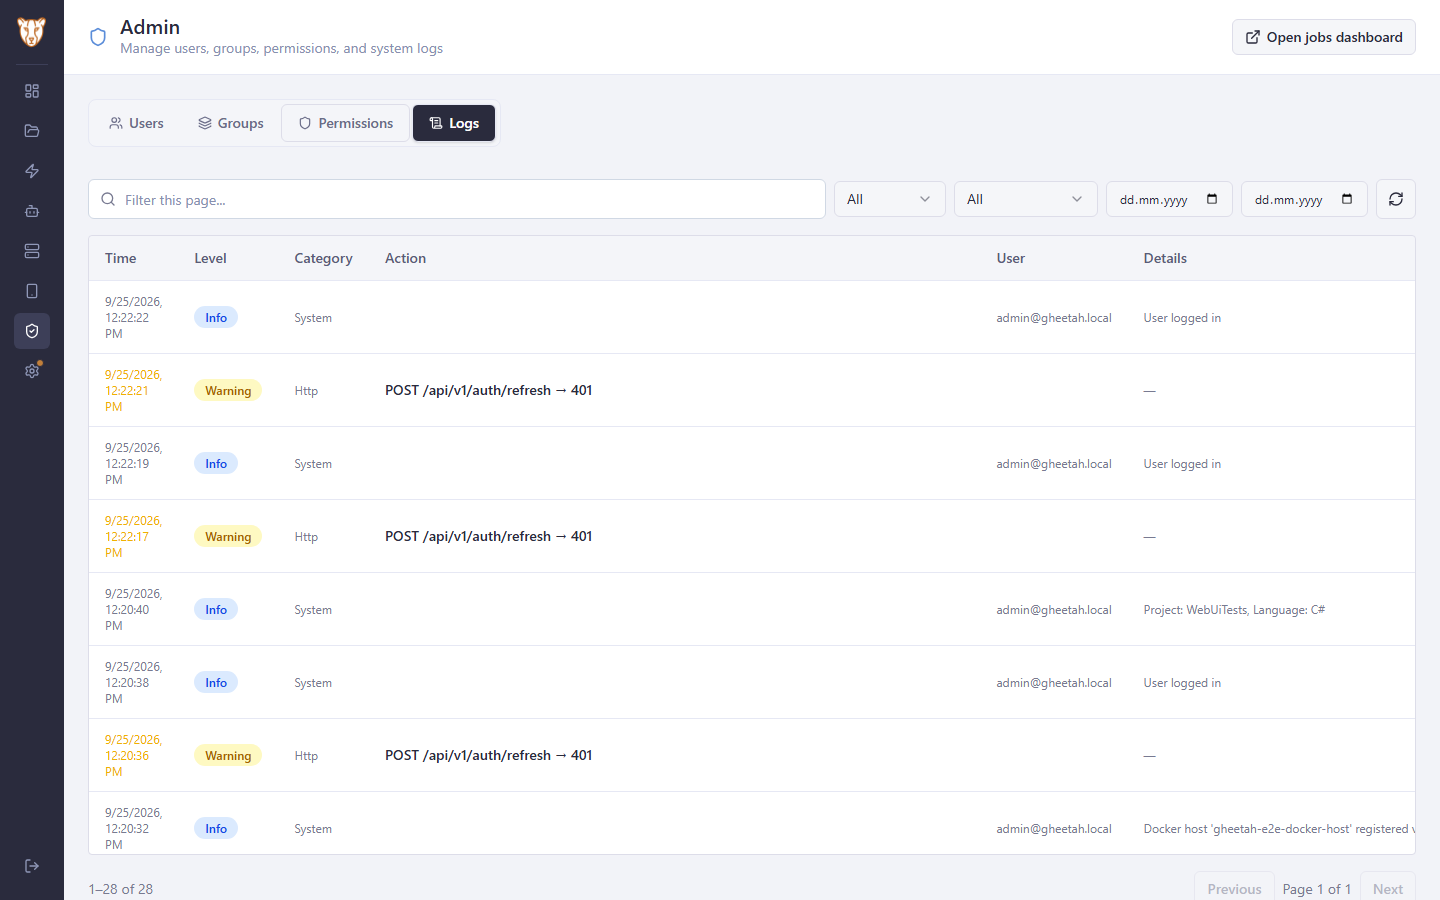
Every sign-in, every project created, every run started and every setting changed is recorded with who did it and when. The list is filtered by level and date and paged by the server, so it stays usable on an installation that has been running for a year.

What has been done

Things worth knowing about administration

Permissions are enforced on the server

What a group may do is checked on every request, by the server. The interface follows from the permissions — a person without execution permission is not shown a Run button — but the button is not what protects anything. This matters when Gheetah is driven from a pipeline with an API key: the key gets exactly the permissions of its group, and no more.

Groups, not people

Permissions are granted to groups and people are put into groups. On an installation using Azure AD, Google or SSO, directory group membership can be mapped onto Gheetah's groups, so joining a team in the directory is what grants access here.

The activity log

Sign-ins, project creation, runs, setting changes and administrative actions, each with who did it and when. The log grows without bound, so it is filtered and paged by the server, and a retention window can be set to prune it on a schedule.

Backup

Gheetah's own data — projects, users, groups, settings, execution history — can be exported and restored from Admin. On a JSON installation this is the Data folder; on a database it is a provider-level export, so a backup taken on one provider can be restored onto another.

The jobs dashboard

Background work — scheduled runs, retention, Docker host maintenance — runs through Hangfire, and its dashboard is reachable from Admin for anyone with administrative permission. It is where a job that did not run is explained.

10

Settings and licensing

Where the installation is configured, and what each licence tier includes.

Watch this flow

10.1 What can be configured

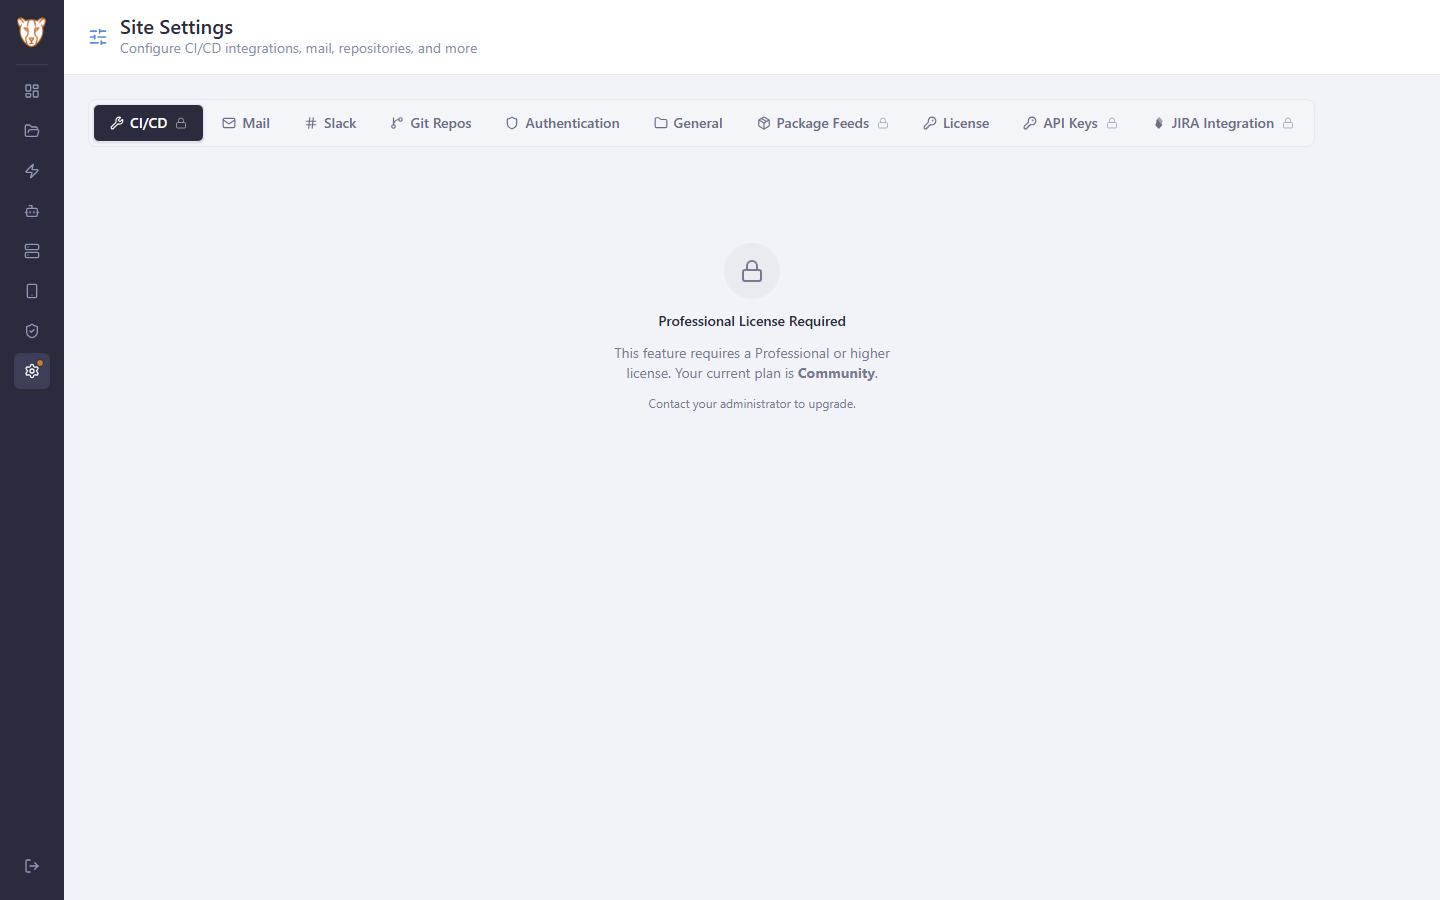
Settings gathers everything the installation needs to talk to the rest of your estate: CI/CD, mail, Slack, Git repository connections, how people sign in, the project folder, private package feeds, the licence, API keys and JIRA. Some of them are licence-gated and say so rather than hiding.

What can be configured

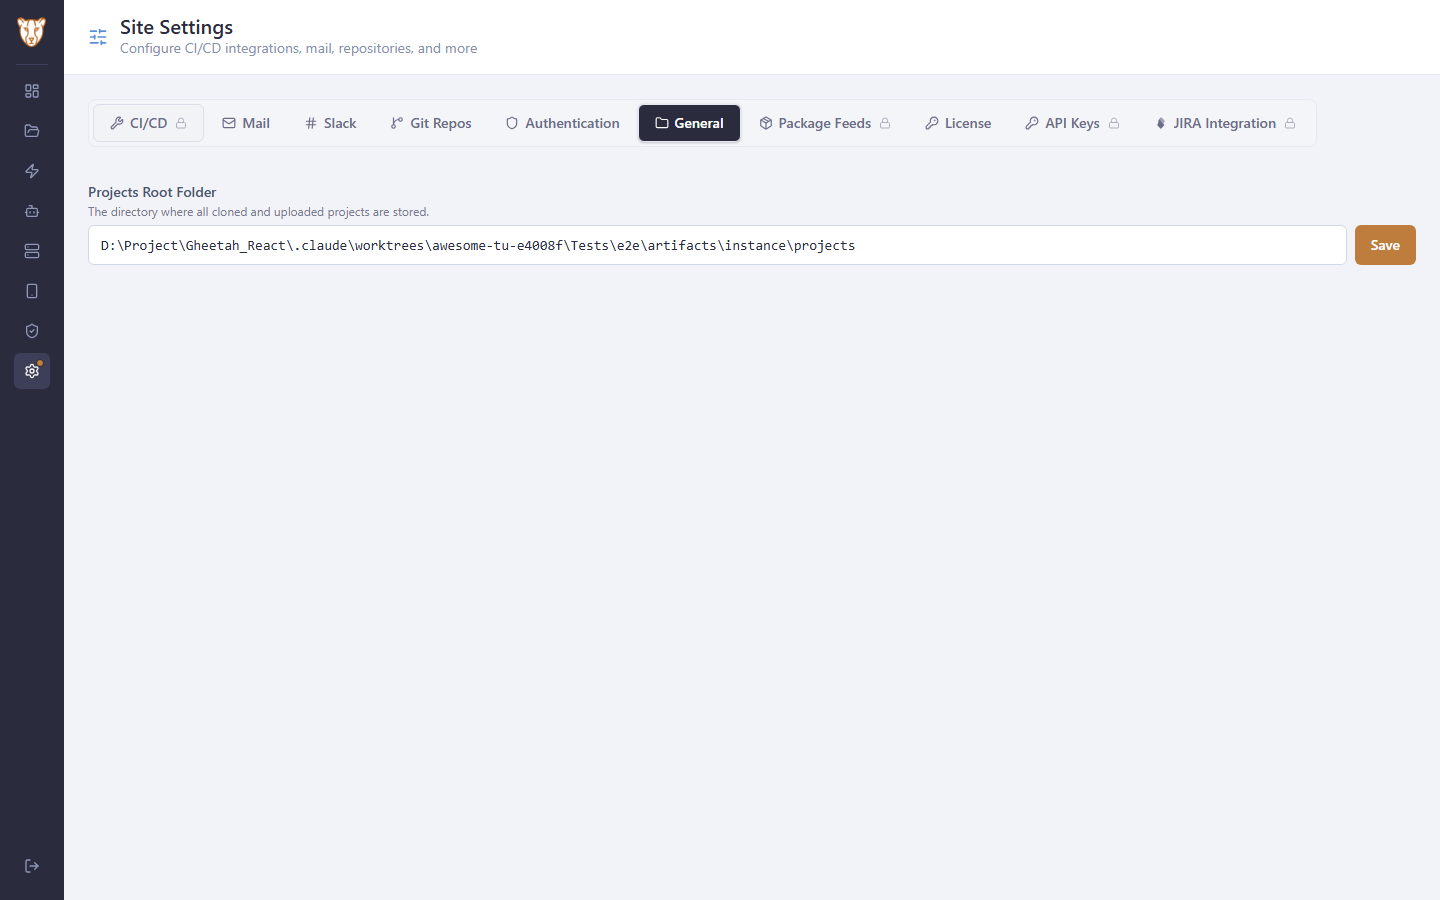
10.2 The project folder, after the installation

The folder chosen during the first installation can be changed here. Gheetah creates it if it does not exist yet, so a folder that has only been typed is a folder that works.

The project folder, after the installation

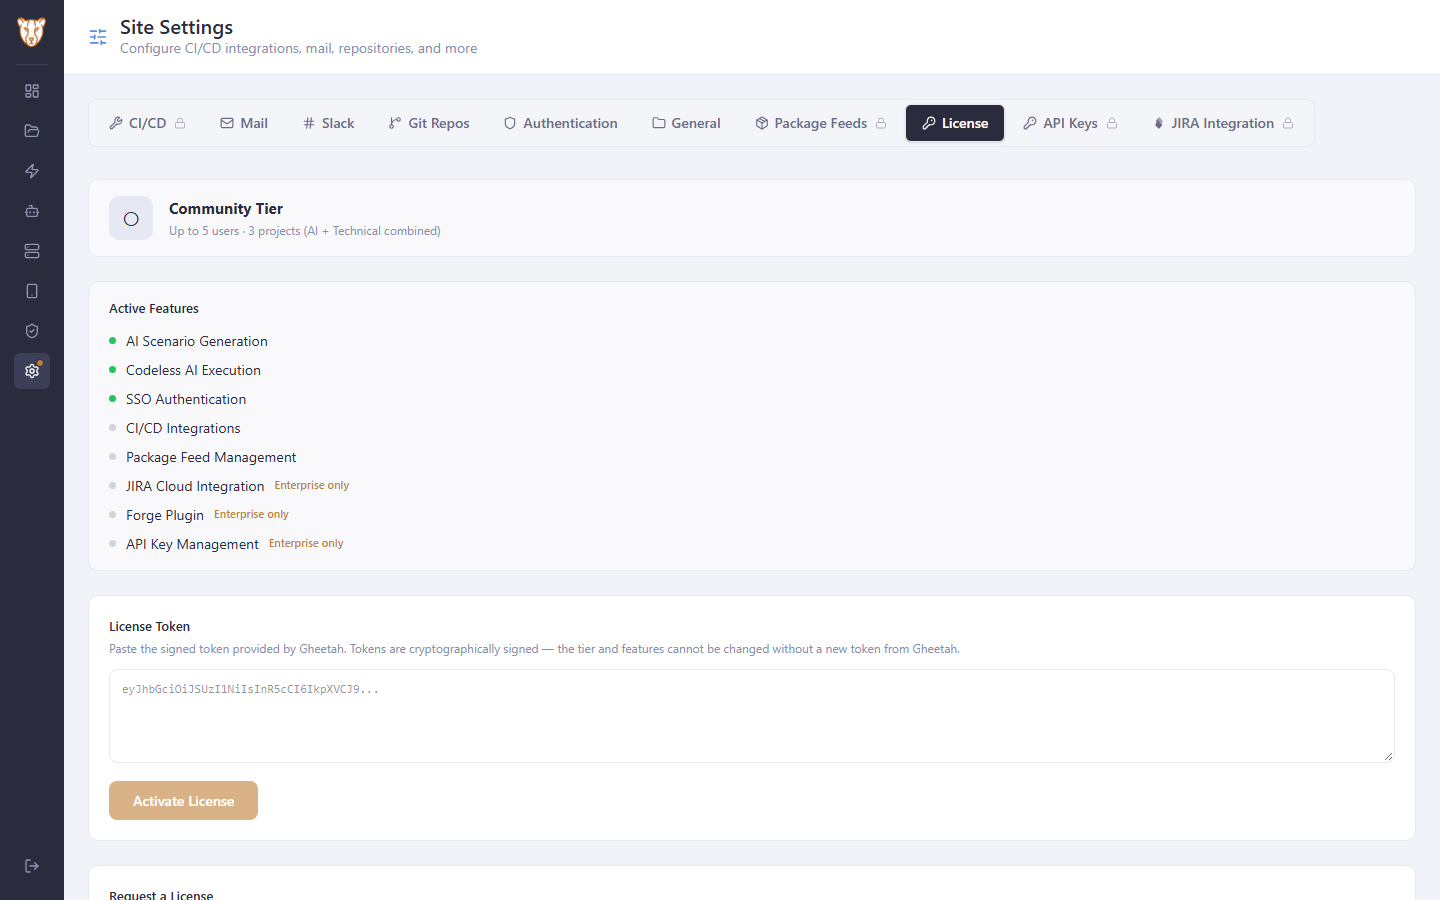
10.3 The licence and what it opens

A fresh installation is on the Community tier: up to five people and three projects, and rather more than that suggests — AI generation and codeless execution, the editor with its pull requests, the run history and its analysis, and signing in through Azure AD or Google. CI/CD integrations, private package feeds and Device Hub come with Professional; JIRA and the Forge app, API keys, MCP nodes and the MongoDB and Cosmos DB stores with Enterprise. A licence is a signed token — the tier and its features cannot be edited into place, only replaced by a new token.

The licence and what it opens

The settings the walkthrough passed by

Mail

An SMTP configuration, used for two things: sending an execution report when a run asks for one, and sending a licence request to Gheetah. Several configurations can exist — a team's own relay for reports, the corporate one for anything leaving the building.

Slack

Incoming webhooks. A run can be told to notify one or more of them, and the message carries the scenario, the outcome and the failing steps. Webhooks are stored encrypted and are never shown again after they are saved.

Git Repos

The connections to GitHub, GitLab, Bitbucket and Azure DevOps that the Clone tab offers. Configured once, with a token stored encrypted, so nobody has to paste credentials into a project form.

Authentication

What was chosen during the first installation, changeable afterwards: local accounts, Azure AD, Google, or a generic OpenID Connect provider. Changing it does not delete the accounts that exist.

Package Feeds

Private NuGet and Maven registries. A feed configured here is offered when a project is built, so a build that needs a company package does not need the credentials written into the project.

API Reference — API Keys

Keys for driving Gheetah from a pipeline: start a run, read a result, list projects. Each key carries the permissions of the group it is issued for, so a key can be narrower than the person who created it.

JIRA Integration

Links scenarios and runs to JIRA issues, and pushes results back as comments or status transitions. An Enterprise installation can also publish the Forge plugin, which brings the same view inside JIRA itself.

Licence tiers

CommunityProfessionalEnterprise
People515, plus $19.99 a seatunlimited
Projects310, plus $19.99 a projectunlimited
C#, Java and Playwright projectsyesyesyes
Docker and agent executionyesyesyes
Single sign-on (Azure AD, Google)yesyesyes
AI generation and codeless executionyesyesyes
The editor, with pull requests and reviewyesyesyes
Execution history and AI analysisyesyesyes
JSON, SQLite, PostgreSQLyesyesyes
CI/CD integrationsnoyesyes
Private package feedsnoyesyes
Device Hub — register machines and devicesnoyesyes
More than one AI model providernoyesyes
JIRA and the Forge appnonoyes
API keysnonoyes
Device Hub control — drive a device, run Maestrononoyes
Self-hosted MCP nodesnonoyes
MongoDB and Cosmos DBnonoyes

A tier includes everything the tiers below it have: the check is a rank comparison, so Enterprise has what Professional has, and both have what needs no licence at all.

Single sign-on is on that last list. It is chosen on the first screen of the setup wizard and nothing checks a licence for it — a Community installation signs in through Azure AD or Google exactly as a licensed one does.

A licence is a signed token: the tier and the features it unlocks cannot be edited into place, only replaced by a new token from Gheetah. The token names a term — one month, three, six, twelve, or, for Enterprise, one that does not expire — and the term is simply how far ahead the token’s expiry is set.

11

Real devices

Where Android and iOS devices are attached, and what a Community installation sees instead.

Watch this flow

11.1 Device Hub on a Community installation

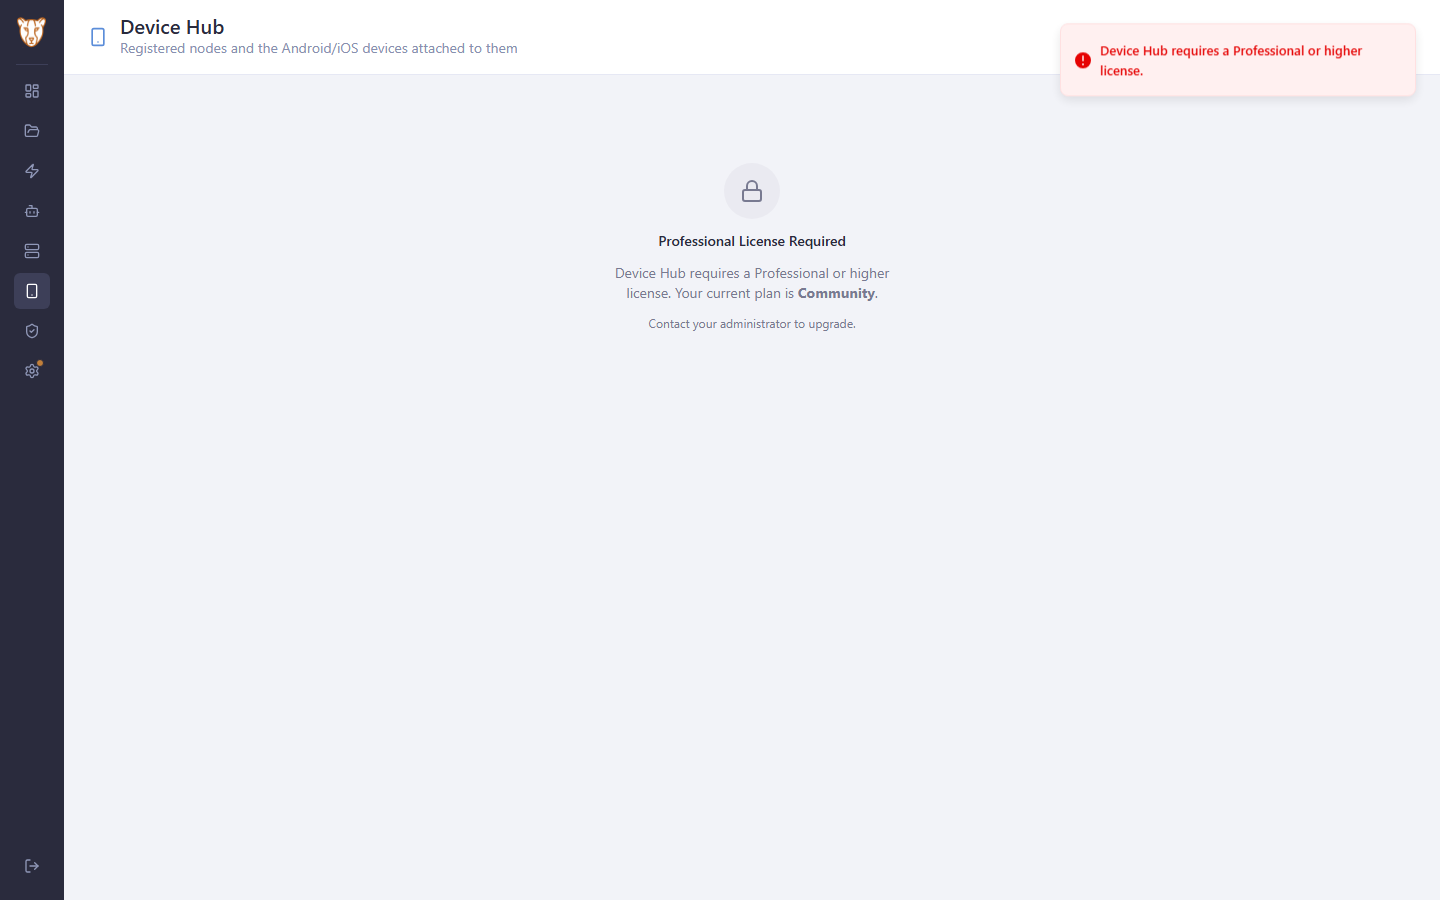
Device Hub is where node machines are registered and the Android and iOS devices attached to them become available to mobile scenarios. Registering them needs a Professional licence, and driving a device — mirroring its screen, running a Maestro flow on it — needs Enterprise. Rather than showing an empty page that would never fill, it says which licence it needs and what the current one is.

Device Hub on a Community installation

What Device Hub does when the licence allows it

Device Hub is where real Android and iOS devices become available to mobile scenarios. It needs a Professional licence; a Community installation sees the notice instead, which is why the walkthrough above stops there.

Nodes

A node is a machine with devices attached to it — a Mac with iPhones on USB, a Linux box with an Android farm. The node runs the Gheetah node agent, registers itself, and an administrator approves it the same way an execution agent is approved. Nothing is trusted because it asked.

Devices

Each device attached to an approved node appears with its model, operating system version and state. Gheetah talks to them through Appium, so the devices a mobile project can drive are the ones a node reports.

Control

A device can be driven from the browser — screen mirrored, taps and text sent — which is how a failing mobile step is investigated without walking over to the device. The same view records what was done, so a manual reproduction can be turned into a scenario.

This is the part that needs Enterprise, and it is a separate gate from the one above: registering nodes and seeing the devices on them is Professional, driving a device and running a Maestro flow on it is Enterprise.

What a Community installation can still do

Mobile projects can be generated, written and built without Device Hub. What needs the licence is attaching real devices to the installation; an emulator reachable from an execution target is not affected.

12

Codeless projects

Creating an AI project: what is being tested, which model drives it, and the context the model is given before it is asked for anything.

Watch this flow

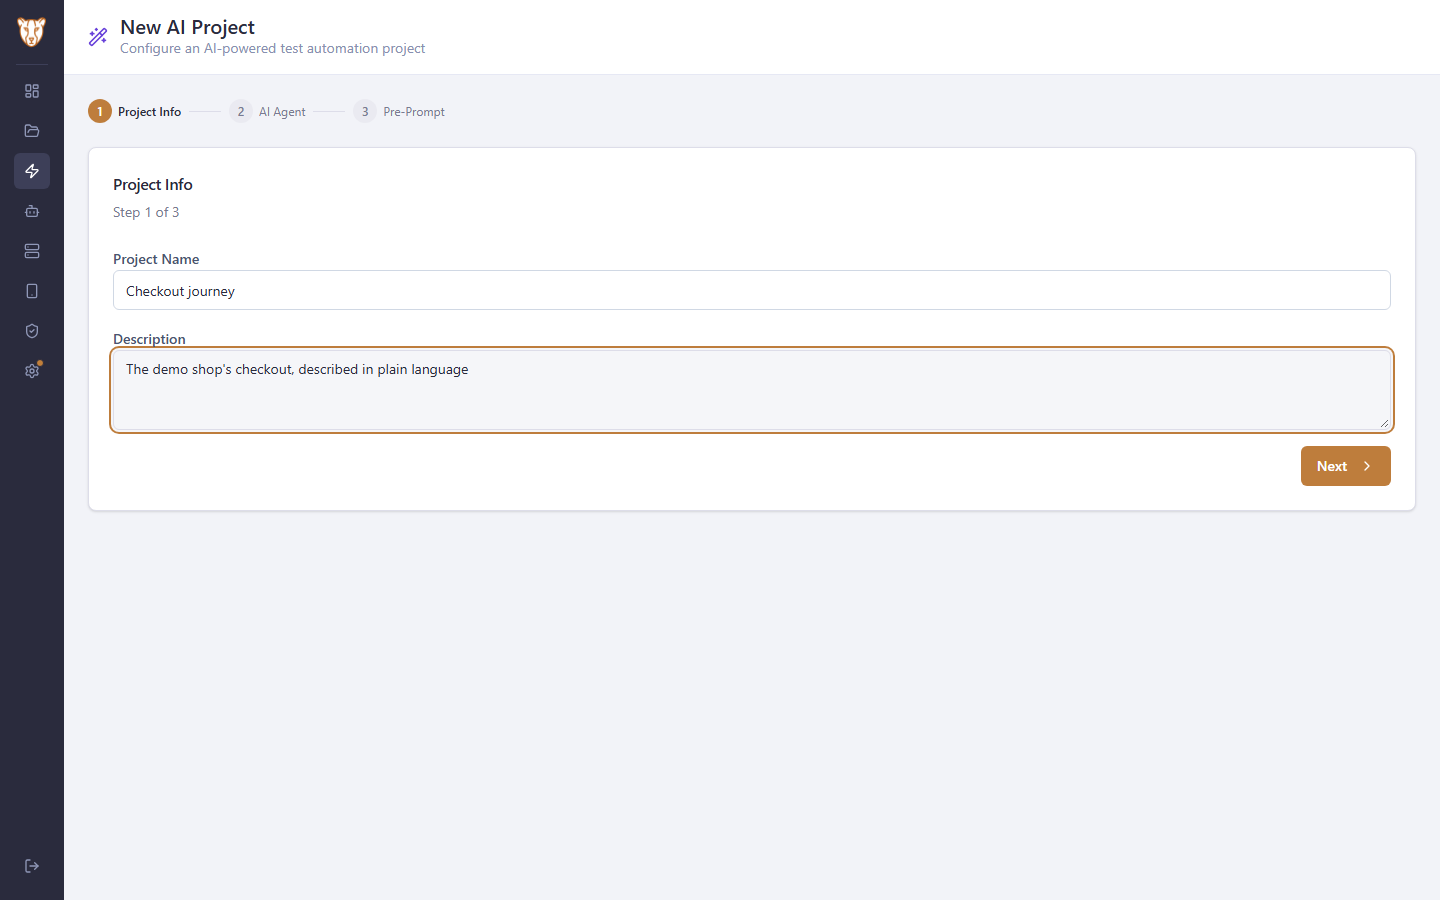
12.1 Start a codeless project

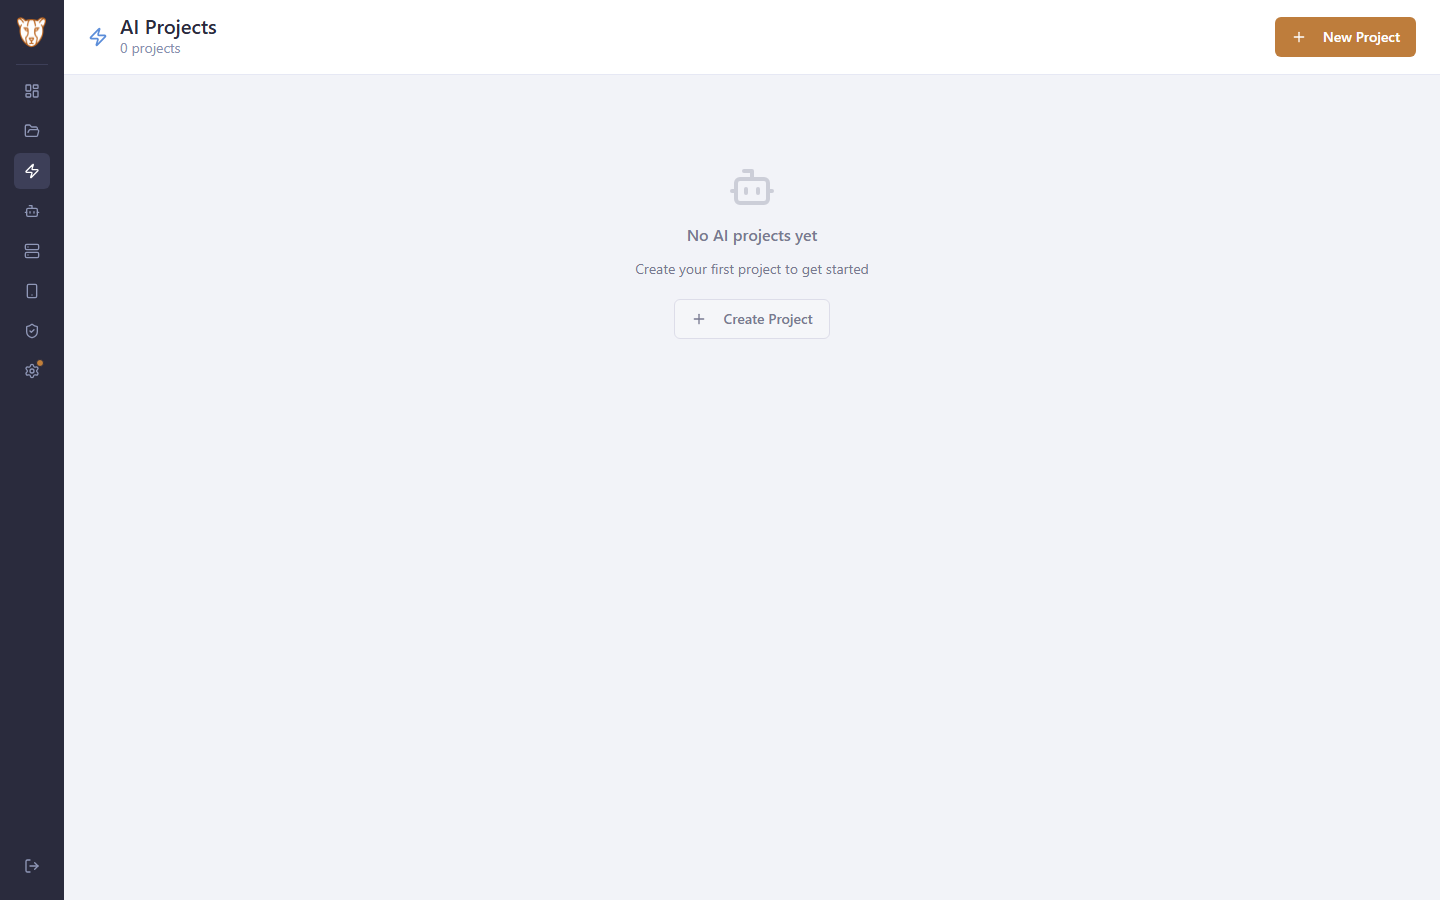
AI Projects sit beside the written ones and are listed the same way. The difference is inside: there are no step definitions to maintain, so a scenario is written by whoever knows what the product should do.

Start a codeless project

12.2 Say what is being tested

The name and a description. The description is not decoration: it is given to the model as context every time it is asked to write or run a scenario, so it is worth a sentence that says what the product is.

Say what is being tested

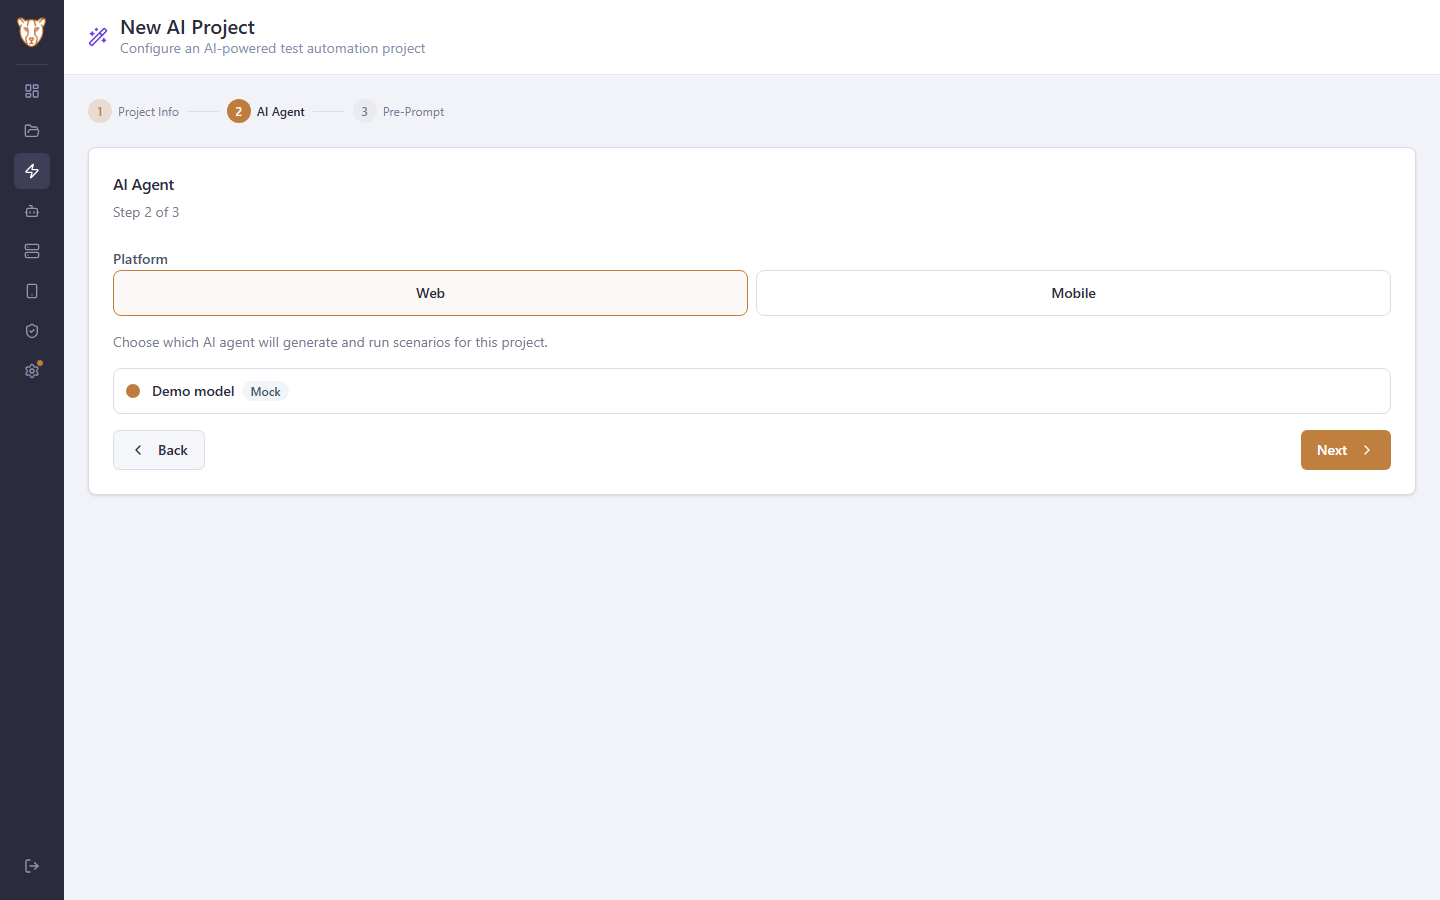
12.3 Choose the model that will drive it

Web or mobile, and which of the registered models does the work. A codeless project needs a model that can drive an interface — Claude and Gemini do it through computer use; a custom endpoint does it if it supports the same. The model registered earlier is offered here because it was registered for both.

Choose the model that will drive it

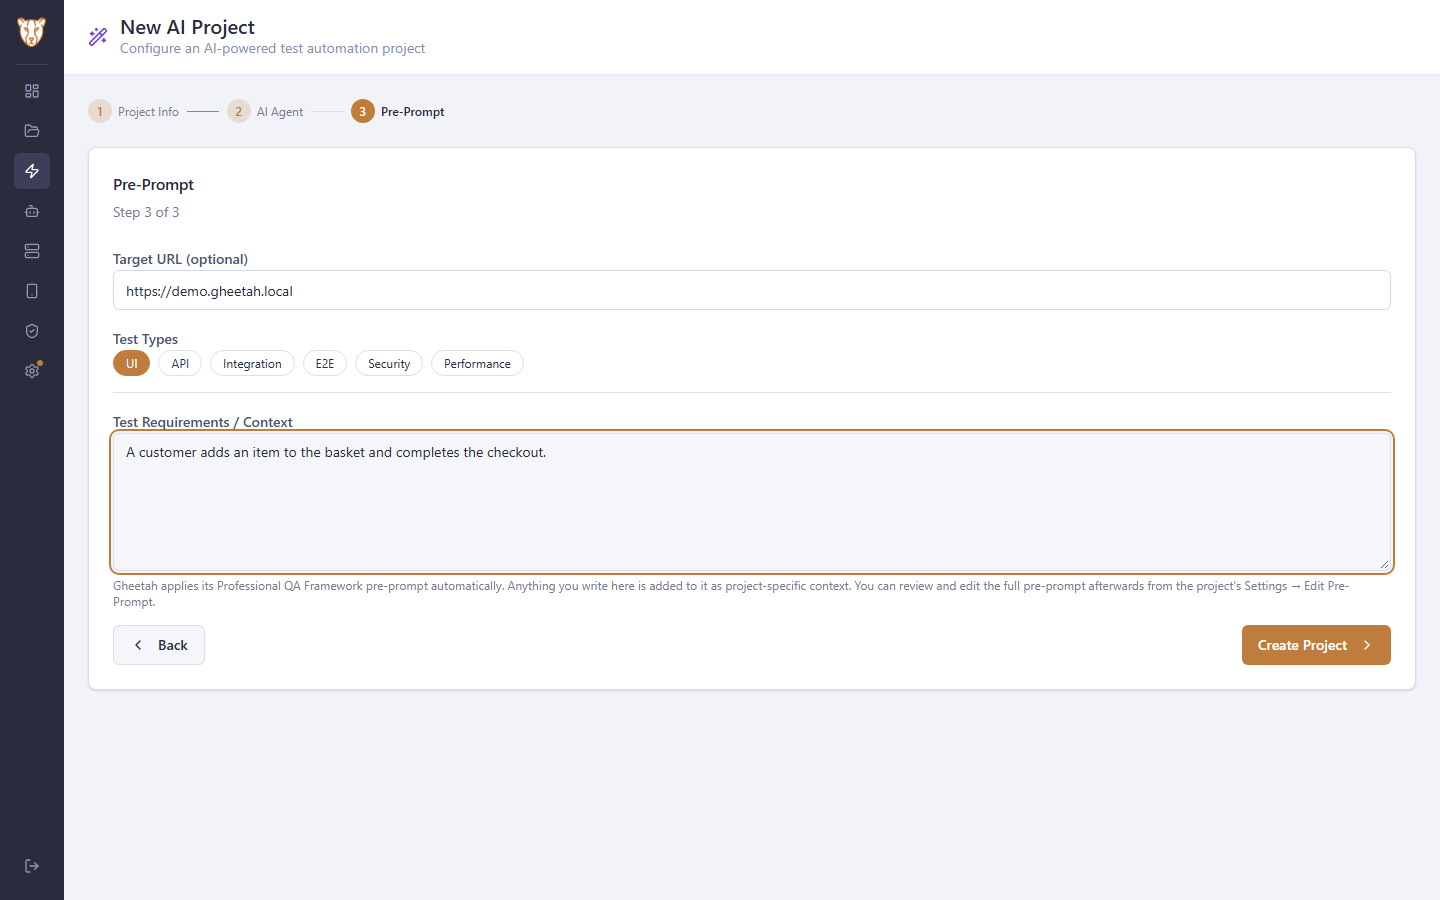
12.4 Give the model its context

The address under test, the kinds of testing this project is for, and anything the model should know — a test account, a rule about what must never be clicked. Gheetah adds its own QA framework pre-prompt around it, and the whole thing can be read and edited afterwards from the project’s settings, so nothing is hidden from the person responsible for what the model does.

Give the model its context

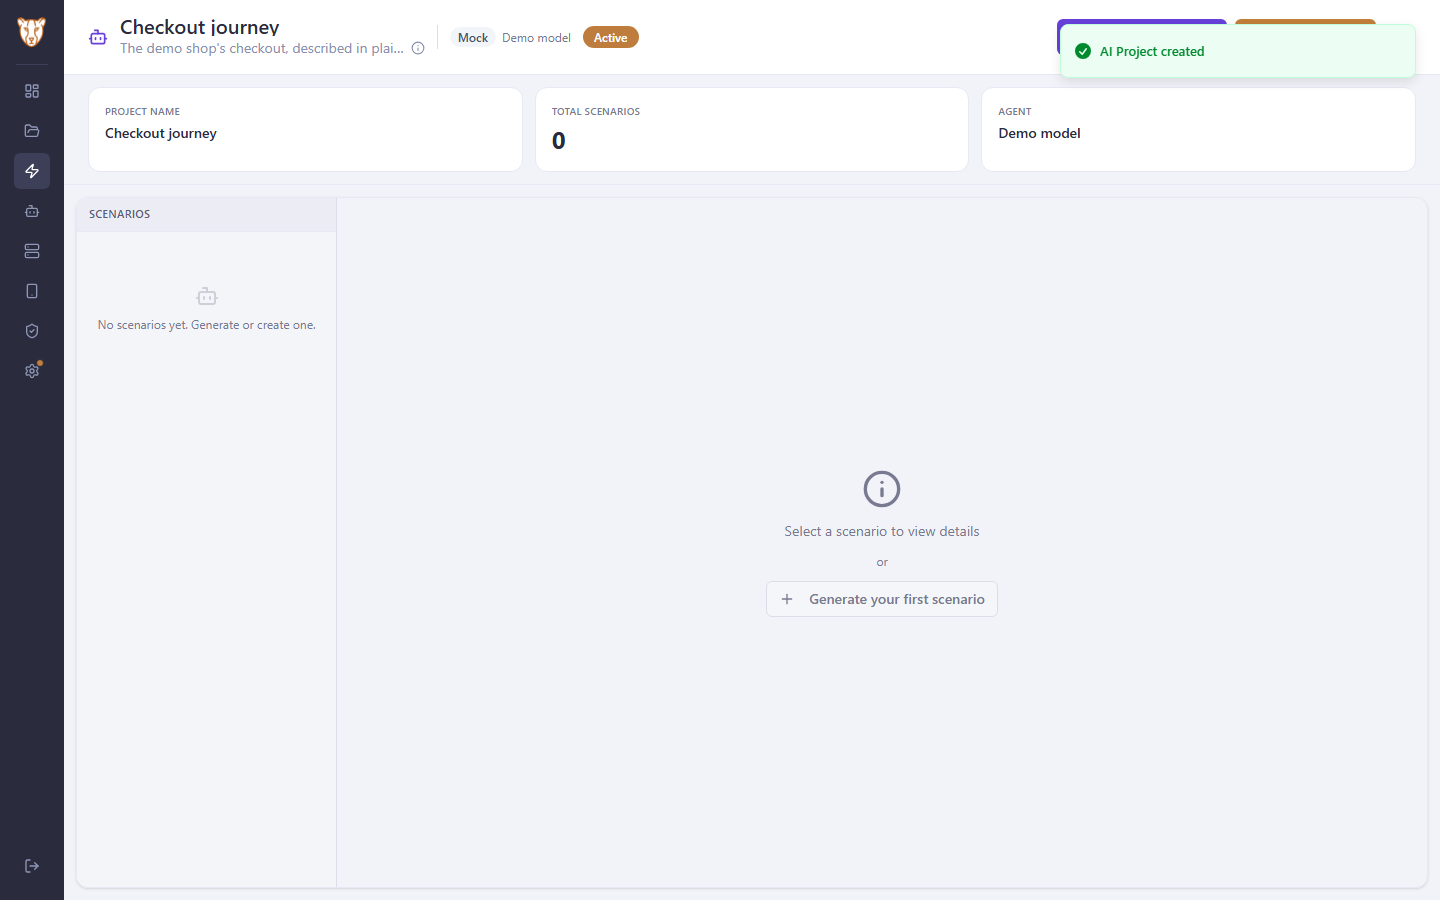
12.5 The project is ready

The project opens on its scenarios — none yet. **Generate Scenario** asks the model for one from a topic you name; **New Scenario** is for writing it yourself in the same plain language. Either way the scenario is run by the model against the target, on the same execution targets a written project uses.

The project is ready

Writing and running scenarios without step definitions

The walkthrough stops at a project that is ready. What happens next is the part that makes a codeless project different from a written one.

Generating a scenario

Generate Scenario asks for a topic — "a customer completes the checkout", "login with an expired password" — and the model writes the scenario from it, using the project description and pre-prompt as context. What comes back is Gherkin in plain language: Given/When/Then that name what the user does, not which selector to click.

The scenario is editable afterwards. A model that misunderstood the product is corrected by rewriting a line, not by regenerating and hoping.

New Scenario skips the model entirely and lets you write those same plain-language steps yourself. This is the usual path once a team knows what it wants: the model is for the first draft and for filling gaps.

Running one

A codeless scenario is executed by the model driving the application. It reads the step, looks at the page, decides what to do and does it — clicking, typing, waiting — then checks the expectation the step describes. There is no step-definition layer to write, and nothing breaks when a selector changes.

It runs on the same execution targets a written project uses, and produces the same step-by-step report, so a mixed estate is read the same way whichever kind of project produced the result.

What it costs, and when to use which

Every step is a call to the model, so a codeless run is slower and costs per run in a way a compiled test does not. That trade decides where each kind belongs:

  • Codeless for exploratory coverage, for a product whose interface is still moving, and for the scenarios a

non-developer needs to own end to end.

  • Written (C#, Java, Playwright) for the suite that runs on every commit, where speed and determinism matter

more than flexibility.

Most teams end up with both, which is why they sit side by side and report the same way.

Which models can do it

Driving an interface needs a model with computer use: Claude and Gemini offer it, and a custom endpoint does if it supports the same. The other providers can still be registered for the technical side — generating step definitions and code — which is what the Agent Mode field on a provider decides.

13

Editing a project in the browser

Writing a scenario with the project’s own steps offered as you type, then taking the change through a diff, a commit, a pull request and a merge — without cloning anything.

Watch this flow

13.1 Open the project in the editor

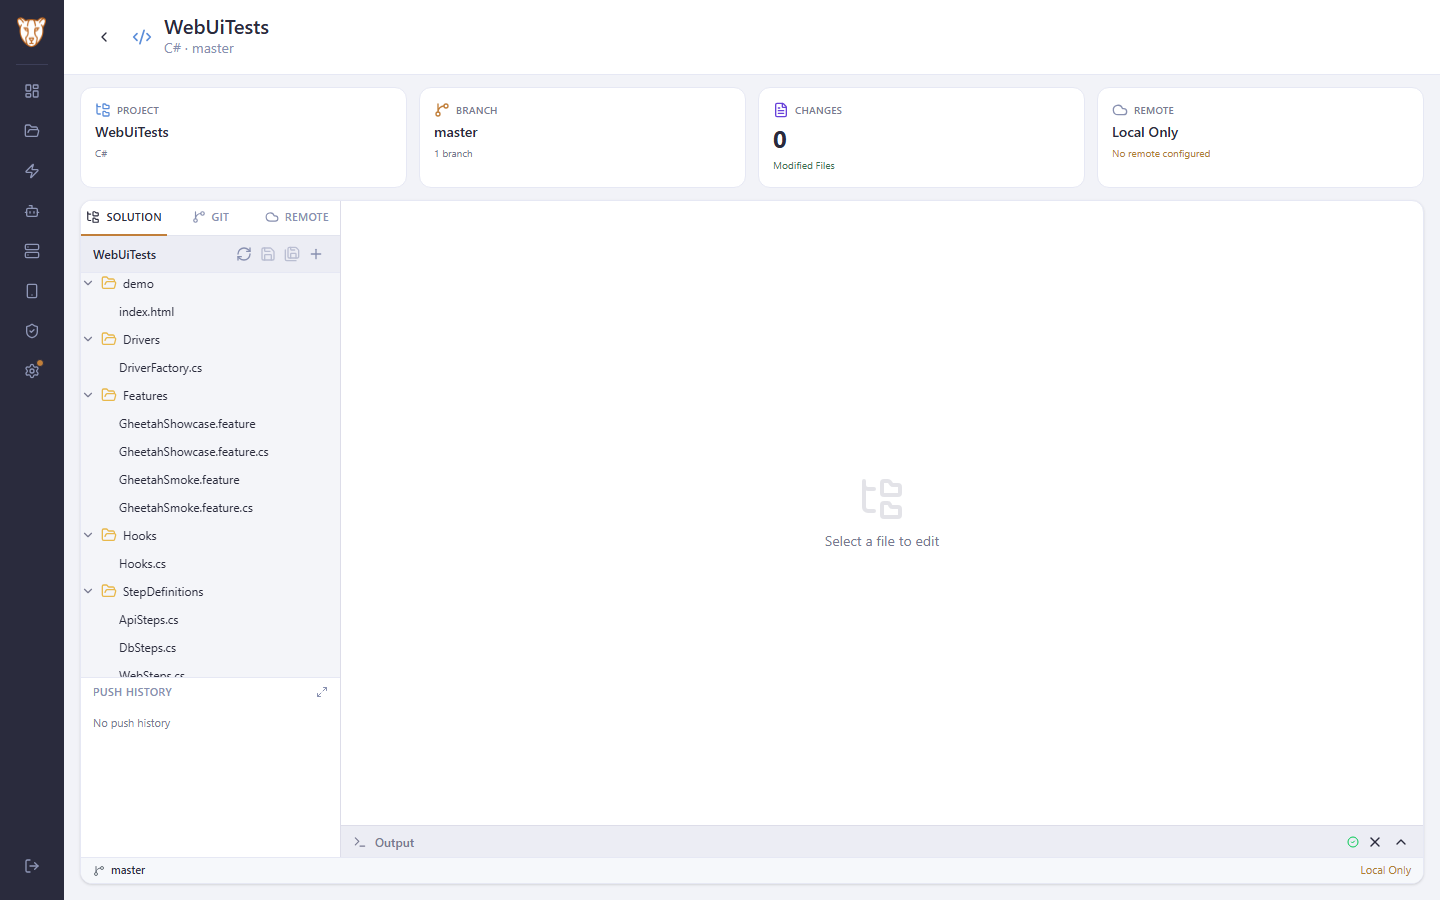
Every built project has an editor of its own, reached from the Code icon on its row. It opens on the working copy Gheetah cloned or generated — the same files a run uses — so what you change here is what runs next.

Open the project in the editor

13.2 The project, its branch and what has changed

The four cards across the top are the state of the working copy: which project, which branch it is on, how many files differ from that branch, and whether a remote is attached. The sidebar switches between the file tree, the changes, and the remote.

The project, its branch and what has changed

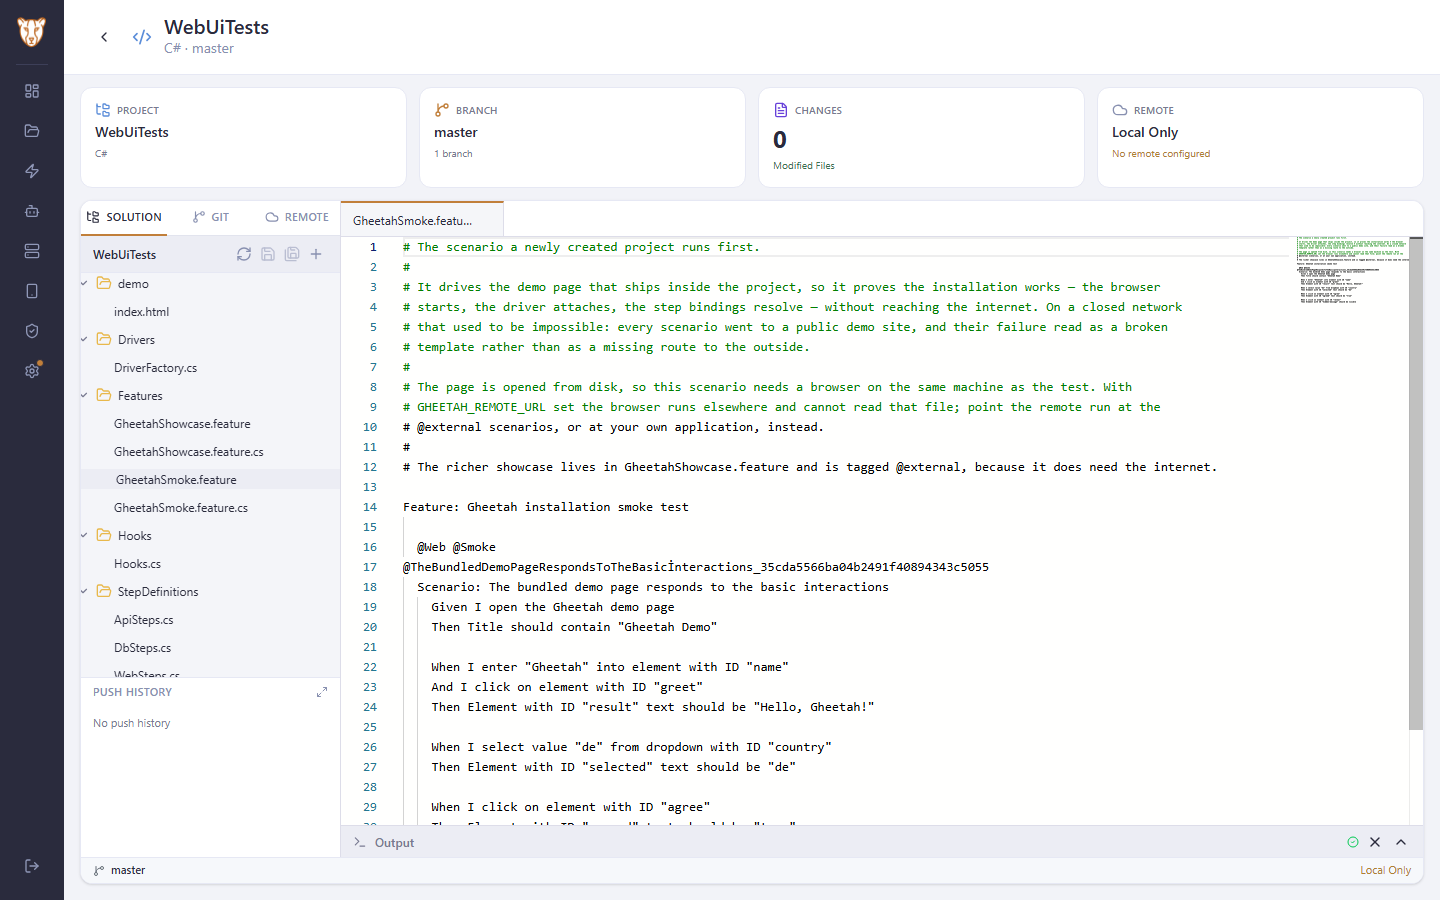
13.3 Read a feature file

The tree is the project as it is on disk. Opening a file opens a tab, and a .feature file opens with Gherkin highlighting — the same file the scenarios page shows read-only, here with the whole project around it.

Read a feature file

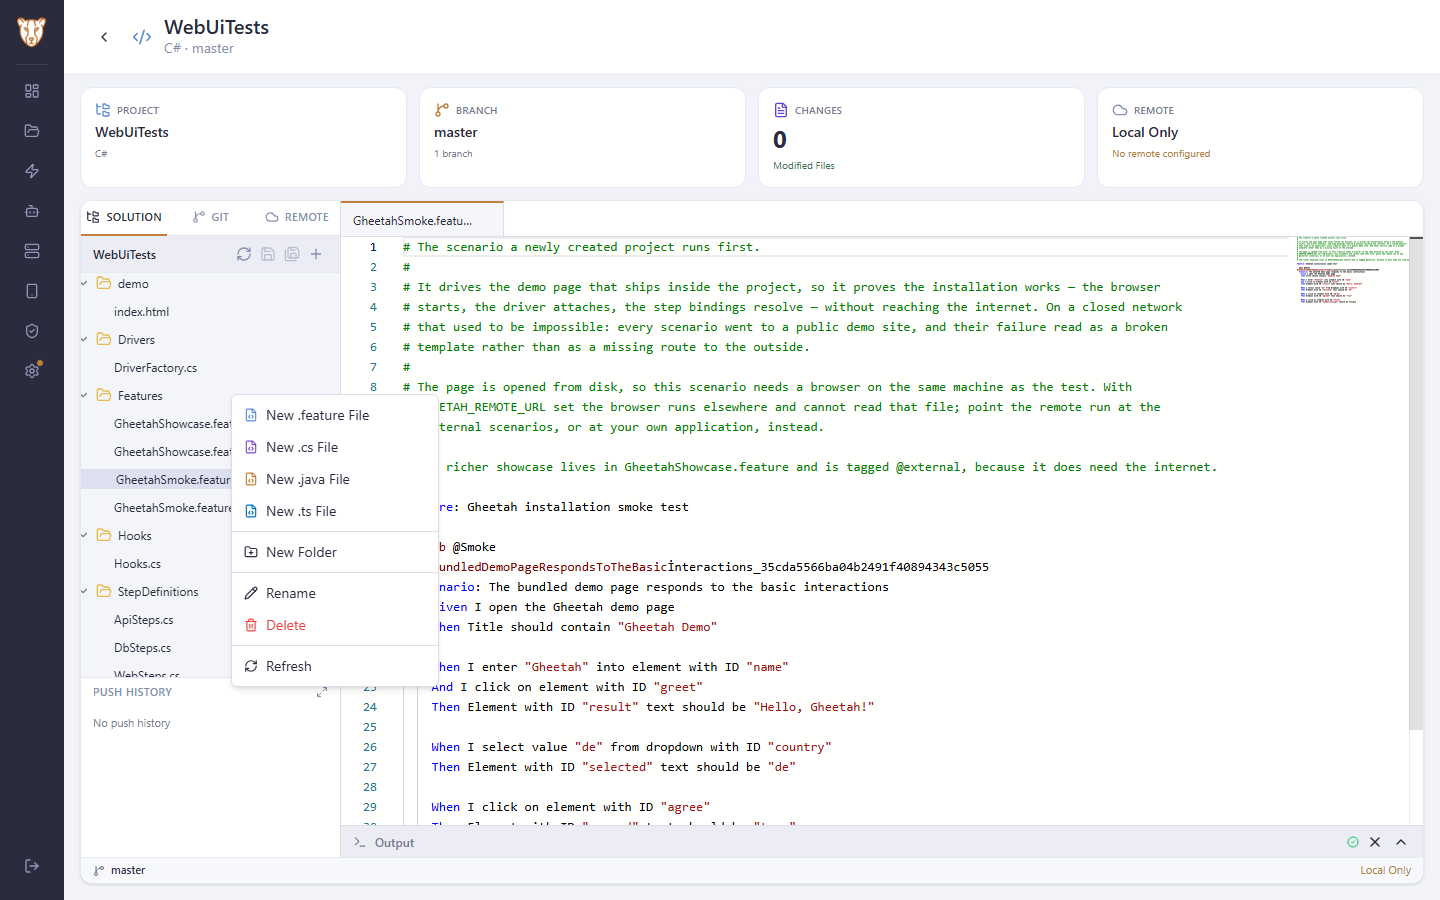
13.4 Start a new feature file

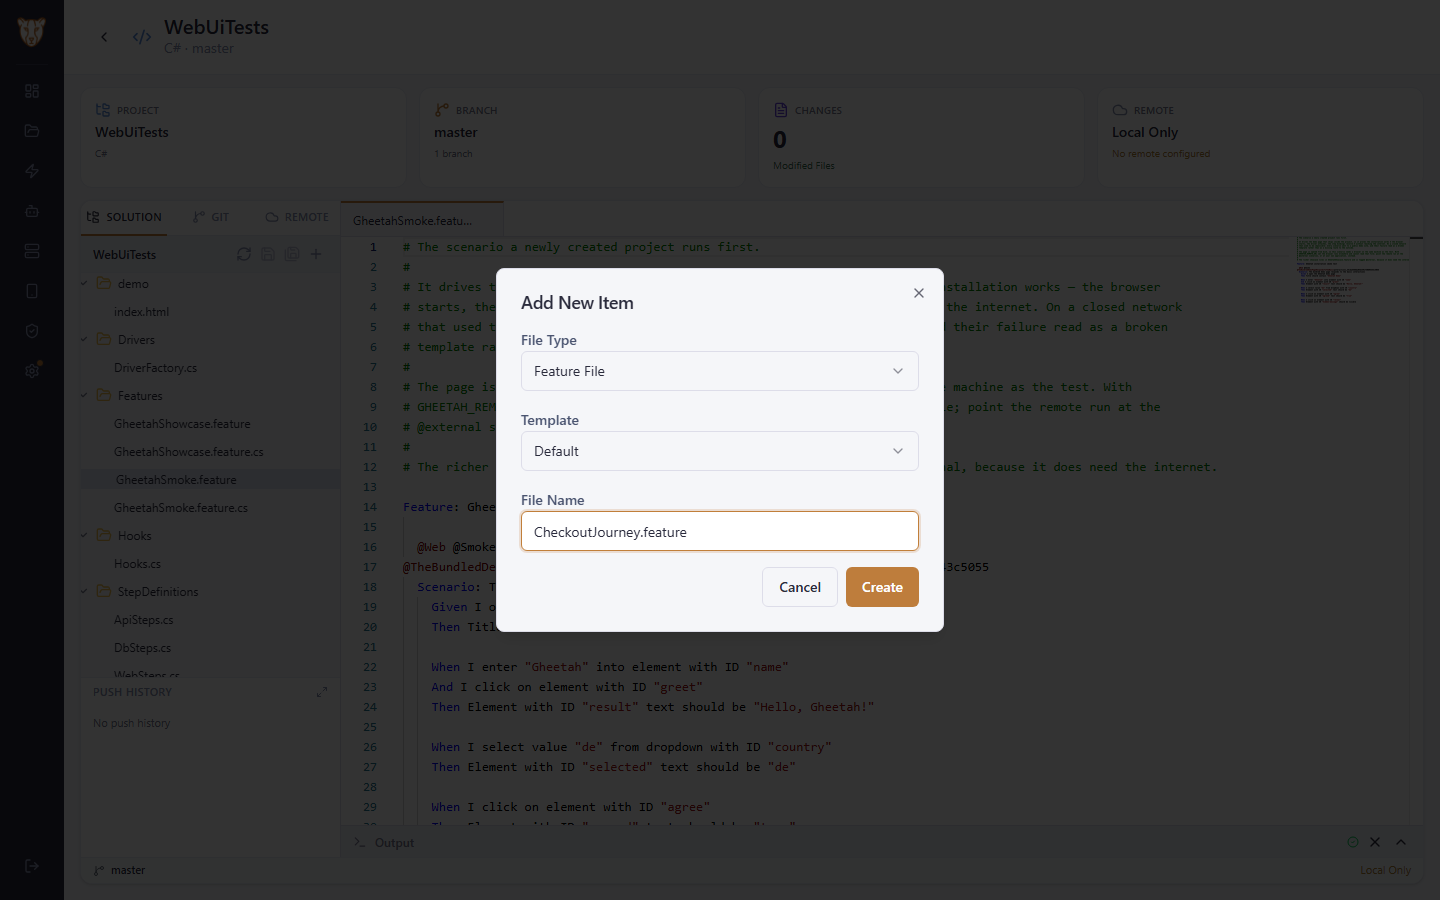
New files are made from the templates a BDD project actually needs — a feature, a step-definition class, a page object, a hooks file — so a new file arrives with the right skeleton rather than empty. Right-clicking a folder in the tree is where it starts.

Start a new feature file

13.5 Name it

The file type decides the templates on offer. A feature file can start from a plain scenario or from a Scenario Outline with its Examples table already in place.

Name it

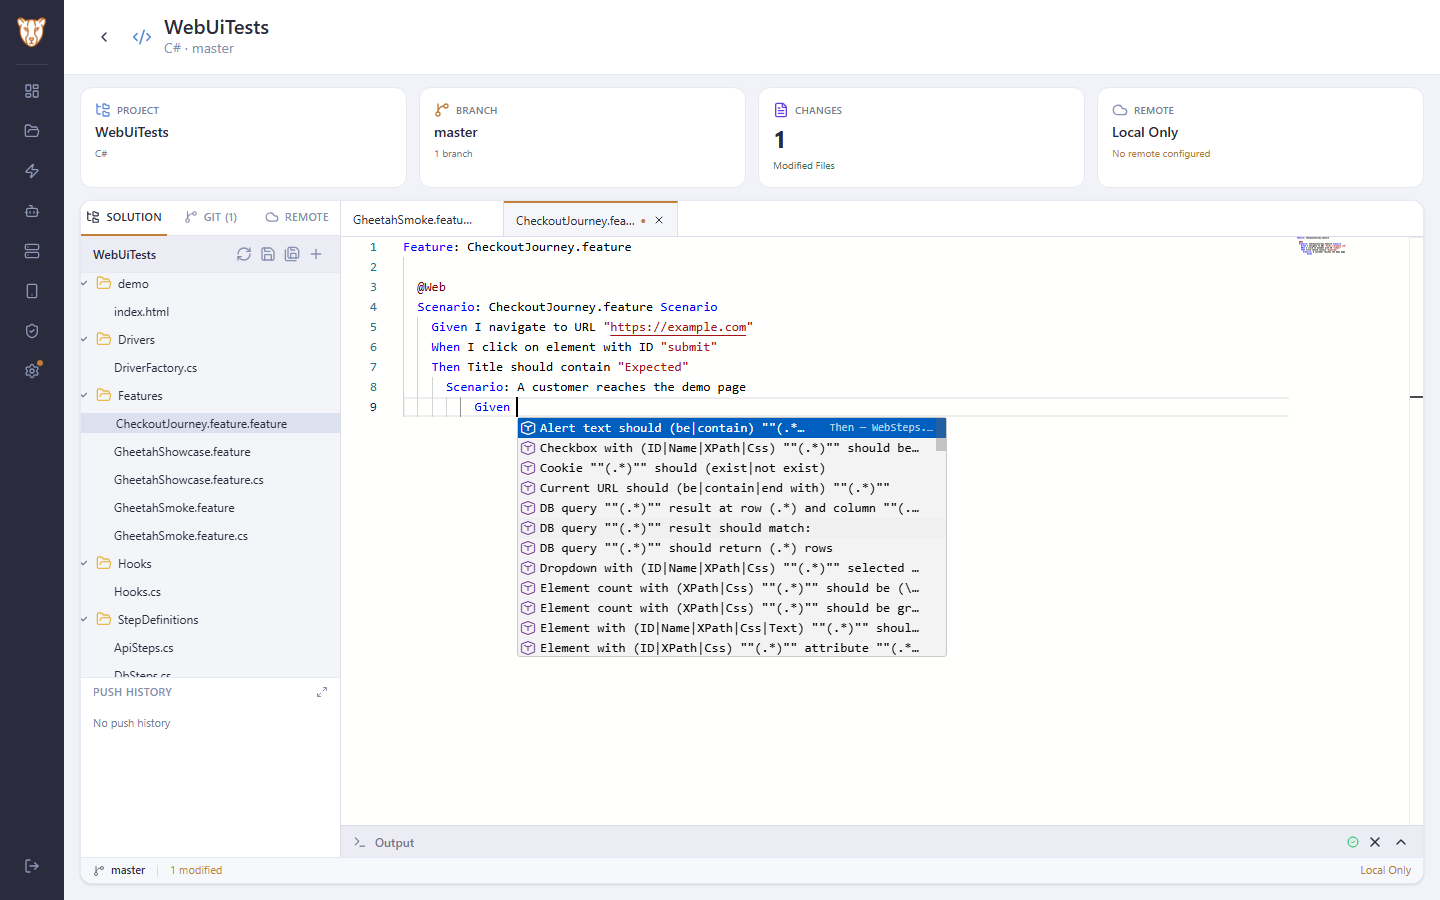
13.6 The steps the project already has

Gheetah reads the step definitions out of the project and offers them as you write. This is the difference between a text box and an editor that knows the project: the suggestion list is the steps this project binds, not a generic Gherkin vocabulary, so a scenario written here has somewhere to run.

The steps the project already has

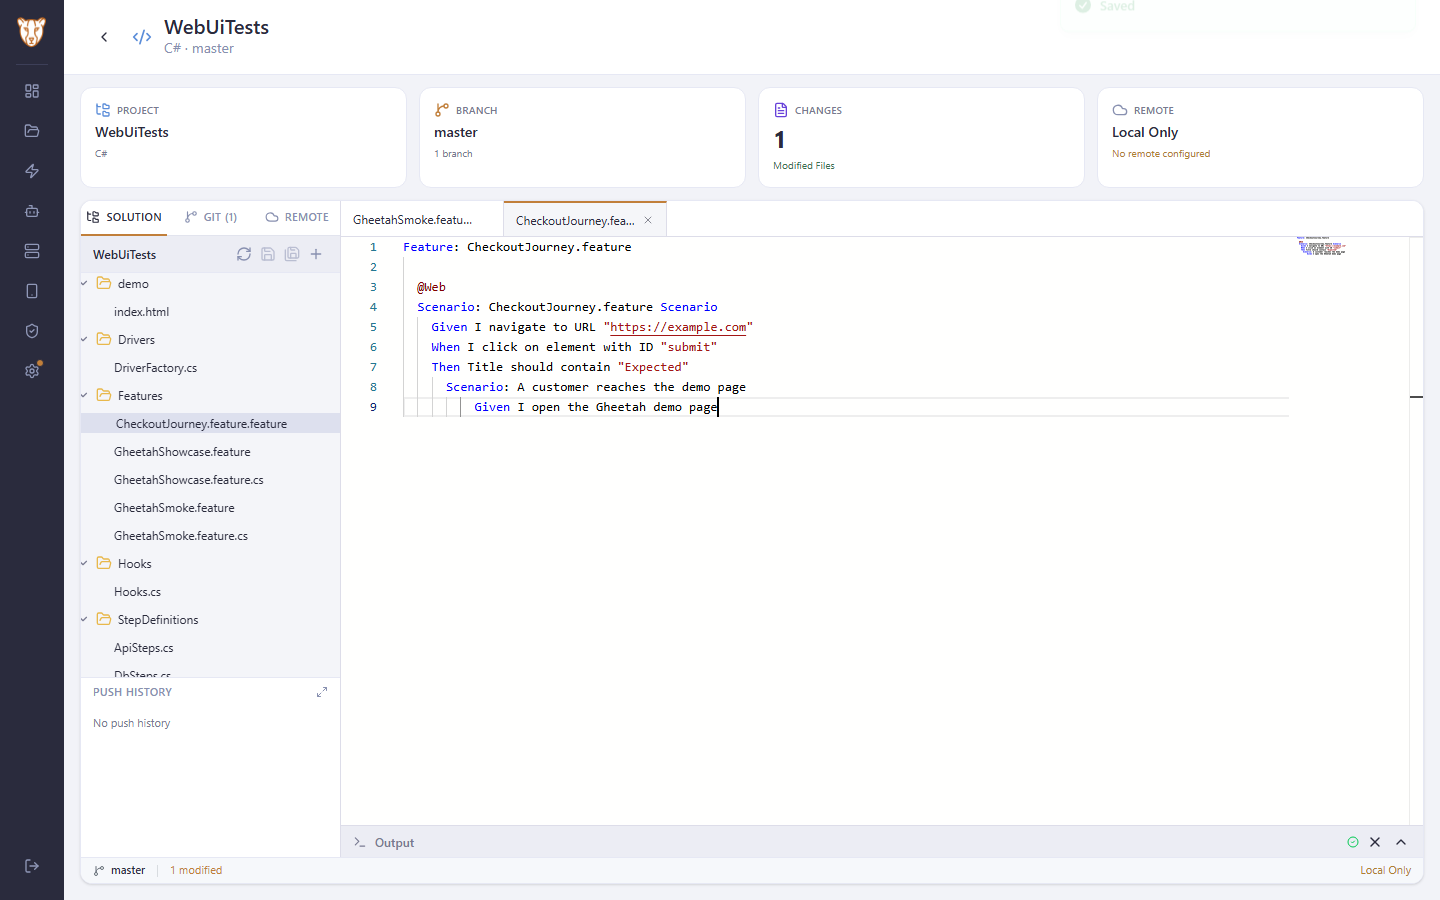
13.7 Save it

Saving is explicit — Ctrl+S, or the button in the tree toolbar — and it writes through to the working copy. Gheetah sends the version you started from with the change, so if the file moved underneath you the save is refused rather than silently overwriting someone else’s work.

Save it

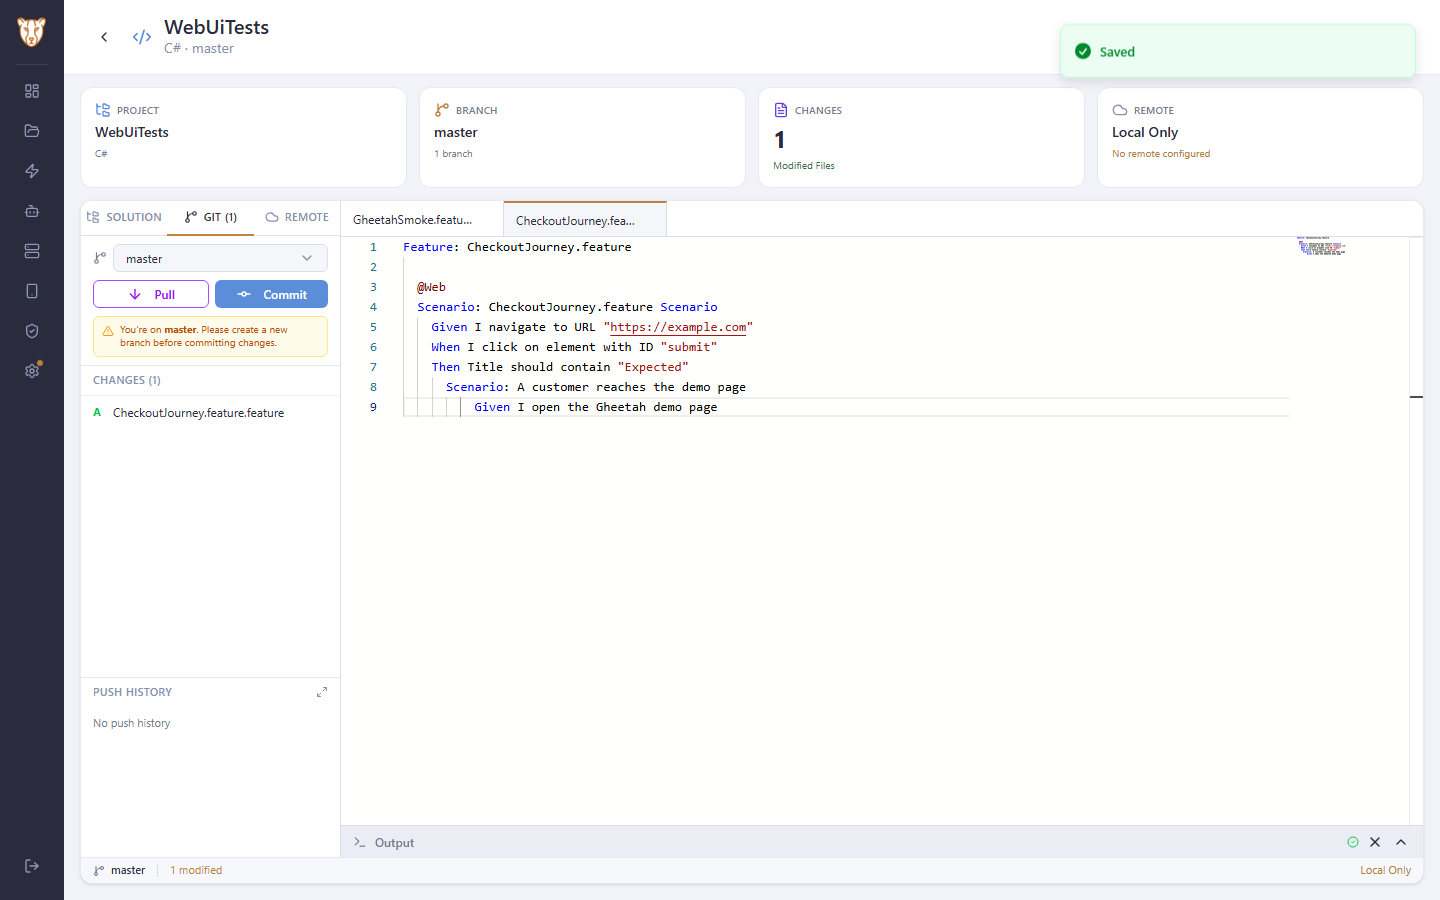
13.8 What changed, against the branch

The Git tab lists every file that differs from the branch the project is on. Opening one shows it side by side with the committed version — the same diff view, read-only, so you can check a change before you stand behind it.

What changed, against the branch

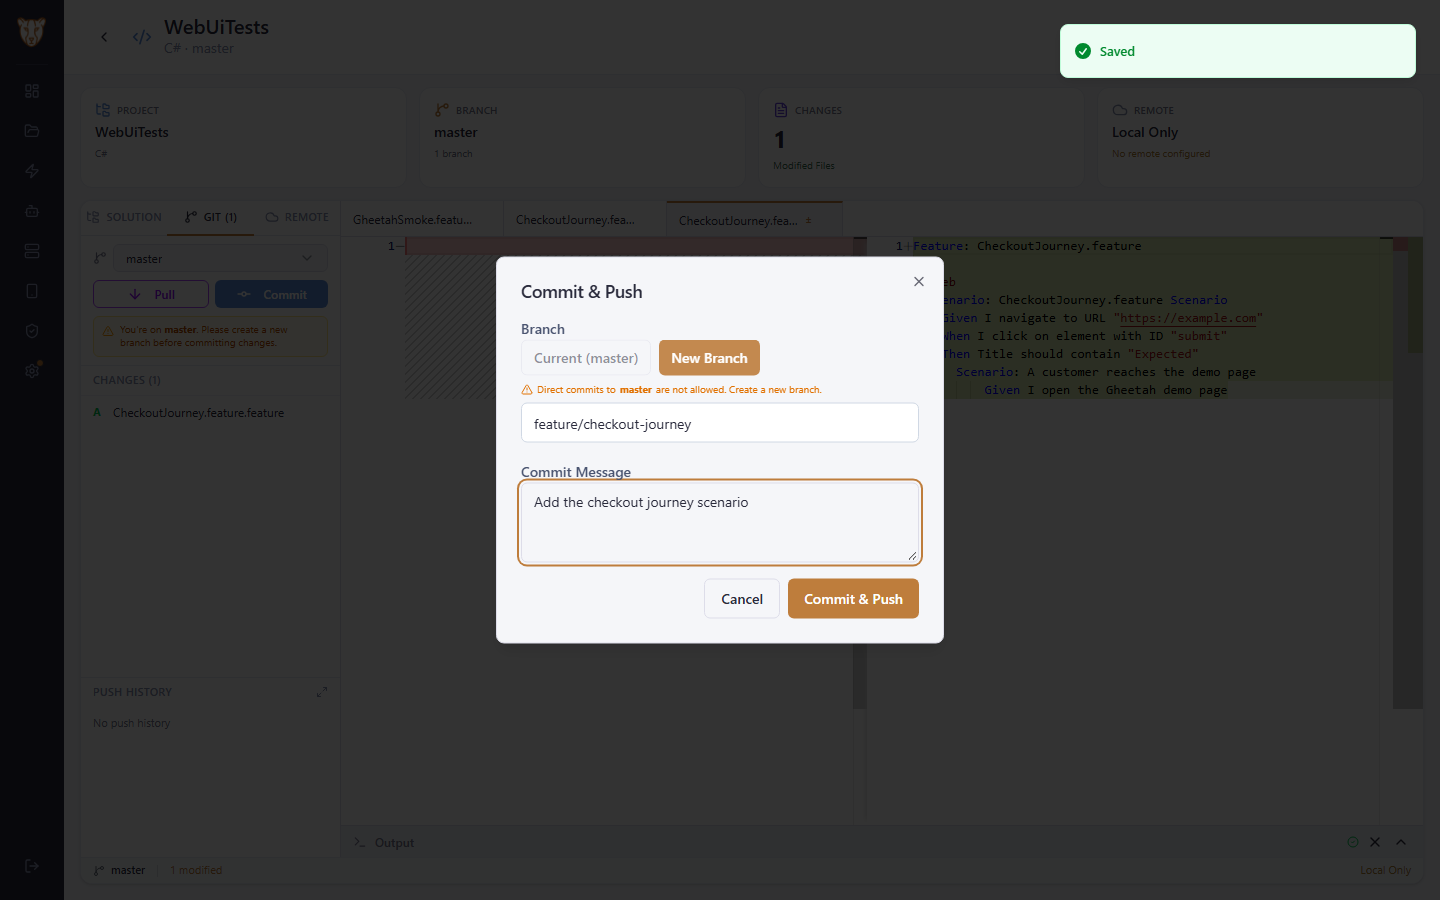
13.9 Commit onto a branch of its own

Gheetah will not let a change go straight onto main from here: the commit dialog asks for a branch to put it on. The commit is scanned before it is made — build output, environment files and anything that looks like a key are left out, and a commit carrying a secret is refused outright.

Commit onto a branch of its own

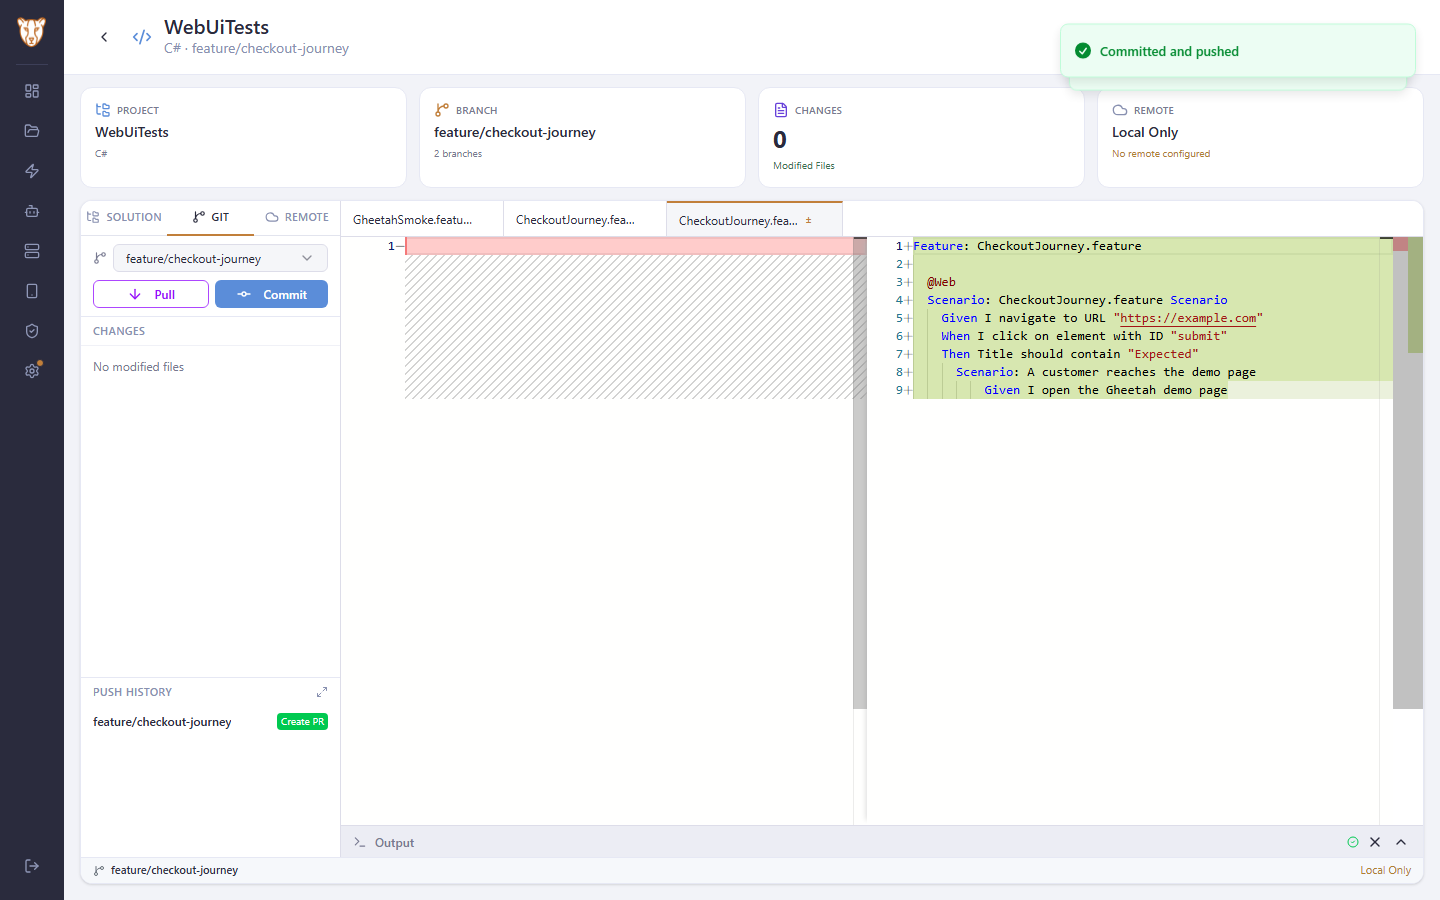
13.10 Open a pull request

Every push is listed with the branch it went to and who sent it, and a pull request can be raised from it. Gheetah keeps pull requests itself, so a team without a GitHub or Azure DevOps account still reviews changes before they land — and a team with one can attach a remote and push there as well.

Open a pull request

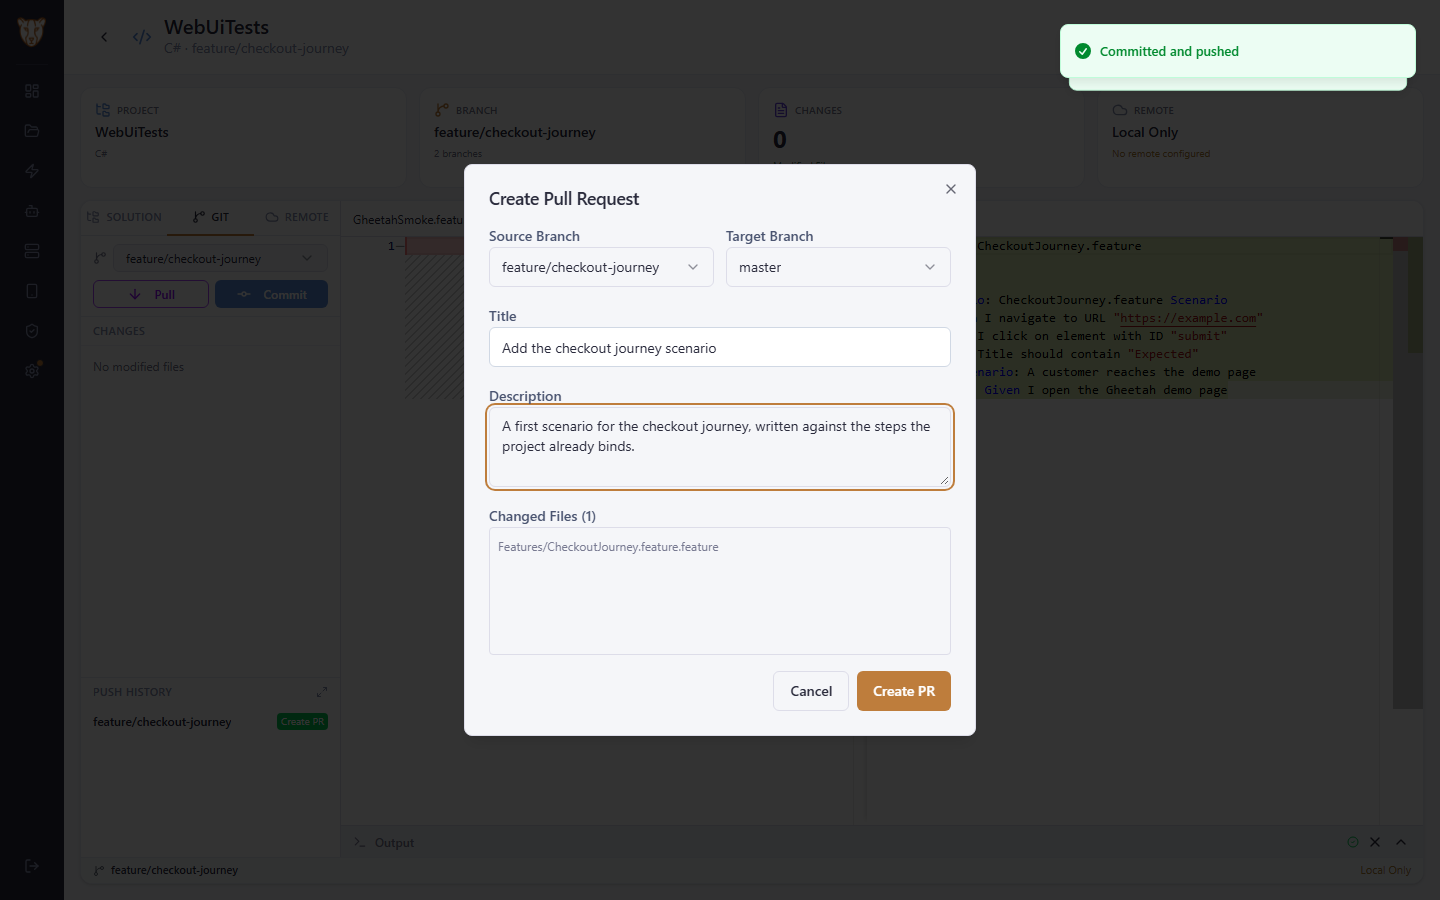
13.11 Say what it is for

A title, a description, and the reviewers it should go to. The files the branch changes are listed as they are read, so the request is raised against what is really in it.

Say what it is for

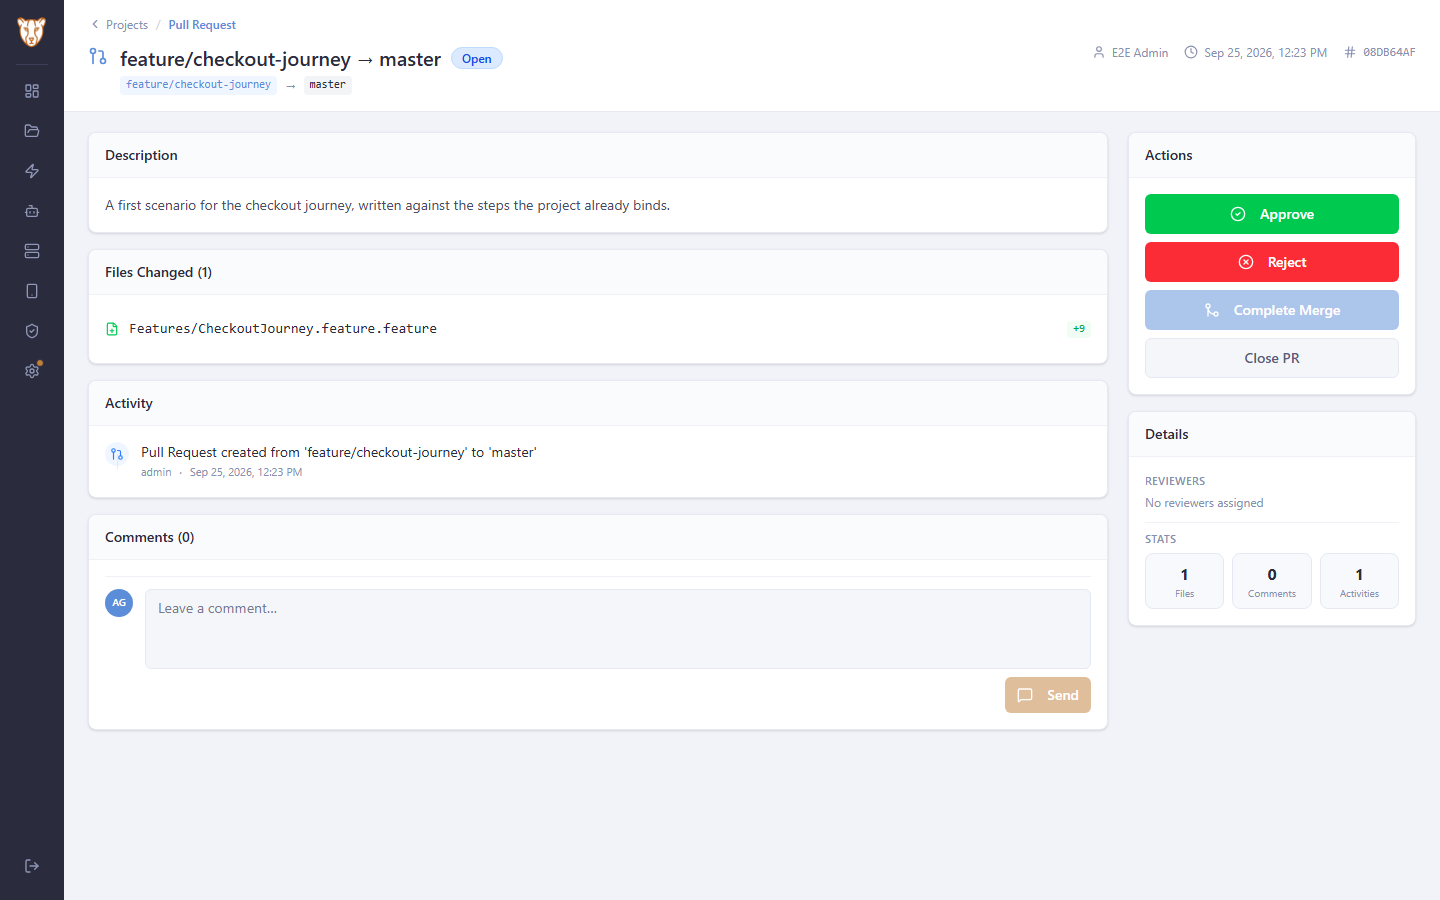
13.12 Review it

The pull request page is the whole conversation: the files it changes, what has happened to it, and the comments on it. A comment left on a line of the diff has a state of its own, and a request with an unresolved comment on it cannot be merged.

Review it

13.13 Merge it

Merging brings the branch into the one it was raised against and, where the installation asks for it, builds the result before the merge is allowed to stand. The project is rebuilt afterwards, so the scenario that was written here is one the next run can choose.

Merge it

The parts of the editor this walkthrough did not need

The flow above takes one change from an empty file to a merged pull request. Around it are the choices an installation makes once, and the paths a single person on a fresh instance never reaches.

Who can change what

Reading the editor needs the Editor permission, which Administrators, Leads and Runners all have. Everything that writes — saving a file, creating or renaming or deleting one, committing, switching branches, pushing, raising or merging a pull request — is refused to anyone who is not an Administrator or a Lead. A Runner therefore opens the same editor, reads the same diffs, and is told no if they try to change something. This is enforced on the server, not by hiding buttons.

If the installation turns on project ownership, the editor additionally only opens projects the signed-in user owns.

Reviewing when there is more than one of you

On an instance with a single Administrator, the person who raises a pull request may approve and merge it — otherwise nothing could ever be merged. As soon as there is a second Administrator or Lead, that stops:

  • the author can no longer approve their own request;
  • if reviewers are assigned, the request has to be Approved before it can be merged;
  • a request with an Active comment on it cannot be merged at all, whoever left it. A comment is resolved from

the thread it lives in, where its state can be set to Resolved or Won't Fix, and reactivated later if the answer was not good enough.

An installation can also require the merge to build before it is allowed to stand. Merge & Build performs the merge in a temporary working copy, builds it, and only keeps it if the build succeeds.

Committing safely

Two things happen to every commit made from the editor, and neither can be turned off from inside it:

  • Build output, package directories, .env files, key files and the rest of the exclusion list are never staged,

so a commit from the editor cannot accidentally carry bin/, obj/ or node_modules/ into the repository.

  • The staged content is scanned for secrets — provider tokens, access keys, private-key headers. A file that

looks like it contains one is left out, and a commit that would consist of nothing else is refused with the reason.

Branch protection is separate and set by the installation: a branch on the protected list refuses direct pushes from anyone.

Working with a remote

A project can stay local. The commit still happens, the pull request still works, and the history is Gheetah's own — nothing needs a hosting account.

Attaching a remote is done from the Remote tab, either by choosing a repository configured in Settings → Git Repos (GitHub, Azure DevOps or GitLab, with the credentials held once and centrally) or by pasting a URL. The URL is checked before it is accepted: HTTPS only, no credentials embedded in it, no loopback or private-network hosts, and the host has to belong to the provider that was chosen. Once a remote is attached, Push and Pull move the branch between the working copy and it, and a pull that cannot be fast-forwarded reports the conflicting files rather than guessing.

Jumping to the code behind a step

Ctrl+Click on a step in a .feature file — or Go to Step Definition from the right-click menu — opens the class that binds it and scrolls to the line. It reads the project's own bindings, so it works in a project that arrived from a repository exactly as it does in a generated one, and it is how a scenario and its implementation stay in the same place in your head.

What the editor deliberately does not do

The Output panel below the editor shows what the server is streaming about this project — a build, a merge build — and nothing else. There is no shell: the editor changes files and drives Git, and running anything is the execution target's job.